I remember the first time I brought a holiday cheese ball to a potluck – it was an instant hit! The vibrant colors, the creamy texture, and that irresistible savory bite. It sparked a conversation, connected people over food, and honestly, felt like a little win. If you’re looking to recreate that magic and elevate your festive snacking game, you’ve landed in the right spot. We’re diving into the wonderful world of holiday cheese balls – specifically, six delicious variations that are guaranteed to impress and delight.
Why You’ll Love This Dish
Holiday cheese balls are more than just a dip; they’re a centerpiece, a conversation starter, and a fantastic way to offer something truly special to your guests without breaking a sweat. What makes them so compelling?
- Effortlessly Elegant: They look incredibly festive and sophisticated with minimal effort. Think vibrant herbs, colorful spices, and crunchy nuts creating a beautiful mosaic.
- Make-Ahead Magic: This is arguably their biggest superpower! You can prepare them days in advance, freeing you up to enjoy the festivities when your guests arrive. No last-minute cooking stress here!
- Crowd-Pleasing Flavors: With endless possibilities for flavors and coatings, there truly is a cheese ball for everyone, from savory and spicy to subtly sweet and tangy.
- Versatile Serving: Pair them with crackers, pretzels, crudités, or even fruit – they’re incredibly adaptable to whatever you have on hand.
- Budget-Friendly Brilliance: Often relying on staple pantry ingredients like cream cheese and various cheeses, they offer a high impact without a high cost.
> “I used to think cheese balls were old-fashioned, but these recipes completely changed my mind! So easy to make, and my family devoured them. The Bacon Ranch one was a total showstopper!” – A Happy Home Cook
The Cooking Process Explained
Making a holiday cheese ball is surprisingly straightforward, focusing more on assembly and chilling than complex cooking techniques. Essentially, you’ll be blending various cheeses and seasonings to create a flavorful, spreadable base. This mixture is then shaped, typically into a sphere, and finally, coated with an array of delicious toppings. The chilling step is crucial, as it allows the flavors to meld and the cheese ball to firm up, making it easier to handle and serve. Each of the six variations follows this basic blueprint, with unique ingredients defining its distinct character.
What You’ll Need
Here’s a general list of ingredients you’ll need for holiday cheese balls, with specifics varying by the dip you choose.
For the Base (Common to most):
- 2 (8-ounce) packages cream cheese, softened
- 1 cup shredded sharp cheddar cheese (or other cheese as specified)
- 1/2 cup mayonnaise (or sour cream/Greek yogurt for tang)
- Seasonings (garlic powder, onion powder, salt, black pepper, Worcestershire sauce)
Specific Ingredients for 6 Dips You Must Try:
- Classic Savory: 1/4 cup finely chopped pecans, 2 tablespoons finely chopped fresh parsley.
- Bacon Ranch: 1/2 cup cooked and crumbled bacon, 1 (1-ounce) packet ranch seasoning mix, 1/4 cup finely chopped fresh chives for coating.
- Spicy Jalapeño Popper: 1/4 cup finely diced pickled jalapeños, 4 ounces shredded Monterey Jack cheese, 1/4 cup chopped fresh cilantro. Coating: 1/2 cup crushed tortilla chips.
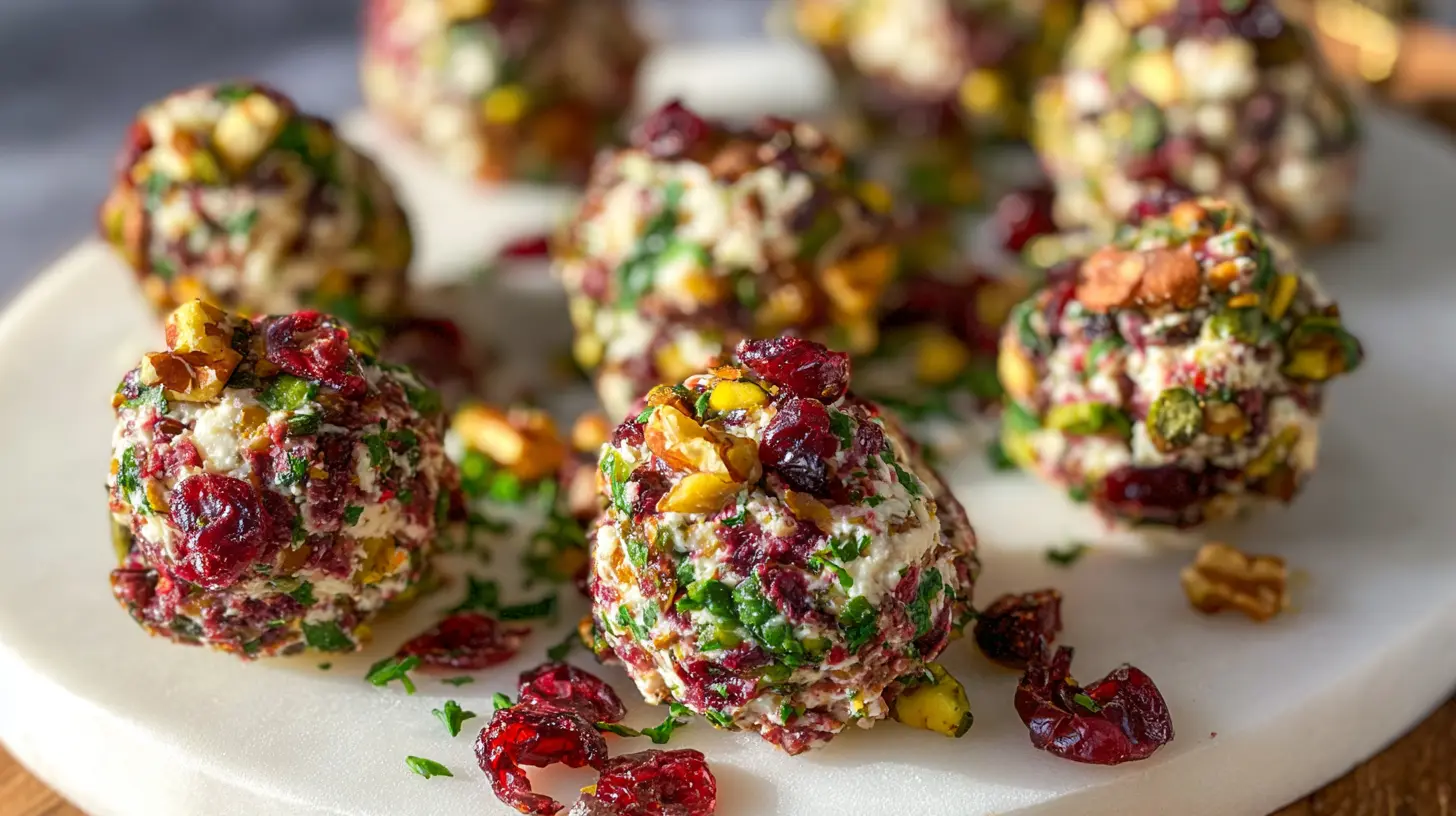
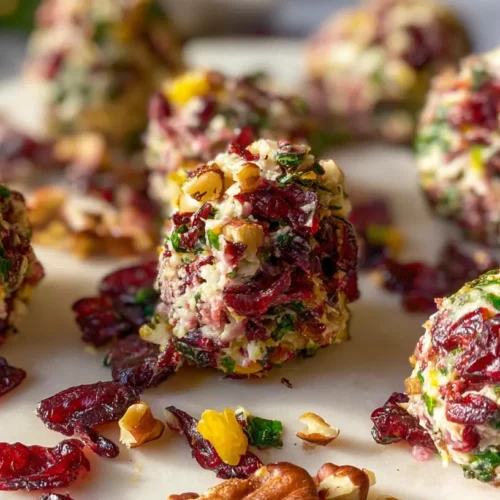
- Cranberry Pecan: 1/2 cup dried cranberries, 1/2 cup finely chopped pecans, 2 tablespoons orange zest. (Optional: 1/4 cup crumbled goat cheese or blue cheese).
- Everything Bagel Spice: 1 (1-ounce) packet everything bagel seasoning. Coating: 1/2 cup everything bagel seasoning.
- Spinach Artichoke: 1 (10-ounce) package frozen chopped spinach, thawed and squeezed dry; 1 (14-ounce) can artichoke hearts, drained and chopped; 1/2 cup grated Parmesan cheese. Coating: 1/4 cup grated Parmesan cheese, 2 tablespoons finely chopped fresh parsley.
Directions to Follow
Let’s break down the general process for crafting these delicious holiday cheese balls:
- Soften the Cream Cheese: Ensure your cream cheese is at room temperature. This is crucial for a smooth, lump-free mixture. You can do this by leaving it on the counter for about an hour or carefully microwaving it for 15-20 seconds.
- Combine Base Ingredients: In a large mixing bowl, beat the softened cream cheese with the shredded cheddar, mayonnaise (or sour cream/yogurt), and any initial base seasonings (like garlic powder, onion powder, salt, pepper, Worcestershire sauce) until smooth and well combined. An electric mixer works wonders here.
- Add Flavor-Specific Ingredients: Now, incorporate the unique ingredients for your chosen cheese ball (e.g., bacon and ranch seasoning for Bacon Ranch, cranberries and pecans for Cranberry Pecan). Mix gently until everything is evenly distributed.
- Shape the Ball: Scrape the mixture onto a piece of plastic wrap or parchment paper. Using the wrap to help, form the mixture into a neat ball or log shape.
- Chill Thoroughly: Wrap the cheese ball tightly in plastic wrap and refrigerate for at least 2-4 hours, or preferably overnight. This firming-up stage allows the flavors to deepen and makes the cheese ball easier to coat and serve.
- Coat and Serve: Before serving, unwrap the chilled cheese ball. Place your chosen coating (nuts, herbs, spices, crushed chips) on a shallow platter or plate. Roll the cheese ball gently in the coating until it’s completely covered.
- Final Chill (Optional): If you coated it well in advance, you can pop it back in the fridge for another 30 minutes to help the coating adhere.
Best Ways to Enjoy It
Serving your holiday cheese ball is where you really get to showcase its festive appeal!
- The Classic Platter: Arrange your cheese ball prominently on a beautiful serving platter. Surround it with an assortment of crackers – think butter crackles, whole wheat, water crackers, and even some fancy artisanal crisps.
- Crudités Companion: For a lighter option, offer a rainbow of fresh vegetables like carrot sticks, celery stalks, cucumber slices, bell pepper strips, and cherry tomatoes. The crispness of the veggies is a wonderful contrast to the creamy dip.
- Bread & More: Toasted baguette slices, mini pretzels, or even apple slices can be fantastic dippers, especially with the Cranberry Pecan or Classic Savory variations.
- Garnish for Glamour: Before guests arrive, give your cheese ball an extra touch of pizzazz. A sprig of fresh rosemary, a few whole pecans, or some extra chopped chives on top can make it look even more inviting.
- Individual Servings (Mini Balls): For a party where individual portions might be preferred, you can form smaller, golf-ball-sized cheese balls. Coat them and serve them with toothpicks for easy grabbing.
- Wine Pairing: Most savory cheese balls pair beautifully with a crisp Sauvignon Blanc, a light-bodied Pinot Noir, or even a sparkling rosé. For sweeter or fruiter variations like the Cranberry Pecan, consider a sweeter white wine like a Riesling or even a cider.
How to Store & Freeze
These holiday cheese balls are fantastic for making ahead, which means storage is key!
- Refrigeration: Store the cheese ball, tightly wrapped in plastic wrap (without the coating), in the refrigerator for up to 5-7 days. If you’ve already coated it, it’s best consumed within 2-3 days, as coatings can sometimes get soft.
- Coating Tip: For best results, don’t coat the cheese ball until about an hour or two before you plan to serve it. This keeps the coating fresh and crunchy.
- Freezing (Uncoated): Yes, you can freeze cheese balls! Prepare the base mixture and form it into a ball or log. Wrap it very tightly in several layers of plastic wrap, then an additional layer of aluminum foil to prevent freezer burn. Label with the date.
- Thawing Frozen Cheese Balls: When ready to use, transfer the frozen cheese ball to the refrigerator and allow it to thaw slowly overnight or for at least 24 hours. Once thawed, unwrap, coat, and serve as directed.
- Safe Handling: Always ensure raw ingredients like bacon are fully cooked before incorporating them. And as with any dairy product, if the cheese ball has been sitting at room temperature for more than 2 hours, it’s best to discard it to avoid bacterial growth.
Pro Chef Tips
Want to take your Holiday Cheese Balls from great to unforgettable? Here are some simple tricks:
- Softened Cream Cheese is Non-Negotiable: I can’t stress this enough! If your cream cheese isn’t soft, you’ll end up with lumps, and your cheese ball won’t be as smooth and creamy. Let it sit on the counter or use the microwave trick mentioned earlier.
- Grate Your Own Cheese: While pre-shredded cheese is convenient, it often contains anti-caking agents that can slightly alter the texture and melt of the cheese. Grating your own fresh cheddar or Monterey Jack will give you a creamier, richer result.
- Taste and Adjust: Before shaping, always taste your mixture! This is your chance to adjust salt, pepper, or other seasonings. A little extra garlic powder or a dash more Worcestershire can make all the difference.
- Get Creative with Coatings: Don’t limit yourself to just nuts and herbs. Consider crushed pretzels (especially for a salty contrast), finely chopped sun-dried tomatoes, toasted sesame seeds, or a blend of several things for texture and visual appeal.
- Chill Time is Your Friend: Rushing the chilling process is a common mistake. A well-chilled cheese ball is much easier to shape, coat, and handle, and it allows the flavors to truly meld together. Plan for at least 4 hours, or better yet, make it the day before.
- Presentation Matters: Use a nice serving board, a festive platter, and colorful dippers. A few sprigs of fresh rosemary or cranberries scattered around the base can instantly elevate the look.
Creative Twists
The beauty of Holiday Cheese Balls is how easily they can be customized! Here are some ideas to inspire your own culinary adventures:
- Sweet & Savory Dessert Cheese Ball: Instead of a savory base, consider using cream cheese and mascarpone, mixed with confectioners’ sugar, vanilla, and maybe some orange zest. Roll it in crushed graham crackers, mini chocolate chips, or finely chopped dried fruit like apricots and figs. Perfect with shortbread cookies or fruit slices!
- Mediterranean Inspired: Incorporate crumbled feta cheese, finely chopped Kalamata olives, sun-dried tomatoes, and oregano into the cream cheese base. Coat with chopped pistachios or finely chopped fresh basil.
- Smoked Salmon & Dill: Add finely chopped smoked salmon and fresh dill to your cream cheese mixture. A little lemon zest would also be lovely. Coat with more fresh dill or finely crushed pumpernickel breadcrumbs.
- Spicy Buffalo Chicken: Mix in shredded cooked chicken, a generous amount of buffalo sauce, and a touch of blue cheese crumbles. Roll in crumbled blue cheese or finely crushed spicy chips.
- Pesto Paradise: Swirl in a few tablespoons of your favorite pesto into the cream cheese base. Add some toasted pine nuts for crunch. Coat with finely grated Parmesan cheese or more pine nuts.
Common Questions
Q1: Can I make these cheese balls ahead of time?
Absolutely! This is one of their biggest advantages. You can prepare the cheese ball mixture, shape it, and chill it (uncoated) in the refrigerator for up to 5-7 days. For the best presentation, only add the coating 1-2 hours before you plan to serve it.
Q2: What’s the best way to get the cream cheese soft quickly?
If you forget to take your cream cheese out of the fridge, you can unwrap it and place it on a microwave-safe plate. Microwave on high for 15-20 seconds for standard blocks, checking for softness. Be careful not to actually cook it, just soften it! For a no-microwave option, cut it into smaller cubes and let it sit on the counter for 20-30 minutes.
Q3: My cheese ball mixture is too sticky to form a ball. What should I do?
This usually means it’s not cold enough or your cream cheese might have been too warm to begin with. Try chilling the entire mixture in the bowl for 30 minutes before attempting to shape it. A light dusting of flour on your hands, or using plastic wrap to help mold it, can also provide assistance. Alternatively, if your ingredients were too warm, adding a bit more shredded cheese (especially a harder variety like Parmesan) can help firm it up.
Classic Herb & Garlic Cheese Ball
Equipment
- medium-sized mixing bowl
- electric mixer
- plastic wrap
Ingredients
Cheese Ball
- 8 ounce cream cheese, softened
- 4 ounces shredded sharp cheddar cheese
- 2 tablespoons unsalted butter, softened
- 2 cloves garlic, minced
- 1 tablespoon fresh parsley, finely chopped
- 1 tablespoon fresh chives, finely chopped
- 1 teaspoon dried dill
- ½ teaspoon onion powder
- ¼ teaspoon black pepper
Coating
- ½ cup finely chopped walnuts
- 2 tablespoons finely chopped fresh parsley
Instructions
Preparation
- In a medium bowl, combine softened cream cheese, shredded cheddar, and softened butter; beat until smooth with an electric mixer.
- Add minced garlic, fresh parsley, fresh chives, dried dill, onion powder, and black pepper to the cheese mixture, then mix thoroughly.
- Scrape the mixture onto plastic wrap and form it into a ball, wrapping tightly.
- Refrigerate the cheese ball for 1-2 hours until firm, allowing flavors to meld and making it easier to handle.
- Unwrap the firm cheese ball and roll it on a plate with finely chopped walnuts and fresh parsley until fully covered.
- Place the coated cheese ball on a platter and serve with crackers, pretzel crisps, or crostini.