I remember my college days when nachos were practically a food group. But let’s be honest, many of those late-night creations were, well, a little sad. Soggy chips, unevenly melted cheese, and a distinct lack of oomph. It took a few years and a fair few culinary experiments, but I finally cracked the code to truly spectacular nachos, specifically the kind baked in the oven. It’s not just about piling things on; it’s about strategic layering and choosing toppings that sing together. If you’re ready to elevate your nacho game from good to absolutely glorious, especially when cooking for a crowd or just yourself, you’re in the right place.
Why You’ll Love This Dish
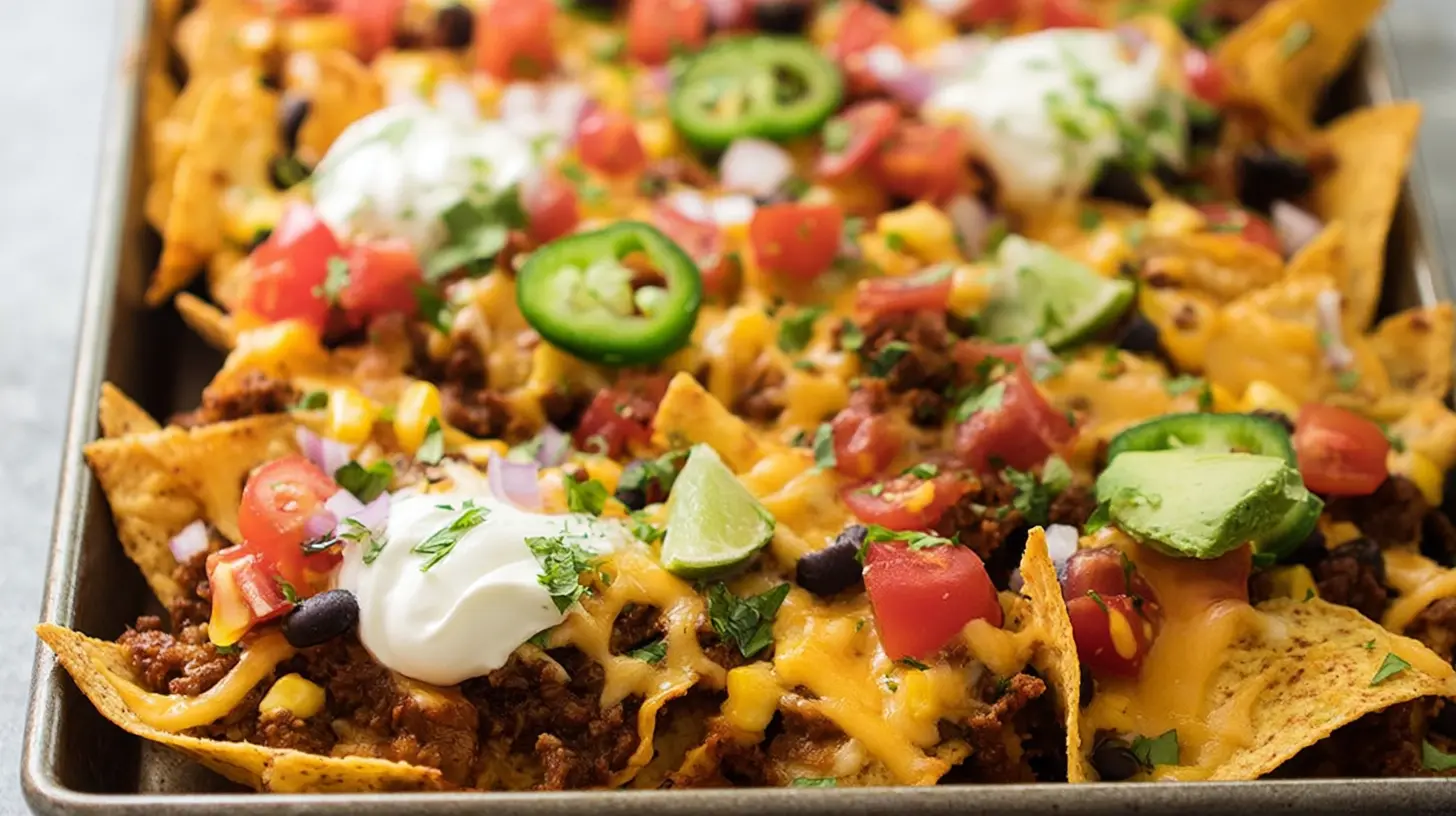
There’s something inherently joyful about a platter of perfectly baked nachos. It’s the ultimate communal food, perfect for game nights, casual get-togethers, or even a fun, easy weeknight dinner when you don’t feel like slaving over a hot stove. What makes this particular approach special is its focus on quality over quantity and smart layering techniques. By baking them in the oven, you achieve that coveted melty cheese and slightly crisp chip without the dreaded sogginess that often plagues microwave versions. Plus, zeroing in on the “4 best toppings” isn’t about limitation, but about creating a balanced, flavorful experience every time. It’s quick to assemble, incredibly satisfying, and endlessly customizable once you master the basics.
> “I used to think all nachos were the same, but focusing on these key toppings and baking them in the oven changed everything! They’re so much better than anything you get at a restaurant.” — A happy home cook
Preparing Nachos in the Oven
Crafting these irresistible nachos starts with a solid foundation and smart layering. You’ll begin by spreading a single, even layer of tortilla chips on a baking sheet. This ensures every chip gets its moment in the spotlight, covered with cheese and toppings. Next comes your first layer of cheese, followed by some of your chosen toppings. You’ll then add another layer of chips, more cheese, and the remaining toppings. This double-layer approach is key to guaranteeing maximum flavor and texture in every bite. Finally, a quick stint in a hot oven melts the cheese into gooey perfection and warms all the ingredients through, creating a harmonious blend of flavors and textures.
What You’ll Need
Key Ingredients:
- Tortilla Chips: Sturdy, restaurant-style chips work best. Avoid thin, delicate chips which can become soggy too quickly.
- Shredded Cheese: A good melting cheese blend is crucial. Monterey Jack, cheddar, or a Mexican blend are excellent choices. Shred it yourself for superior melt.
- Ground Beef (or protein of choice): Seasoned ground beef, shredded chicken, or black beans.
- Salsa: A good quality jarred salsa or homemade pico de gallo.
- Jalapeños: Freshly sliced or pickled, for a kick.
- Sour Cream (for serving): A dollop of cool sour cream beautifully balances the heat.
- Avocado/Guacamole (for serving): Creamy avocado or a vibrant guacamole adds freshness.
- Optional garnish: Fresh cilantro, chopped red onion.
Directions to Follow
- Preheat Oven: Preheat your oven to 375°F (190°C).
- Prepare Toppings: If using ground beef, cook and season it to your liking. Drain any excess fat. If using canned black beans, rinse them thoroughly. Slice your jalapeños, chop your cilantro, and prepare any other desired cold toppings.
- First Layer: Spread about half of your tortilla chips in a single, even layer on a large baking sheet. Don’t let them overlap too much.
- First Topping & Cheese Layer: Sprinkle about a third of your shredded cheese over the chips, followed by half of your ground beef/beans and half of your jalapeños.
- Second Layer: Carefully add the remaining tortilla chips in another layer over the first.
- Second Topping & Cheese Layer: Top with the remaining cheese, ground beef/beans, and jalapeños.
- Bake: Place the baking sheet in the preheated oven for 10-15 minutes, or until the cheese is bubbling and melted and the chips are lightly toasted. Keep an eye on them to prevent burning.
- Serve: Carefully remove the nachos from the oven. Let them cool for a minute or two. Garnish generously with dollops of sour cream, spoonfuls of salsa, fresh cilantro, and avocado or guacamole. Serve immediately!
Best Ways to Enjoy It
These oven-baked nachos are truly versatile! While fantastic on their own as a hearty snack or appetizer, they can easily become the star of a casual meal. For a relaxed party, serve them directly on the baking sheet (just be sure to place it on a trivet!) and let everyone dig in. Pair them with a crisp green salad to add some freshness and balance out the richness. For a complete meal, consider adding a side of Mexican rice or refried beans, though honestly, with all those toppings, you might not even need them! Don’t forget a refreshing beverage—a cold beer, margarita, or even a glass of sparkling water with lime would be perfect.
Keeping Leftovers Fresh
Nachos are definitely at their best when eaten fresh out of the oven. Unfortunately, once the cheese melts and cools, and especially when combined with wetter toppings, the chips tend to get soggy. If you do have leftovers (a rare occurrence!), it’s best to store any unbaked and cold toppings separately in airtight containers in the refrigerator. The cheesy chips themselves can be refrigerated for up to 1-2 days, but be aware they will lose their crispness.
Reheating Tips: To attempt to revive leftover baked nachos, spread them on a baking sheet and reheat in a 300°F (150°C) oven for 5-10 minutes, or until warmed through. The chips might regain a little crispness, but they won’t be as good as freshly made. Avoid the microwave, as it will only make them soggier.
Helpful Cooking Tips
- Don’t Overcrowd: This is the golden rule for crispy nachos. Overlapping chips too much leads to steaming, not toasting. Use two baking sheets if necessary.
- Shred Your Own Cheese: Pre-shredded cheese often contains anti-caking agents that can make it melt less smoothly. Shredding a block of cheese yourself will result in a creamier, more delicious melt.
- Warm Your Toppings: If you’re using cooked meat or beans, ensure they are warm before adding them to the nachos. This helps everything heat through evenly in the oven.
- Strategic Layering: As mentioned, layering is key. Don’t dump all the cheese on top of a mountain of chips. Distribute the cheese and toppings between layers for maximum flavor distribution.
- Don’t Overbake: Keep a close eye on the nachos. Once the cheese is bubbly and melted and the edges of the chips just start to turn golden, they’re done. Overbaking can lead to burnt chips and tough cheese.
- Serve Immediately: Nachos wait for no one! Have your cold garnishes (sour cream, salsa, guacamole, cilantro) ready and serve these beauties as soon as they emerge from the oven.
Creative Twists
While our “4 best toppings” are a fantastic starting point, feel free to get creative!
- Protein Power-Up: Swap ground beef for shredded slow-cooker pork carnitas, seasoned chicken, grilled steak, or even smoky tempeh crumbles for a vegetarian option.
- Veggie Variety: Add finely diced bell peppers, sweet corn, black olives, or even a sprinkle of finely chopped red onion before baking.
- Cheesy Choices: Experiment with different cheese blends. Oaxaca cheese for an authentic Mexican touch, pepper jack for extra heat, or even a sprinkle of crumbled cotija after baking.
- Spice It Up: Drizzle with a homemade chipotle crema, sprinkle with a pinch of chili powder, or add a dash of hot sauce before serving for an extra kick.
- Sweet & Savory: A controversial but delicious twist: add a sprinkle of cooked, crumbled bacon towards the end of baking for a smoky, salty crunch.
- Breakfast Nachos: Top with scrambled eggs, breakfast sausage, and a generous amount of cheese for a fun brunch dish!
Common Questions
How do I prevent my nachos from getting soggy?
The key is proper layering and not overcrowding the baking sheet. Use sturdy chips, spread them in thin layers, and bake in a hot oven just until the cheese is melted. Avoid piling on too many wet ingredients (like overly juicy salsa) before baking. Add most of your fresh, wet garnishes after baking.Can I make these vegetarian?
Absolutely! Simply swap the ground beef for seasoned black beans, pinto beans, or even a plant-based ground “meat” alternative. Make sure to season your vegetarian protein option well for maximum flavor.What’s the best type of cheese for nachos?
For optimal melt and flavor, a blend of good quality, freshly shredded cheeses works best. Monterey Jack melts beautifully and has a mild flavor, while cheddar adds a sharper tang. A Mexican blend is also a convenient and tasty option. Avoid using only very crumbly cheeses as they don’t hold together as well.How much time does it take to prepare?
Prep time is remarkably quick, usually around 10-15 minutes, especially if your protein is already cooked. Cooking time in the oven is another 10-15 minutes, making the total “hands-on” time for delicious nachos under 30 minutes!
Classic Oven-Baked Nachos
Equipment
- Oven
- Baking Sheet
Ingredients
Nachos
- 1 bag (13 oz) sturdy tortilla chips
- 2 cups shredded Monterey Jack or cheddar cheese blend
- 1 lb cooked ground beef, seasoned with taco seasoning
- 1/2 cup salsa (mild, medium, or hot)
- 1/4 cup sliced pickled jalapeños (or fresh)
- 1/2 cup rinsed and drained black beans optional
- 1/4 cup chopped fresh cilantro for garnish
- sour cream and guacamole for serving (optional)
Instructions
Preparation
- Preheat your oven to 400°F (200°C).
- Arrange a single layer of tortilla chips on a large baking sheet and pre-toast in the oven for 3-5 minutes.
- Remove the chips, sprinkle half the shredded cheese, then distribute the seasoned ground beef, salsa, and black beans.
- Add a second layer of chips, sprinkle the remaining cheese and jalapeños.
- Bake for 8-12 minutes until bubbly and golden; watch carefully to prevent burning.
- Garnish with fresh cilantro and serve immediately with sour cream and guacamole.