
I used to dread lunchtime. Another bland sandwich, another expensive takeout, or worse – skipping it entirely. It felt like a constant battle between time, budget, and my desire to eat something genuinely satisfying. That’s why diving headfirst into meal prepping for my lunches was a revelation, and now I’m here to share how you can conquer your midday meals with delicious, pre-planned goodness for an entire workweek. Say goodbye to sad desk lunches and hello to a fridge full of fantastic food!
Why you’ll love this dish
Meal prepping your lunches for five days isn’t just about saving time; it’s a complete lifestyle upgrade. Imagine waking up knowing your delicious, healthy lunch is already sorted, packed, and waiting for you. No more morning scramble, no more unhealthy impulsive buys, and no more succumbing to the allure of greasy takeout. This approach brings financial savings, mental peace, and a consistent boost to your energy levels because you’re fueling your body with thoughtfully prepared meals. It’s truly game-changing for anyone with a busy schedule but a desire to eat well.
> “I used to spend a fortune on lunch, and half the time it wasn’t even that good. Since I started meal prepping my lunches using these kinds of strategies, I’ve saved so much money, and my workday energy is through the roof! It’s actually enjoyable to eat my lunch now.” — A Satisfied Meal Prepper
How this recipe comes together
The beauty of meal prepping for five days lies in strategic planning and efficient execution. It’s not about cooking five different meals; it’s about cleverly combining components or preparing larger batches of adaptable dishes. You’ll typically dedicate a few hours, usually on a Sunday, to chop vegetables, cook grains, protein, and assemble your containers. The general flow involves selecting a few complementary recipes, prepping all the ingredients at once (think assembly line!), cooking in logical stages (e.g., bake chicken while rice cooks), then portioning and packing for the week ahead.
What you’ll need
For Base Components (Mix & Match):
- Grains:
- 2 cups dry quinoa or brown rice (yields ~6 cups cooked)
- Or 1 large sweet potato, scrubbed
- Proteins:
- 2 lbs boneless, skinless chicken breasts or thighs
- 1.5 lbs lean ground turkey or beef
- 1 can (15 oz) chickpeas, rinsed and drained
- 2-3 hard-boiled eggs
- Vegetables:
- 1 large head broccoli or cauliflower, chopped
- 1 large bell pepper (any color), sliced
- 1 red onion, thinly sliced
- 2 cups cherry tomatoes, halved
- Large bag of mixed greens or spinach
- Healthy Fats/Toppings:
- 1 avocado (to be added fresh daily)
- 1/4 cup nuts or seeds (e.g., almonds, pumpkin seeds)
- Dressings/Sauces:
- Olive oil & vinegar (for vinaigrettes)
- Tahini or Greek yogurt (for creamy dressings)
- Spices: preferred seasoning blends (e.g., Italian herbs, chili powder, cumin, garlic powder, salt, pepper)
Directions to follow
- Plan Your Menu: Choose 2-3 lunch concepts for the week. For example, a chicken and veggie bowl, a ground turkey stir-fry, and a quick chickpea salad.
- Prep Grains & Starchy Veggies: Cook quinoa or brown rice according to package directions. If using sweet potato, prick it several times and bake at 400°F (200°C) until tender (about 45-60 minutes). Let cool.
- Protein Power: Season chicken breasts/thighs with salt, pepper, and your favorite spices (e.g., paprika, garlic powder) and bake at 400°F (200°C) for 20-25 minutes, or until cooked through. Once cooled, slice or shred. If using ground meat, cook it in a skillet until browned, crumbling as it cooks. Season with a taco seasoning blend or soy sauce and ginger for an Asian-inspired twist.
- Roast Your Veggies: Toss chopped broccoli/cauliflower and bell peppers with a drizzle of olive oil, salt, and pepper. Roast at 400°F (200°C) for 15-20 minutes, until tender-crisp.
- Assembly Line: Once all components are cooked and cooled, it’s time to assemble!
- Bowl-Style Lunches: Divide cooked grain into 5 meal prep containers. Add a portion of cooked protein (e.g., sliced chicken or ground turkey) and roasted vegetables to each. You can add fresh elements like cherry tomatoes or red onion slices to some.
- Salad-Style Lunches: For green salads, keep the greens separate or in a smaller container to prevent wilting. Layer heartier ingredients like chickpeas, hard-boiled eggs, or chopped roasted veggies in the main container, and add greens just before eating. Portion dressing into small, separate containers.
- Cool Completely: Allow all hot food to cool completely before sealing the containers. This prevents condensation and keeps food fresher.
- Refrigerate: Place sealed containers in the refrigerator.
How to serve these meals
The beauty of meal-prepped lunches is their versatility. For bowl-style meals with grains, protein, and roasted veggies, simply reheat in the microwave until warm throughout (usually 1-2 minutes, stirring halfway). If your meal is a salad, add your dressing and any fresh toppers like avocado or nuts just before eating to maintain freshness and texture. You can also pack a small piece of fruit on the side, or a homemade energy ball for an extra boost.
Storage and reheating tips
Proper storage is key to making your meal prep last! Always use airtight containers to prevent spoilage and freezer burn (if freezing). Store prepped lunches in the refrigerator for up to 5 days. For food safety, ensure cooked foods are cooled rapidly before refrigerating. To reheat, microwave without the lid (or with a slightly vented lid) until piping hot. If you’ve prepped something that benefits from oven reheating (like a baked sweet potato), you can briefly do so, but for most office environments, a microwave will be your go-to. Items like cooked grains and proteins can often be frozen for longer storage (up to 2-3 months) if you prepare a larger batch than needed for the week.
Pro chef tips
- Batch Cook Smart: Focus on cooking large quantities of staple ingredients (like grains and roasted veggies) that can be mixed and matched across different meals.
- Season Generously: Don’t be shy with seasonings! Cooked food can taste bland if not properly seasoned. Taste as you go.
- Variety is Key: Even if you’re eating the same base, switch up your seasonings, sauces, or add-ins (like different nuts, seeds, or fresh herbs) each day to prevent flavor fatigue.
- Cool Completely: This cannot be stressed enough. Hot food stored immediately creates condensation, which leads to soggy food and bacterial growth. Let everything cool down before lidding and refrigerating.
Creative twists
- Mediterranean Bowls: Use quinoa as a base, add baked chicken or chickpeas, cucumber, cherry tomatoes, olives, feta cheese, and a lemon-tahini dressing.
- Asian-Inspired Stir-Fry: Brown ground turkey or tofu with soy sauce, ginger, garlic, and sesame oil. Add quickly sautéed bell peppers, snap peas, and shredded carrots. Serve over brown rice.
- Spicy Black Bean & Corn Salsa Jars: Layer cooked rice, seasoned black beans, corn, diced bell peppers, red onion, and top with a cilantro-lime dressing. Add avocado just before eating.
- Deconstructed Chicken Caesar: Cooked chicken, croutons (pack separately), romaine lettuce, cherry tomatoes, and Caesar dressing.
FAQ
How long does meal-prepped lunch stay good in the fridge?
Generally, properly stored meal-prepped lunches will stay fresh and safe to eat for 3-5 days in the refrigerator. Always ensure components are cooked thoroughly and cooled quickly before sealing in airtight containers.Can I freeze these meal-prepped lunches?
Many components of meal-prepped lunches, such as cooked grains (quinoa, brown rice), roasted vegetables, and most cooked proteins (chicken, ground turkey), freeze very well. However, fresh greens, delicate sauces, and certain vegetables like cucumber or tomatoes don’t freeze and thaw nicely. If freezing, assemble only the freezable components and add fresh items later.What kind of containers should I use for meal prepping?
Airtight, microwave-safe containers are ideal. Glass containers are excellent because they are durable, don’t stain or retain odors, and are oven-safe. BPA-free plastic containers are also a good, more affordable option. Look for ones with divided sections if you like to keep components separate.How do I prevent my prepped salads from getting soggy?
The key is to keep dressings separate until just before serving. For salads with greens, consider layering your container with the dressing at the very bottom, then hardier vegetables (like carrots, bell peppers), then protein, and finally the delicate greens on top. When you’re ready to eat, just shake it up!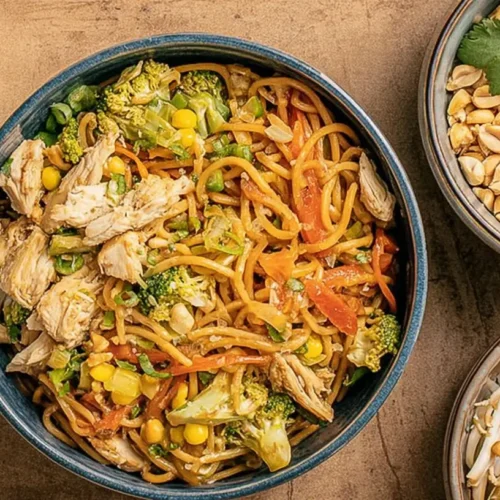
Zesty Mediterranean Quinoa Bowl
Equipment
- large bowl
- small bowl
- whisk
Ingredients
Main Ingredients
- 1 cup cooked quinoa
- 1/2 cup canned chickpeas rinsed and drained
- 1/4 cup cherry tomatoes halved
- 1/4 cup cucumber diced
- 1/4 cup red onion thinly sliced
- 1/4 cup crumbled feta cheese
- 2 tablespoons fresh parsley chopped
- 1 tablespoon fresh mint chopped
Dressing
- 2 tablespoons olive oil
- 1 tablespoon fresh lemon juice
- 1/2 teaspoon dried oregano
- Salt and black pepper to taste
Instructions
Preparation
- In a large bowl, combine the cooked quinoa, chickpeas, cherry tomatoes, cucumber, red onion, feta cheese, parsley, and mint.
- In a small bowl, whisk together the olive oil, lemon juice, oregano, salt, and pepper to create the dressing.
Assembly
- Pour the dressing over the quinoa and vegetable mixture.
- Toss gently to ensure all ingredients are well coated.
- Serve immediately or refrigerate for later enjoyment.