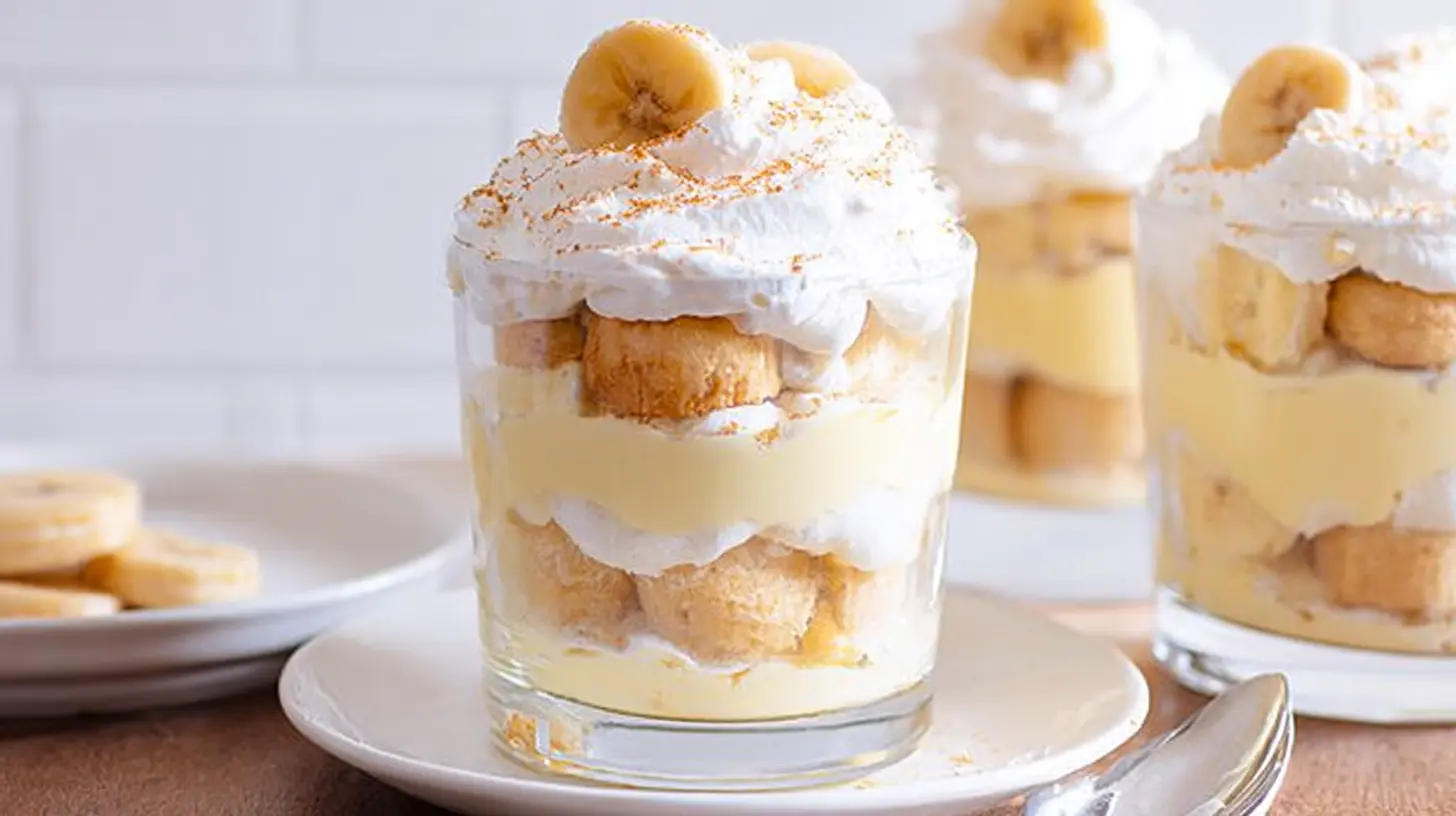
My grandmother’s banana pudding was legendary, a creamy, sweet hug in a bowl that always signaled a special occasion. But as I’ve gotten older and a little more mindful of sugar intake, I’ve often wished for a version that captured that same nostalgic comfort without the sugar rush. That’s why I was thrilled to discover how simple it is to create a delightful sugar-free banana pudding. It truly brings that classic Southern charm back to the table, but with a lighter touch that makes it perfect for everyday enjoyment or for those managing their sugar intake.
Why You’ll Love This Dish
This dish isn’t just about cutting down on sugar; it’s about enjoying a beloved classic in a healthier way without sacrificing flavor or texture. You’ll adore this sugar-free banana pudding because it’s surprisingly easy to whip up, making it ideal for a weeknight treat or a quick potluck contribution. It’s also incredibly satisfying, offering that rich, creamy goodness we all crave from banana pudding, but with a gentler sweetness that lets the natural flavor of the bananas shine. Plus, it’s a fantastic option if you’re catering to guests with dietary restrictions, ensuring everyone can indulge.
> “I was skeptical about sugar-free banana pudding, but this recipe completely changed my mind! It’s so creamy and delicious, and I don’t feel guilty enjoying a second helping.” – A happy home cook
The Cooking Process Explained
Making sugar-free banana pudding generally involves a few straightforward steps: preparing a sugar-free vanilla pudding base, layering it with fresh banana slices and sugar-free vanilla wafers, and then allowing it to chill so all the flavors can meld beautifully. You’ll start by whisking ingredients for the pudding, cooking it until thickened, and then assembling everything in your serving dish. The hardest part is usually waiting for it to chill sufficiently!
What You’ll Need
To embark on this delightful baking adventure, gather these items:
- Sugar-Free Vanilla Instant Pudding Mix: The star of our creamy base. Make sure it’s instant!
- Milk: Any kind works, but whole milk will give you the richest consistency.
- Bananas: Ripe, but firm. You don’t want them mushy, but they should have some sweet spots.
- Sugar-Free Vanilla Wafers: These provide that quintessential crunch and classic flavor.
- Whipped Topping (Sugar-Free): Optional, for an extra fluffy, luxurious finish.
Directions to Follow
Here’s your simple 10-step guide to creating perfect sugar-free banana pudding:
- Prepare the Pudding Base: In a large bowl, whisk together the sugar-free vanilla instant pudding mix with the cold milk. Continue whisking for about 2 minutes until the mixture begins to thicken.
- Let it Set (Briefly): Allow the pudding to sit for 5 minutes; it will continue to firm up.
- Slice the Bananas: While the pudding sets, peel and slice your ripe bananas into 1/4-inch thick rounds.
- First Wafer Layer: Arrange a single layer of sugar-free vanilla wafers at the bottom of a 9×13-inch baking dish or a large trifle bowl.
- First Banana Layer: Place a layer of sliced bananas over the wafers.
- First Pudding Layer: Carefully spoon about half of the prepared pudding mixture over the bananas, spreading it evenly.
- Repeat Layers: Add another layer of sugar-free vanilla wafers.
- Second Banana Layer: Follow with another layer of sliced bananas.
- Second Pudding Layer: Pour the remaining pudding mixture over the bananas, smoothing the top.
- Chill and Serve: Cover the dish with plastic wrap and refrigerate for at least 4 hours, or preferably overnight, to allow the flavors to meld and the wafers to soften slightly. If desired, garnish with sugar-free whipped topping before serving.
How to Serve It
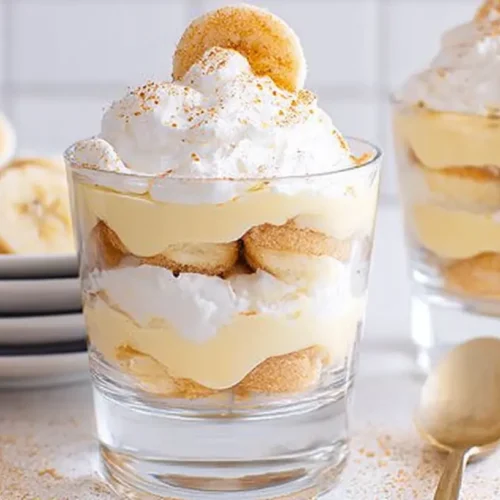
This sugar-free banana pudding is best served chilled, directly from the refrigerator. For an elegant touch, a sprinkle of finely crushed sugar-free vanilla wafers or a few fresh banana slices on top of each serving adds visual appeal. It’s a fantastic standalone dessert, but it also pairs wonderfully with a cup of coffee or a light herbal tea. It truly shines as the sweet ending to a casual family meal or a backyard barbecue.
Storage and Reheating Tips
Any leftover sugar-free banana pudding should be covered tightly with plastic wrap and stored in the refrigerator. It’s best enjoyed within 2-3 days. Beyond that, the bananas might start to brown and the wafers can become too soft. This dessert is not ideal for freezing, as the pudding texture can become watery upon thawing. Always ensure the pudding is kept cold to maintain food safety and optimal texture.
Pro Chef Tips
- Choose the Right Bananas: For the best results, use bananas that are ripe (some brown freckles are good!) but still firm. Overripe bananas will get too mushy in the pudding, while underripe ones won’t offer enough sweetness.
- Prevent Browning: If you’re particularly concerned about your banana slices browning, you can lightly toss them in a small amount of sugar-free lemon-lime soda or a tiny splash of lemon juice before layering.
- Chill Time is Key: Don’t rush the chilling process! The pudding needs ample time to set properly and for the wafers to absorb some of the moisture, creating that characteristic soft-yet-structured texture.
- Instant vs. Cooked: While this recipe uses instant pudding for convenience, you can certainly make a sugar-free cooked vanilla pudding from scratch for a different depth of flavor. Just be sure to cool it completely before layering.
Creative Twists
- Chocolatey Delight: Add a layer of sugar-free chocolate syrup or sugar-free chocolate chips between the banana and pudding layers for a richer flavor.
- Nutty Crunch: Sprinkle some chopped, toasted pecans or walnuts over a layer for added texture and a nutty flavor profile.
- Coconut Cream: For a tropical twist, use unsweetened coconut milk instead of regular milk for the pudding base, and garnish with toasted unsweetened shredded coconut.
- Spiced Version: A pinch of cinnamon or nutmeg in the pudding mix can add a subtle warmth that complements the bananas beautifully.
Common Questions
Can I make this a day ahead?
A: Absolutely! In fact, making it a day ahead is often recommended as it gives the pudding ample time to set and the layers to meld, resulting in an even more delicious and cohesive dessert.
What if I can’t find sugar-free vanilla wafers?
A: If sugar-free vanilla wafers are unavailable, you can use plain sugar-free shortbread cookies or even a crushed sugar-free graham cracker crust as an alternative for a similar base texture.
Is this recipe suitable for diabetics?
A: This recipe uses sugar-free pudding and wafers, making it a much lower-sugar option than traditional banana pudding. However, it’s always best for individuals with diabetes to consult their doctor or a registered dietitian regarding dietary choices, as carbohydrate content from milk and bananas still needs to be factored in.
Classic Sugar-Free Banana Pudding
Equipment
- Medium saucepan
- Whisk
- 9×5 inch loaf pan
- Plastic wrap
Ingredients
Main Ingredients
- 3-4 medium-sized, ripe but firm bananas sliced
- 1 box sugar-free vanilla wafers (6.75 oz) e.g., Nilla Wafers sugar-free variety
- 2 cups unsweetened almond milk (or other milk of choice)
- 3 tablespoons cornstarch
- 1/2 cup erythritol or monk fruit sweetener (or to taste)
- 1 teaspoon vanilla extract
- Pinch salt
Garnish (Optional)
- Sugar-free whipped topping
- cinnamon a sprinkle of
Instructions
Pudding Preparation
- In a medium saucepan, thoroughly whisk together almond milk, cornstarch, sweetener, and salt until a smooth consistency is achieved.
- Place the saucepan over medium heat and stir continuously for 5-7 minutes until the mixture thickens and gently boils.
- Remove the pudding from heat, stir in vanilla extract, and let it cool for 10-15 minutes, stirring occasionally to prevent a skin from forming.
Assembly
- While the pudding cools, thinly slice the ripe bananas.
- In a 9×5 inch loaf pan or individual dishes, create a base layer with sugar-free vanilla wafers.
- Spoon one-third of the cooled pudding over the wafers, then arrange a layer of sliced bananas on top.
- Repeat the layering process two more times, ensuring each layer consists of wafers, pudding, and bananas, and finishing with a final pudding layer.
- Cover the pudding tightly with plastic wrap and refrigerate for a minimum of 4 hours, or ideally overnight, to allow the wafers to soften and flavors to meld.
- If desired, garnish with sugar-free whipped topping or a light dusting of cinnamon just before serving.