Unleashing Your Inner Mad Scientist (with Delicious Results!)
Hey there, fellow Halloween enthusiasts and dessert devotees! Are you ready to conjure up some truly unforgettable treats this spooky season? I don’t know about you, but there’s something utterly magical about crafting edible delights that perfectly capture the spirit of Halloween – a little fright, a lot of fun, and an undeniable sweetness. Today, we’re diving headfirst into a recipe that’s as wickedly clever as it is delightfully delicious: Marshmallow Rice Krispies Halloween Brains. Prepare to amaze your guests and satisfy your sweet tooth with these ghoulishly good goodies!
Why You’ll Love These Marshmallow Rice Krispies Halloween Brains
- Spooktacularly Simple: No advanced culinary degrees needed here! This recipe is incredibly easy to follow, making it perfect for bakers of all skill levels, even those just starting their mad scientist careers.
- Kid-Friendly Fun: Involve the little ghouls and goblins in the kitchen! Shaping these “brains” is a fantastic hands-on activity that kids will adore.
- Allergy-Friendly Options: With a few simple substitutions, you can easily adapt this recipe to be gluten-free, making it accessible for more of your Halloween party guests.
- No-Bake Brilliance: Forget heating up the oven! These treats come together quickly on the stovetop, leaving you more time for costume planning and pumpkin carving.
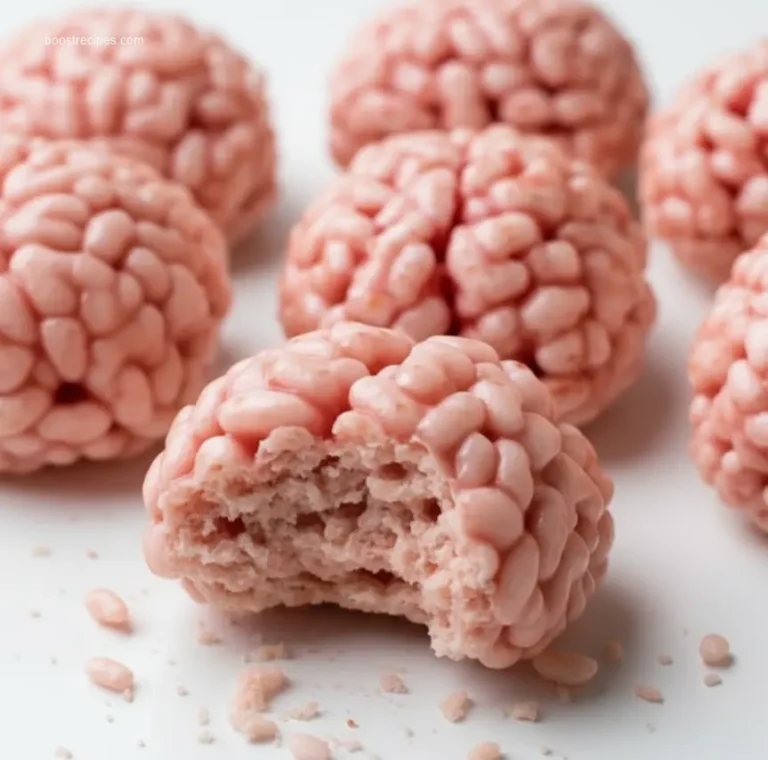
- Seriously Delicious: At the end of the day, these are still classic Rice Krispies Treats – gooey, sweet, and utterly addictive. The Halloween twist just makes them even better!
How to Make Marshmallow Rice Krispies Halloween Brains
Making Marshmallow Rice Krispies Halloween Brains is easy. You only need a few simple ingredients and a short amount of time. You will melt marshmallows and butter, mix in cereal, and shape the mixture into brains.
Ingredients of Marshmallow Rice Krispies Halloween Brains
- For the Brains Base:
- 6 cups Rice Krispies cereal
- 1 (10-ounce) bag mini marshmallows
- 3 tablespoons unsalted butter
- 1/2 teaspoon vanilla extract
- Food coloring (red, pink, or a mix for a realistic brain color)
- For the Gory Details (Optional Garnishes):
- Red gel food coloring or edible red piping gel
- Chocolate syrup (for a darker “blood” effect)
- Candy eyes (for an extra creepy touch!)
Directions of Marshmallow Rice Krispies Halloween Brains
- Prepare Your Workspace: Lightly grease a large bowl or baking dish with butter or non-stick spray. Set aside.
- Melt the Marshmallow Goo: In a large saucepan, melt the butter over low heat. Add the mini marshmallows and stir continuously until completely melted and smooth. Remove from heat.
- Add the Flavor & Color: Stir in the vanilla extract. Immediately add your chosen food coloring(s) a few drops at a time, mixing well until you achieve your desired “brain” hue. Remember, a little goes a long way with strong food dyes!
- Combine with Cereal: Gently fold in the Rice Krispies cereal until thoroughly coated with the gooey marshmallow mixture. Work quickly before it cools too much.
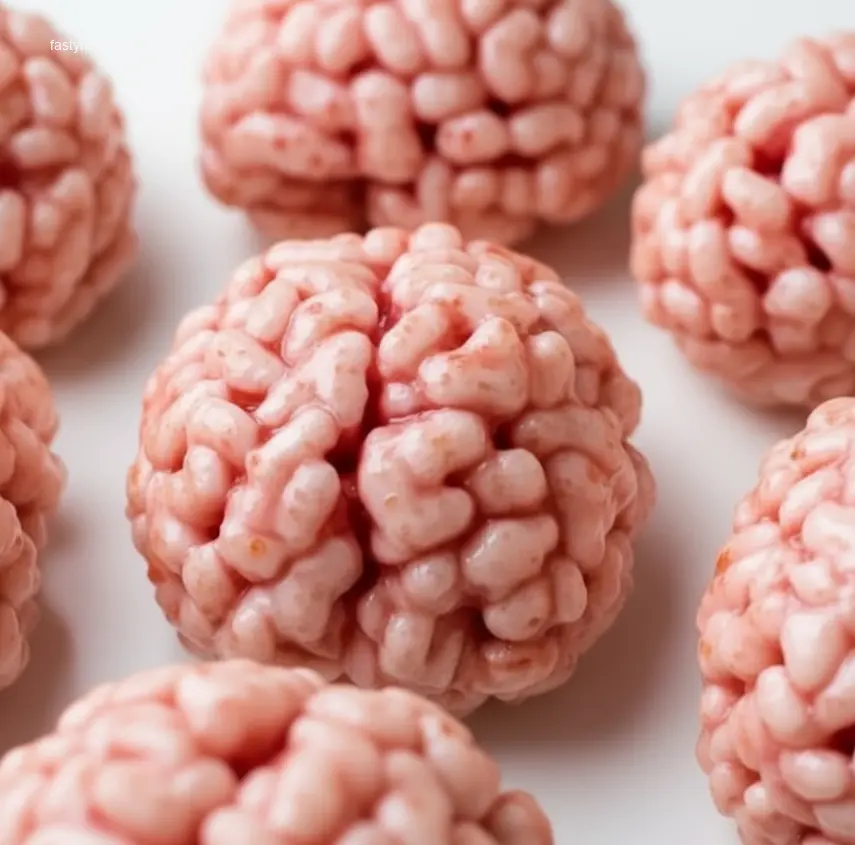
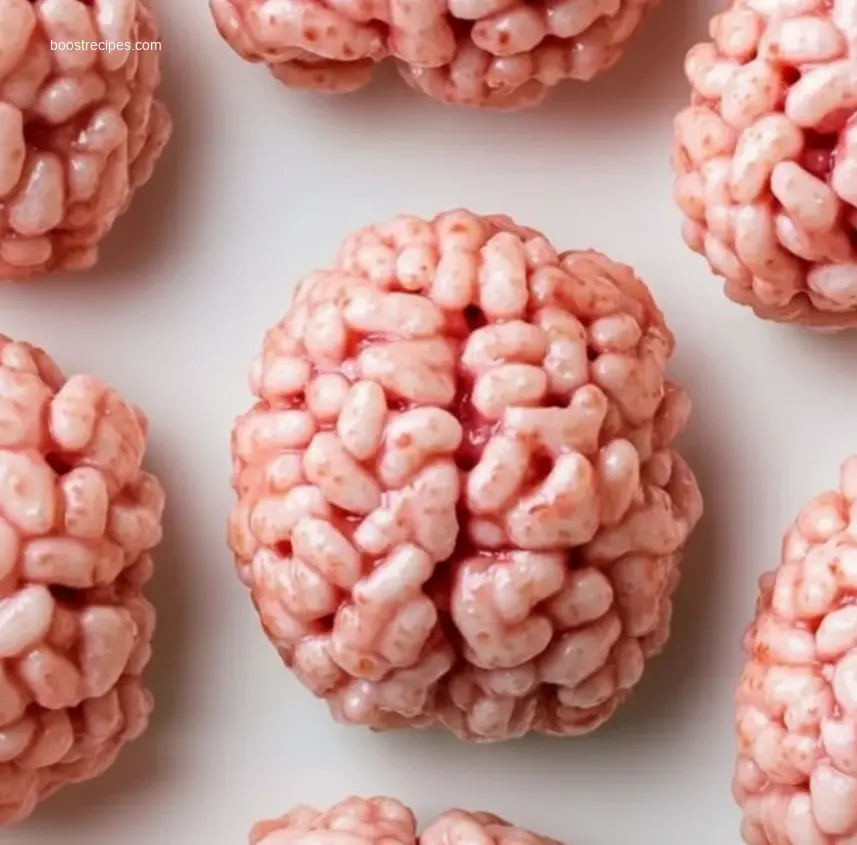
- Shape Your Brains: Lightly grease your hands with butter or non-stick spray (this is key!). Take a portion of the mixture and carefully mold it into a brain-like shape. You can make individual mini brains or one larger centerpiece brain. Use a butter knife or the side of your hand to create a central “fissure” for added realism.
- Decorate (Optional but Recommended!): Once your Marshmallow Rice Krispies Halloween Brains are formed, use red gel or piping gel to create “veins” or a “bloody” effect. You can drizzle chocolate syrup for a darker, gruesome look. If using candy eyes, gently press them in before the treats fully set.
- Set and Serve: Allow the brains to cool and set completely at room temperature or chill them in the refrigerator for quicker setting.
How to Serve Marshmallow Rice Krispies Halloween Brains
- Mad Scientist’s Platter: Arrange your Marshmallow Rice Krispies Halloween Brains on a black platter surrounded by dry ice (handled safely!) for a dramatic, fog-filled presentation.
- Zombie Apocalypse Buffet: Create a “body parts” spread with these brains alongside gummy worms, severed finger cookies, and “eyeball” cake pops.
- Individual Portions: Place smaller brains in clear plastic cups or treat bags for easy grab-and-go party favors.
- Bloody Punch Garnish: Skewer a small brain onto a cocktail stick and use it as a gruesome garnish for your favorite Halloween punch.
How to Store Marshmallow Rice Krispies Halloween Brains
Store your Marshmallow Rice Krispies Halloween Brains in an airtight container at room temperature for up to 3 days. They taste best when fresh.
Tips to Make Marshmallow Rice Krispies Halloween Brains
- Fresh Marshmallows are Key: Use fresh marshmallows for the best texture. Stale ones will not melt smoothly.
- Work Quickly: The marshmallow mixture sets fast. Have all your ingredients ready before you start.
- Greased Hands are Your Best Friend: Grease your hands when shaping. This prevents sticking.
- Color Creativity: Use different shades of red, pink, and even a touch of purple for the perfect “brain” color.
- Low Heat is Crucial: Melt the marshmallows over low heat. This stops them from becoming tough.
- Don’t Over-Mix the Cereal: Mix the cereal just enough to coat it. Over-mixing can crush the Rice Krispies.
- Press Firmly but Gently: When shaping, press the mixture firmly to hold its shape. Do it gently to keep the treats light.
Variation
- Chocolate Brains: Add 1/2 cup of chocolate chips (milk, dark, or white) with the Rice Krispies for more flavor.
- Peanut Butter Brains: Add 1/2 cup of creamy peanut butter to the melted marshmallow mixture for a nutty flavor.
- Fruity Brains: A few drops of berry-flavored extract (like strawberry or cherry) can add a different sweet flavor.
- Glow-in-the-Dark Brains: Add a tiny amount of tonic water when melting marshmallows (it contains quinine, which glows under blacklight!). This creates a cool effect for a spooky party.
FAQs
Q1: How can I make my Marshmallow Rice Krispies Halloween Brains look extra realistic?
A1: To make your Marshmallow Rice Krispies Halloween Brains look more realistic, mix red with a tiny bit of blue or purple food coloring. This creates a deeper, pinkish-red color. After shaping, use a butter knife to make a central line and smaller winding lines to look like brain folds. Drizzle with red gel icing or thin raspberry jam for convincing “blood.”
Q2: Can I make these Marshmallow Rice Krispies Halloween Brains ahead of time?
A2: Yes, you can! You can make Marshmallow Rice Krispies Halloween Brains 1-2 days before. Store them in an airtight container at room temperature. For the best freshness, eat them within 3 days. If you keep them in the refrigerator, they will get firmer. Let them warm up to room temperature before serving.
Q3: Are there any gluten-free alternatives for the Rice Krispies in this recipe?
A3: Yes, there are! Many brands sell certified gluten-free crisp rice cereal. This is a perfect alternative for regular Rice Krispies. Always check the packaging to make sure it is gluten-free if you need to meet dietary needs for your Marshmallow Rice Krispies Halloween Brains.
Marshmallow Rice Krispies Halloween Brains
Spook up your Halloween party with these delightfully chewy and ghoulish Marshmallow Rice Krispies Halloween Brains! A fun, easy, and slightly creepy treat that everyone will love.
Total Time: 0h 25m
Yield: 12 servings 1x
Ingredients
Scale
3 tablespoons butter
1 package (10 oz, about 40) regular marshmallows
6 cups Rice Krispies cereal
Red or pink food coloring (gel works best)
Black gel icing or edible marker (optional, for veins)
Instructions
1. Grease a large bowl and a 9×13 inch baking pan with butter or cooking spray. Alternatively, prepare a brain-shaped mold or small individual molds for shaping.
2. In a large saucepan, melt butter over low heat. Add marshmallows and stir until completely melted and smooth. Remove from heat.
3. Add a few drops of red or pink food coloring to the melted marshmallow mixture. Stir well until you achieve a desired brain-like color. Remember, you can always add more!
4. Pour the colored marshmallow mixture over the Rice Krispies cereal in the greased large bowl. Stir until the cereal is thoroughly coated.
5. Using greased hands, press the mixture into the prepared baking pan or molds. If making a large brain, gently shape it with your hands on parchment paper. For individual brains, shape small portions into brain-like lumps.
6. Allow the treats to cool completely and set, about 30–60 minutes, or refrigerate for faster setting.
7. Once set, carefully remove from the pan or molds. For an extra ghoulish effect, use black gel icing or an edible marker to draw squiggly ‘veins’ on the surface of your Marshmallow Rice Krispies Halloween Brains.
8. Serve your terrifyingly tasty brains and enjoy the screams (of delight)!
Notes
For a more realistic brain texture, use a small spoon or toothpick to gently indent the surface of the brains while they are still warm and pliable.
These Marshmallow Rice Krispies Halloween Brains can be made a day in advance and stored in an airtight container at room temperature.
Consider adding a few drops of almond extract or vanilla for an extra flavor boost.
- Prep Time: 0h 20m
- Cook Time: 0h 5m
- Category: Dessert
- Method: No-Bake
- Cuisine: American
- Diet: Vegetarian
Nutrition
- Serving Size: 1 brain
- Calories: 180
- Sugar: 25g
- Sodium: 130mg
- Fat: 6g
- Saturated Fat: 3.5g
- Unsaturated Fat: 2g
- Trans Fat: 0g
- Carbohydrates: 32g
- Fiber: 0.5g
- Protein: 1g
- Cholesterol: 15mg
Marshmallow Rice Krispies Halloween Brains
Equipment
- large mixing bowl
- saucepan
- spatula or spoon
- parchment paper
Ingredients
Main Ingredients
- 1/4 cup butter
- 10 oz mini marshmallows
- 6 cups Rice Krispies cereal
- red or pink food coloring a few drops
For Decorating (Optional)
- red gel icing for realistic brain veins
Equipment
- large mixing bowl
- saucepan
- spatula or spoon
- parchment paper
Nutrition
- 150 calories
- 25 g carbohydrates
- 1 g protein
- 5 g fat
- g fiber
- 15 g sugar
- 100 mg sodium
Instructions
Preparation
- Melt the butter in a large saucepan over low heat, then add the marshmallows and stir until completely melted and smooth.
- Remove from heat and stir in a few drops of red or pink food coloring until the mixture is uniform in color.
- Quickly add the Rice Krispies cereal and mix well until evenly coated with the marshmallow mixture.
Shaping the Brains
- Butter your hands or use parchment paper, then form individual portions of the mixture into brain shapes.
- Using your fingers, create a crease down the middle of each brain to mimic the brain's hemispheres.
- Allow the brains to cool and set on parchment paper at room temperature.
Decoration (Optional)
- Once cooled, use red gel icing to draw squiggly lines over the brains for a more realistic and gruesome effect.