Why Make This Zombie Berry Pie
This isn’t just any berry pie; it’s a culinary experience designed to delight! Here’s why this Zombie Berry Pie is about to become your new favorite:
A Burst of Unforgettable Flavor
With a medley of tart berries and a subtle, surprising kick, this pie offers a taste sensation that’s both familiar and exhilarating. It’s the perfect balance of sweet and tangy, guaranteed to awaken your palate.
Eye-Catching and Conversation-Starting
Its vibrant, “zombie-esque” hue and rustic charm make it a showstopper at any gathering. Be prepared for compliments and curious questions about this unique dessert!
Fun and Easy to Make
Even if you’re a novice baker, our clear, step-by-step instructions will guide you to pie-making success. It’s a rewarding project that’s more straightforward than you might think.
Perfect for Any Occasion
While it has a fun, spooky name, this pie is versatile enough for year-round enjoyment. Think summer BBQs, holiday feasts, or just a cozy evening in.
How to Make Zombie Berry Pie
Get ready to bring this ghoulishly good dessert to life!
Ingredients of Zombie Berry Pie
#### For the Flaky Pie Crust
- All-purpose flour
- Unsalted butter, very cold and cubed
- Ice water
- Salt
- Sugar (optional, for a slightly sweeter crust)
#### For the Zombie Berry Filling
- Mixed berries (fresh or frozen – a combination of blueberries, blackberries, raspberries, and tart cherries works wonderfully)
- Granulated sugar (adjust to your sweetness preference and berry tartness)
- Cornstarch or tapioca starch (for thickening)
- Lemon juice (to brighten flavors)
- Vanilla extract
- A pinch of ground cinnamon or nutmeg (optional, for warmth)
- A “secret” ingredient for the zombie hue (e.g., a few drops of natural green food coloring or a small amount of spirulina powder for a vibrant, natural green while adding a nutritional boost)
Directions of Zombie Berry Pie
#### Preparing the Pie Crust
- Combine Dry Ingredients: In a large bowl, whisk together flour, salt, and sugar (if using).
- Cut in Butter: Add the cold, cubed butter to the flour mixture. Using a pastry blender or your fingertips, cut the butter into the flour until it resembles coarse meal with some pea-sized pieces of butter remaining.
- Add Ice Water: Gradually add ice water, one tablespoon at a time, stirring with a fork until the dough just comes together. Be careful not to overmix.
- Form Discs: Divide the dough in half, flatten each half into a disc, wrap tightly in plastic wrap, and refrigerate for at least 30 minutes (or up to 2 days).
#### Making the Berry Filling
- Combine Berries and Sugar: In a large bowl, gently mix the mixed berries with granulated sugar. Let it sit for 10-15 minutes to allow the berries to release some of their juices.
- Add Thickener and Flavorings: Stir in the cornstarch (or tapioca starch), lemon juice, vanilla extract, and optional cinnamon/nutmeg.
- Achieve the Zombie Hue: Now for the fun part! Add your chosen “secret” ingredient for the zombie color. Start with a small amount and gradually add more until you reach your desired vibrant, spooky hue. Mix gently until evenly distributed.
#### Assembling and Baking the Pie
- Preheat Oven: Preheat your oven to 400°F (200°C).
- Roll Out Crust: On a lightly floured surface, roll out one disc of pie dough into a 12-inch circle. Carefully transfer it to a 9-inch pie plate. Trim the edges, leaving about a 1/2-inch overhang.
- Add Filling: Pour the Zombie Berry Pie filling into the crust, spreading it evenly.
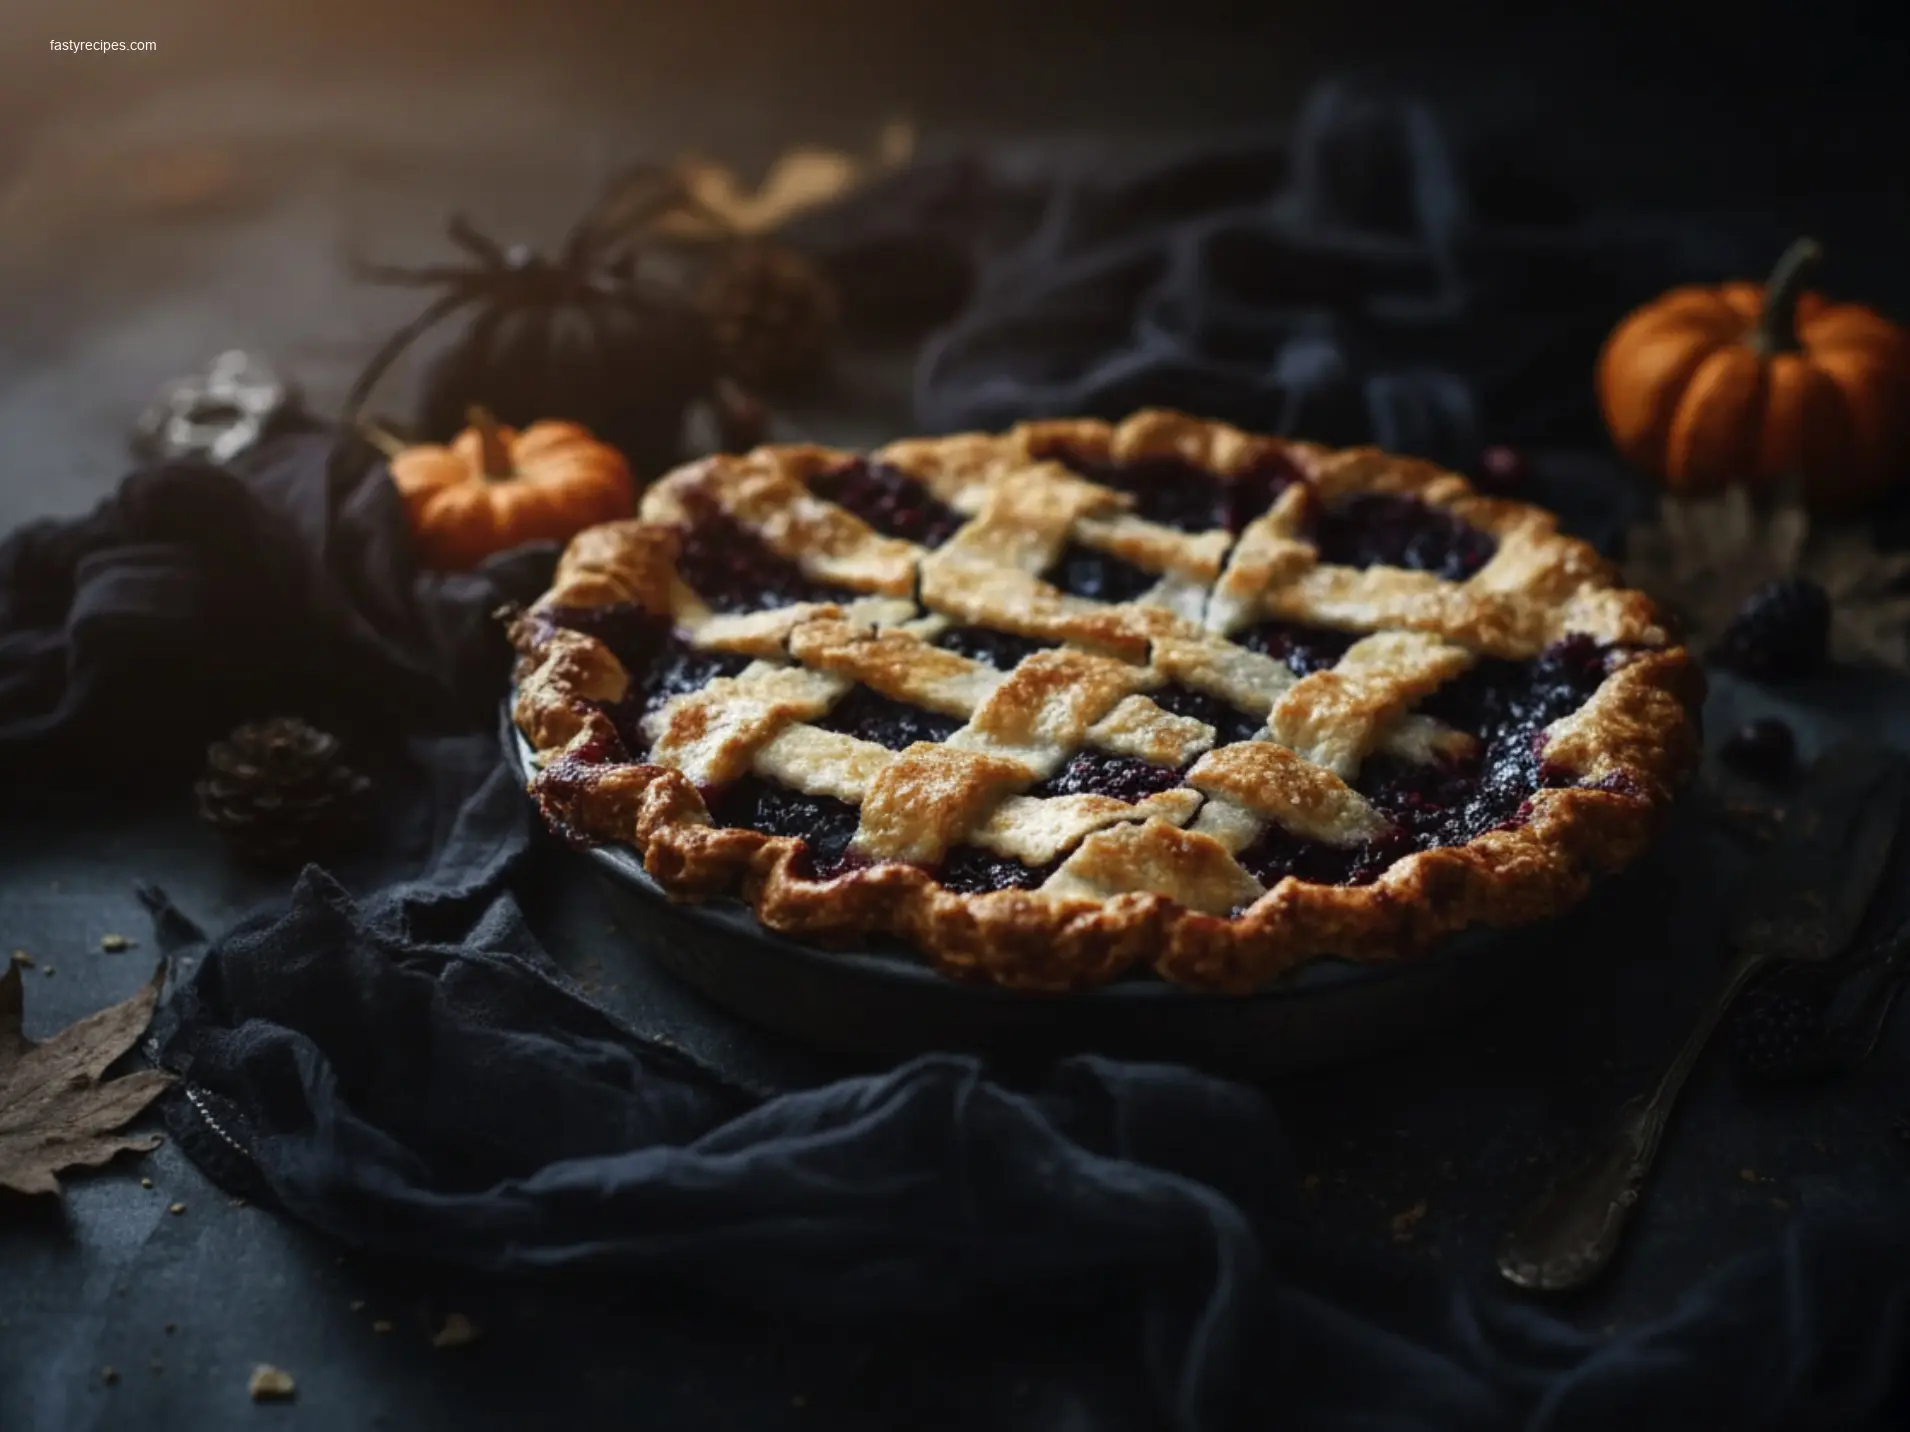
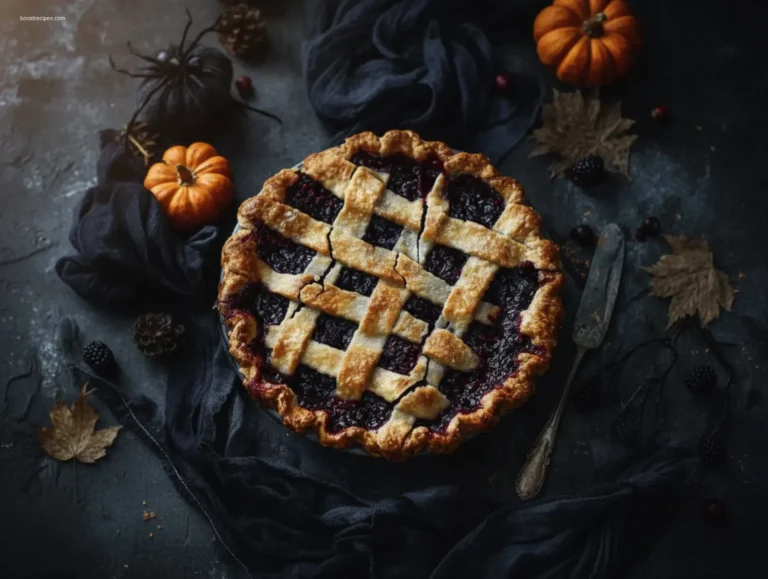
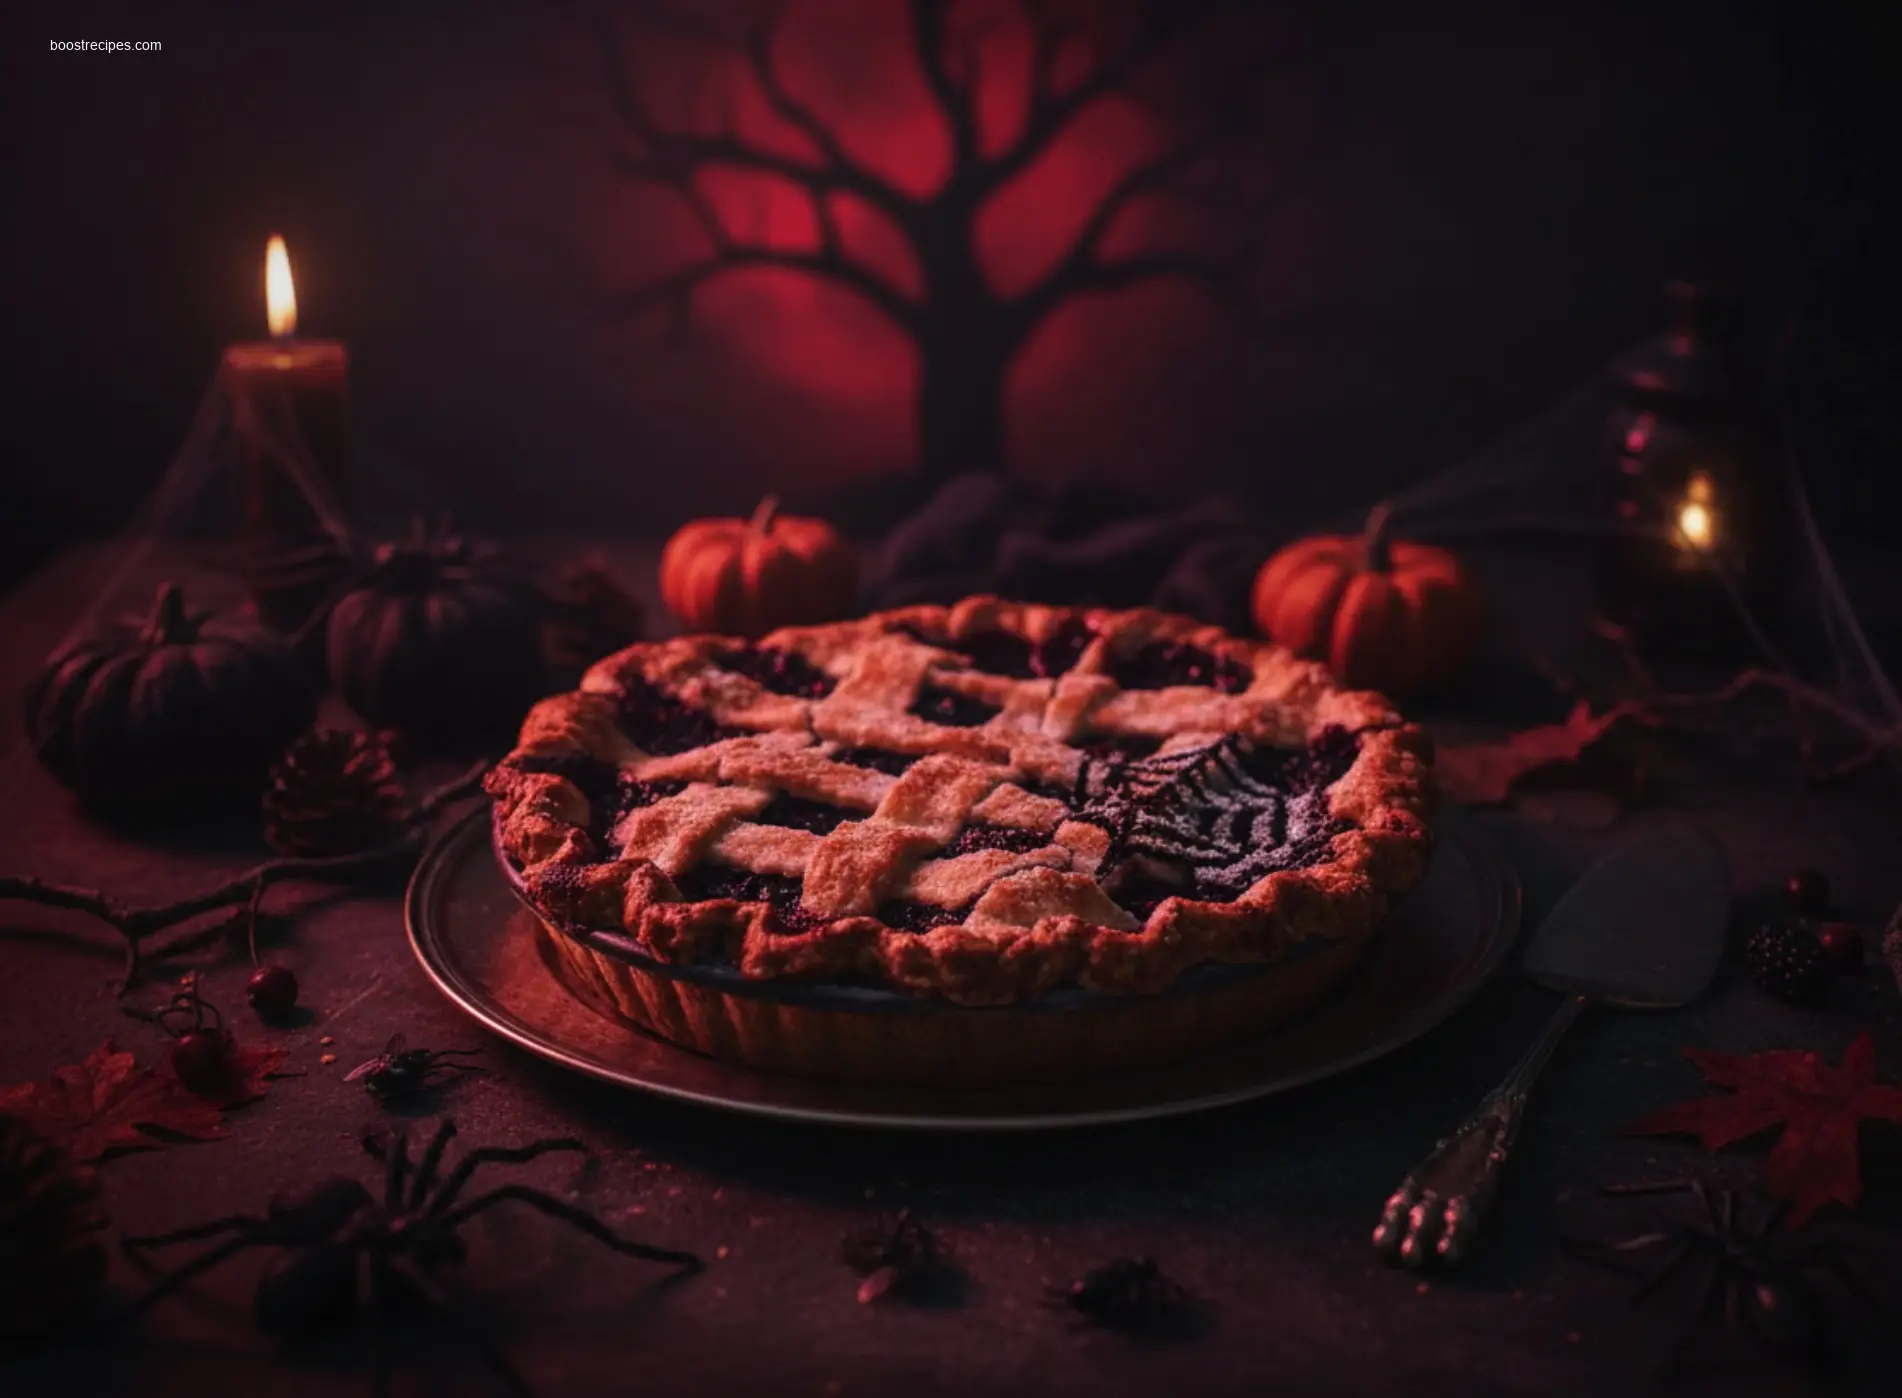
- Top Crust: Roll out the second disc of pie dough. You can create a full top crust (venting with slits), a lattice top, or use cookie cutters to make decorative shapes.
- Seal and Crimp: Place the top crust over the filling. Trim and crimp the edges of both crusts together to seal.
- Egg Wash (Optional): For a golden-brown finish, brush the top crust with an egg wash (one egg beaten with a tablespoon of water). Sprinkle with a little sugar, if desired.
- Bake: Place the pie on a baking sheet to catch any drips. Bake for 15 minutes at 400°F (200°C), then reduce the oven temperature to 375°F (190°C) and continue baking for another 35-45 minutes, or until the crust is golden brown and the filling is bubbling.
- Cool: Let the Zombie Berry Pie cool completely on a wire rack before slicing and serving. This allows the filling to set properly.
How to Serve Zombie Berry Pie
This Zombie Berry Pie is a star on its own, but these additions can elevate the experience:
A Dollop of Creamy Delight
A generous scoop of vanilla bean ice cream or a swirl of freshly whipped cream provides a delightful contrast to the pie’s fruity tartness.
Spooky Sweet Sauce
Drizzle with a simple berry coulis (made by simmering berries with a little sugar and lemon juice, then straining) for an extra layer of berry flavor and an even “goopier” look.
A Sprinkle of Fun
For a playful touch, garnish with edible googly eyes or crushed dark chocolate “dirt” to lean into the zombie theme.
How to Store Zombie Berry Pie
Store leftover pie covered in the refrigerator for up to 3-4 days.
Tips to Make Zombie Berry Pie
- Don’t Overwork the Dough: For a super flaky crust, handle the dough as little as possible.
- Frozen Berries: If you use frozen berries, there’s no need to thaw them first. Just add them directly to the filling mixture and increase the baking time by about 5-10 minutes.
- Achieving the Perfect Color: Experiment with the amount of green coloring or spirulina powder to achieve your ideal “zombie” shade. A little goes a long way!
Variations on the Zombie Berry Pie Theme
Get creative with your Zombie Berry Pie!
The “Swamp Monster” Variation
Instead of a traditional top crust, create a crumbly streusel topping with oats, brown sugar, and butter for a textural contrast that looks like mossy swamp land.
Citrusy Zest
Add orange or lime zest to the berry filling for an extra bright and zesty flavor profile.
Spiced Up Zombies
For a warmer, cozier pie, increase the amount of cinnamon, or add a pinch of ground ginger or cardamom to your berry mixture.
FAQs
1. What makes this pie a “Zombie Berry Pie”?
The “zombie” aspect of our Zombie Berry Pie refers to its vibrant, unconventional (often green-tinted) color achieved through natural food colorings or ingredients like spirulina powder, giving it a playful, spooky twist while still being packed with delicious berry flavor.
2. Can I use only one type of berry for my Zombie Berry Pie?
While a mix of berries provides the best depth of flavor and color contrast, you can certainly use a single type of berry for your Zombie Berry Pie, such as all blueberries or all raspberries. Just be mindful of adjusting the sugar content based on the sweetness of your chosen berry.
3. How do I prevent my Zombie Berry Pie filling from being too runny?
To ensure your Zombie Berry Pie filling sets perfectly, make sure to use the recommended amount of cornstarch or tapioca starch and allow the pie to cool completely before slicing. The cooling process is crucial for the thickener to do its job.
4. Can I make the pie crust ahead of time?
Absolutely! The pie crust dough for your Zombie Berry Pie can be made up to 2 days in advance and stored in the refrigerator, or frozen for up to a month. Just be sure to let it soften slightly at room temperature before rolling it out.
Zombie Berry Pie
This Classic Zombie Berry Pie features a spooktacular blend of mixed berries, a hint of lime, and a delightfully eerie green crust. Perfect for a ghoulish gathering!
Total Time: 1 hour 20 minutes
Yield: 8 servings 1x
Ingredients
Scale
2 pre-made pie crusts (store-bought or homemade)
4 cups mixed berries (fresh or frozen, thawed if frozen)
1/2 cup granulated sugar
2 tablespoons cornstarch
1 tablespoon lime juice
1/2 teaspoon almond extract
Green food coloring (optional, for a zombie-like crust)
1 tablespoon butter, cut into small pieces
1 egg, beaten (for egg wash)
1 tablespoon coarse sugar (for topping)
Instructions
1. Preheat your oven to 400°F (200°C).
2. In a large bowl, gently combine the mixed berries, granulated sugar, cornstarch, lime juice, and almond extract.
3. If using, tint one of the pie crusts green with a few drops of food coloring, kneading until uniformly colored.
4. Place one pie crust into a 9-inch pie plate.
5. Pour the berry mixture into the crust and dot with the butter pieces.
6. Cover with the second pie crust. Crimp the edges to seal and cut a few slits in the top for ventilation.
7. Brush the top crust with beaten egg and sprinkle with coarse sugar.
8. Bake for 15 minutes at 400°F (200°C), then reduce the oven temperature to 375°F (190°C) and bake 35–45 minutes more, until the crust is golden and the filling is bubbling.
9. Cool completely on a wire rack to allow the filling to set.
10. Serve chilled or at room temperature.
Notes
For extra “zombie” vibes, cut spooky shapes from the top crust before placing it on the pie.
If the crust browns too quickly, loosely cover the edges with foil.
Store leftovers in the refrigerator for up to 3 days.
- Prep Time: 30 minutes
- Cook Time: 50 minutes
- Category: Dessert
- Method: Baking
- Cuisine: American
- Diet: Vegetarian
Nutrition
- Serving Size: 1 slice
- Calories: 350
- Sugar: 35g
- Sodium: 250mg
- Fat: 18g
- Saturated Fat: 8g
- Unsaturated Fat: 9g
- Trans Fat: 0.5g
- Carbohydrates: 45g
- Fiber: 4g
- Protein: 3g
- Cholesterol: 15mg
Zombie Berry Pie
Equipment
- Large bowl
- Pastry blender
- Rolling pin
- 9-inch pie dish
- Wire rack
Ingredients
Crust
- 2 ½ cups all-purpose flour
- 1 teaspoon salt
- 1 cup unsalted butter (2 sticks), very cold and cut into ½-inch cubes
- ½ cup ice water
Filling
- 4 cups mixed berries (strawberries, blueberries, raspberries, blackberries)
- ½ cup granulated sugar (adjust to taste)
- ¼ cup cornstarch
- 1 tablespoon lemon juice
- 1 teaspoon almond extract
- green food coloring (optional, for "zombie" effect)
Egg Wash
- 1 large egg beaten
- 1 tablespoon milk
Instructions
Make the pie crust
- Whisk flour and salt, then cut in cold butter until coarse crumbs form; gradually add ice water and mix until just combined.
- Divide dough in half, flatten into discs, wrap in plastic, and chill for at least 30 minutes.
Prepare the filling
- Gently mix mixed berries, sugar, cornstarch, lemon juice, almond extract, and optional green food coloring in a large bowl.
Assemble the pie
- Roll out one dough disc and place it in a 9-inch pie dish; pour in the berry filling.
- Roll out the second dough disc, place it over the filling, trim and crimp edges, then cut slits in the top crust.
Bake the pie
- Brush pie with egg wash, then bake at 400°F (200°C) for 15 minutes, reducing heat to 375°F (190°C) for another 35-40 minutes until golden and bubbly.
- If edges brown too quickly, cover loosely with foil.
Cool and serve
- Cool completely on a wire rack before slicing to allow the filling to set.