Embracing the Spooky Sweetness
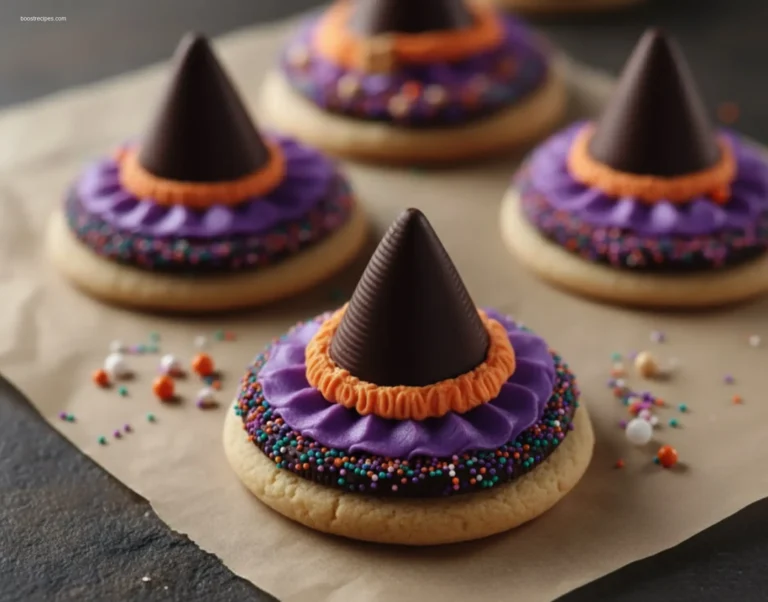
Get ready to make some magical Witch Hat Cookies! These cookies are tiny edible spells. They are perfect for making people happy, young and old. You can make them for a Halloween party or just for fun fall baking.
Why Make This Recipe
These cookies are easy to make, but they look very good. They are fun to look at and yummy to eat. They mix classic cookies with a fun, holiday twist. You can change them up and decorate them in many ways. They are great for Halloween parties, fall get-togethers, or any celebration.

How to Make Witch Hat Cookies
Making Witch Hat Cookies involves three main steps: preparing the cookie dough, baking the cookie bases, and then assembling the witch hats on top. It’s a fun and easy process that results in a delightful treat.
Ingredients of Witch Hat Cookies
- For the Cookie Base
- All-purpose flour
- Unsalted butter, softened
- Granulated sugar
- Egg
- Vanilla extract
- Baking powder
- Salt
- For the Witch Hats
- Chocolate sandwich cookies (like Oreos)
- Hershey’s Kisses or similar chocolate candy cones
- Orange or purple candy melts (or chocolate)
- Sprinkles (optional)
Directions of Witch Hat Cookies
- Step 1: Preparing the Cookie Dough
- Cream Butter and Sugar: Beat soft butter and sugar in a big bowl until light and fluffy.
- Add Wet Ingredients: Beat in the egg and vanilla extract until mixed well.
- Combine Dry Ingredients: In another bowl, mix flour, baking powder, and salt.
- Gradually Add Dry to Wet: Slowly add the dry ingredients to the wet ingredients. Mix until just combined. Do not mix too much.
- Chill the Dough: Make the dough into a flat disc. Wrap it in plastic wrap and put it in the fridge for at least 30 minutes.
- Step 2: Baking Your Cookie Bases
- Preheat Oven and Prepare Baking Sheet: Heat your oven to 350°F (175°C). Line a baking sheet with parchment paper.
- Roll and Cut Dough: On a lightly floured surface, roll out the cold dough to about 1/4 inch thick. Use a round cookie cutter (about 2-3 inches wide) to cut out circles.
- Bake Cookies: Put the cut cookies on the prepared baking sheet. Bake for 8-10 minutes, or until the edges are light golden.
- Cool Completely: Move cookies to a wire rack to cool completely.
- Step 3: Assembling Your Witch Hat Cookies
- Prepare the “Brittle” (Cookie Base of Hat): Carefully separate the chocolate sandwich cookies. You only need one chocolate wafer for each hat. You can throw away the cream or save it.
- Melt Candy Melts: Melt your candy melts (orange, purple, or chocolate) as the package says.
- Assemble the Hats:
- Put a little melted candy in the middle of each baked round cookie.
- Place one chocolate sandwich cookie wafer on the melted candy and press gently.
- Put another small amount of melted candy in the middle of the chocolate wafer.
- Carefully put a Hershey’s Kiss or chocolate cone on top of the melted candy. Press gently to make the “hat” shape.
- Optional: Drizzle with different colored melted candy or add sprinkles while the candy is still wet.
- Allow to Set: Let the Witch Hat Cookies sit until the candy melts are hard.
How to Serve Witch Hat Cookies
- Halloween Party Platter: Arrange these cookies with other fun treats.
- Fall Festival: Serve them with warm apple cider or hot chocolate.
- Classroom Treat: These are a fun treat for school parties.
- Gift of Goblins: Put a few cookies in a box or bag as a homemade gift.
How to Store Witch Hat Cookies
Store assembled Witch Hat Cookies in an airtight container at room temperature for up to 3-4 days. If your kitchen is warm, you can put them in the fridge to stop the chocolate from melting. Let them warm up to room temperature before eating for the best taste.
Tips to Make Witch Hat Cookies
- Dough Consistency: If your dough is too sticky, add a bit more flour. If it is too dry, add a tiny bit of milk or water.
- Cooling is Crucial: Make sure your cookies are completely cool before putting them together. This stops the candy melts from sliding off.
- Melting Candy Melts: Use a microwave-safe bowl. Melt in 30-second steps, stirring each time. This stops burning.
- Read the Recipe First: Always read the whole recipe before you start. This way, you understand all the steps.
- Measure Accurately: Baking needs exact measurements! Use proper measuring cups and spoons for good results.
- Patience is a Virtue: Let cookies cool and candy melts set completely for the best outcome.
- Have Fun! Enjoy making these cookies. Be creative!
Variation
- Chocolate Cookie Base: Use a chocolate cookie recipe for the base for a very rich Witch Hat Cookie.
- Flavored Kisses: Try different flavored Hershey’s Kisses.
- Spiderweb Drizzle: After putting on the chocolate wafer, drizzle a different colored melted candy in circles. Pull a toothpick from the center out to make a spiderweb effect before adding the Hershey’s Kiss.
- Glitter & Glam: Add edible glitter to the candy melts for a shiny, magical look.
FAQs
Q1: Can I make the cookie base for these Witch Hat Cookies ahead of time?
Yes, you can! You can bake the round cookie bases up to 2-3 days before. Keep them in a sealed container at room temperature. This makes putting your Witch Hat Cookies together much faster when you want to serve them.
Q2: What if I can’t find Hershey’s Kisses for my Witch Hat Cookies?
That’s okay! Any small, cone-shaped chocolate candy will work. You can also use chocolate-covered cherries or even make a small cone from modeling chocolate or fondant for a special witch hat for your cookies.
Q3: How should I store leftover Witch Hat Cookies?
Keep your finished Witch Hat Cookies in a sealed container at room temperature for up to 3-4 days. If your kitchen is very warm, you might want to put them in the refrigerator to stop the chocolate from melting. But let them get to room temperature before eating them for the best texture.
Witch Hat Cookies
Spooky and delicious Witch Hat Cookies, perfect for Halloween parties or a fun seasonal treat. They combine a rich chocolate cookie base with a creamy peanut butter filling and a dark chocolate ganache hat.
Total Time: 2 hours
Yield: 24 cookies 1x
Ingredients
Scale
1 cup (2 sticks) unsalted butter, softened
1 cup granulated sugar
1 large egg
1 teaspoon vanilla extract
2 cups all-purpose flour
⅔ cup unsweetened cocoa powder
½ teaspoon baking soda
¼ teaspoon salt
1 cup creamy peanut butter
½ cup powdered sugar
¼ cup (½ stick) unsalted butter, softened
1 teaspoon vanilla extract (for filling)
12 oz dark chocolate chips
½ cup heavy cream
Instructions
1. Preheat oven to 375°F (190°C). Line baking sheets with parchment paper.
2. In a large bowl, cream together 1 cup softened butter and granulated sugar until light and fluffy.
3. Beat in the egg and 1 teaspoon vanilla extract.
4. In a separate bowl, whisk together flour, cocoa powder, baking soda, and salt.
5. Gradually add the dry ingredients to the wet ingredients, mixing until just combined.
6. Roll dough into 1-inch balls and place on prepared baking sheets.
7. Bake for 8–10 minutes, or until set. Let cool completely on a wire rack.
8. Make the peanut butter filling: In a medium bowl, combine creamy peanut butter, powdered sugar, ¼ cup softened butter, and 1 teaspoon vanilla. Mix until smooth and creamy.
9. Spread a generous dollop of filling onto the flat side of half the cooled cookies; top with remaining cookies to form sandwiches.
10. Make ganache: Place dark chocolate chips in a heatproof bowl. Heat heavy cream until just simmering; pour over chips and let sit 5 minutes, then stir until smooth and glossy.
11. Dip the top half of each cookie sandwich into ganache to create a “hat” effect; place on parchment to set.
12. Optionally, add festive sprinkles or edible glitter before the ganache fully sets.
Notes
For an extra spooky touch, use orange or purple sprinkles.
Ensure cookies are completely cool before assembling to keep the filling from melting.
Store in an airtight container at room temperature up to 3 days.
Use a piping bag for a cleaner filling application.
- Prep Time: 30 minutes
- Cook Time: 15 minutes
- Category: Dessert, Halloween
- Method: Baking
- Cuisine: American
- Diet: Vegetarian
Nutrition
- Serving Size: 1 cookie
- Calories: 280
- Sugar: 35g
- Sodium: 150mg
- Fat: 18g
- Saturated Fat: 10g
- Unsaturated Fat: 7g
- Trans Fat: 0g
- Carbohydrates: 30g
- Fiber: 2g
- Protein: 5g
- Cholesterol: 30mg

Witch Hat Cookies: The 8 Best Frosting Ideas
Equipment
- Mixing Bowls
- Electric Mixer
- Baking Sheets
- Parchment Paper
- Cooling Rack
- Piping Bags
- Cookie Cutters (round and pointed or cone shape)
Ingredients
Cookie Base
- 2.5 cups All-purpose flour
- 1 cup Unsalted butter, softened
- 1 cup Granulated sugar
- 1 Large egg
- 1 tsp Vanilla extract
- 0.5 tsp Baking powder
- 0.25 tsp Salt
Royal Icing/Buttercream Frosting
- 4 cups Powdered sugar
- 0.25-0.5 cup Milk
- 1 tsp Vanilla extract
- 0.5 cup Butter, softened for buttercream
- Food coloring as needed
- Sprinkles / Cookie Decor as needed
Instructions
Cookie Preparation
- Cream softened butter and sugar until light and fluffy, then beat in the egg and vanilla extract.
- Whisk together flour, baking powder, and salt; gradually add to the wet ingredients until a dough forms.
- Chill the dough for at least 30 minutes, then roll it out and cut into desired cookie shapes, such as circles and triangles to form witch hats.
- Bake cookies at 375°F (190°C) for 8-10 minutes, or until the edges are lightly golden.
- Transfer baked cookies to a wire rack and allow them to cool completely before proceeding with frosting.
Frosting & Decorating
- Prepare your chosen frosting (royal icing or buttercream) by beating powdered sugar with milk and vanilla; add softened butter if making buttercream.
- Divide the prepared frosting into separate bowls and color with food coloring as desired for various witch hat elements.
- Pipe or spread the frosting onto the completely cooled cookies to create witch hat designs, then add sprinkles or other edible decorations as desired.