Unwrapping the Spooky Fun
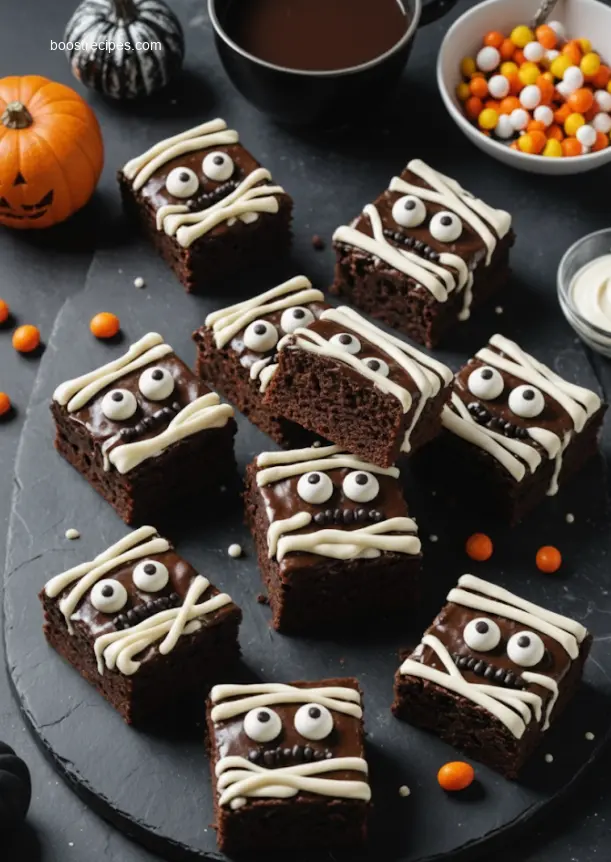
Hello there, fellow dessert lover! Can you feel it in the air? That crisp autumn chill, the whisper of leaves, and the thrilling promise of all things delightfully spooky? As the seasons turn and anticipation for trick-or-treating grows, there’s one sweet treat that always brings a smile, a shiver, and a whole lot of deliciousness to our tables: brownies! But not just any brownies. Today, we’re diving into a recipe that’s as fun to make as it is to eat – our absolutely adorable and utterly scrumptious Spooky Mummy Brownies. Get ready to add a touch of playful ghoulishness to your baking adventures!
Why Make This Recipe
These brownies are super fudgy. They are not dry or cakey. They are rich and dense. You will love every bite.
Decorating them is easy. You do not need special baking skills. The mummy “bandages” and “eyes” are simple to make. This is a great project for everyone.
They are perfect for parties. These mummy brownies are great for Halloween, school bake sales, or a fun family treat. Everyone will love them.
You can customize them. You can make these treats your own.
They bring seasonal joy. Enjoy the season with a festive and satisfying dessert.

How to Make Spooky Mummy Brownies
Making Spooky Mummy Brownies involves two main parts: baking the brownies and then decorating them to look like mummies.
Ingredients of Spooky Mummy Brownies
For the Fudgy Brownies (or Your Favorite Box Mix)
- All-purpose flour
- Unsweetened cocoa powder
- Melted unsalted butter
- Granulated sugar
- Large eggs
- Pure vanilla extract
- Salt
- Chocolate chips or chunks (optional)
- Baking powder (if making from scratch)
For the Mummy Decorations
- White frosting or icing (store-bought vanilla frosting or homemade buttercream)
- Small edible candy eyes
- Piping bag with a small round or flat tip (optional, a Ziploc bag with a snipped corner works too)
Directions of Spooky Mummy Brownies
Baking the Brownie Base
- Preheat & Prep: Heat your oven to the right temperature. Line a baking pan with parchment paper. Leave some paper hanging over the sides. This makes it easy to lift the brownies.
- Melt Butter & Sugar: In a large bowl, melt the butter. Mix in the granulated sugar until well combined.
- Add Wet Ingredients: Whisk in the eggs one at a time. Then add the vanilla extract. Mix until the batter is light and fluffy.
- Combine Dry Ingredients: In a separate bowl, mix the flour, cocoa powder, salt, and baking powder (if using).
- Fold Wet into Dry: Gently mix the dry ingredients into the wet ingredients. Stop mixing when just combined. Do not overmix. If you use chocolate chips, fold them in now.
- Pour & Bake: Pour the batter into your prepared pan. Spread it evenly. Bake for the recommended time. A toothpick put into the middle should come out with moist crumbs.
- Cool Completely: Let the brownies cool completely in the pan on a wire rack. Do these before cutting or decorating. Warm brownies will break apart.
Mummifying Your Brownies
- Cut into Rectangles: Once cooled, use the parchment paper to lift the brownie slab from the pan. Cut the slab into individual rectangular pieces.
- Prepare the Icing: If your frosting is too thick, heat it for a few seconds in the microwave. Or stir it until it is easy to pipe. Put it into a piping bag (or a Ziploc bag).
- Pipe the “Bandages”: Start at one end of a brownie. Pipe thin, uneven lines of frosting across the top. Overlap them a little to look like bandages. Leave a small space near the top for the eyes.
- Add the Eyes: While the frosting is still wet, gently press two candy eyes into the space you left.
- Repeat & Chill: Do this for all the remaining brownies. If you want, chill the decorated brownies in the refrigerator for 15-30 minutes. This helps the frosting set.
How to Serve Spooky Mummy Brownies
These brownies are great on their own. You can also serve them with these options.
- Vanilla Ice Cream: This is a classic choice.
- A Glass of Milk: It goes perfectly with rich brownies.
- Hot Chocolate: Enjoy the cozy autumn feeling.
How to Store Spooky Mummy Brownies
You can make these brownies one to two days before you want to serve them. Keep them in an airtight container at room temperature. If your home is very warm, store them in the refrigerator.
Tips to Make Spooky Mummy Brownies
- Do Not Overbake: If you bake them too long, they will be dry. Watch them closely near the end of the baking time.
- Cooling is Key: Be patient. Let them cool completely. If you rush, they will be messy.
- Frosting Consistency: If your frosting is too thin, add a little powdered sugar. If it is too thick, add a tiny bit of milk or water.
Variation
- Gooey Guts Mummy Brownies: Before piping the white frosting, add a little red gel icing (or strawberry jam). Let it peek out from under the “bandages.”
- Chocolate Drizzle Spooky Mummy Brownies: Once the white frosting hardens, drizzle some melted dark chocolate over the bandages. This adds more color.
- Monster Mummy Brownies: Use different colored candy eyes. Or color a small part of your white frosting green or purple for monster-like bandages.
FAQs
Q1: Can I make these Spooky Mummy Brownies ahead of time?
Yes, you can. Bake the brownies one to two days before. Keep them in an airtight container. You can even decorate them a day before serving. Store them in an airtight container at room temperature or in the refrigerator if your home is warm.
Q2: What kind of frosting is best for the mummy bandages?
A simple store-bought vanilla frosting works well. If you make your own, a basic buttercream or a thick royal icing also works great for making clear “bandages.”
Q3: I cannot find candy eyes! What can I use instead for my Spooky Mummy Brownies?
No candy eyes? That’s fine! You can use mini chocolate chips by placing them upside down. Or use small drops of melted chocolate. You can also pipe two small dots of black gel icing for the eyes. Use what you have.
Spooky Mummy Brownies
These ghostly delicious Spooky Mummy Brownies are fudgy, rich, and decorated with playful white chocolate ‘mummy’ bandages and candy eyes. Perfect for a Halloween treat!
Total Time: 2 hours 30 minutes
Yield: 18 brownies 1x
Ingredients
Scale
1 cup (2 sticks) unsalted butter, melted
1 ¾ cups granulated sugar
4 large eggs
1 tsp vanilla extract
1 cup all-purpose flour
¾ cup unsweetened cocoa powder
½ tsp baking powder
¼ tsp salt
1 cup chocolate chips (optional, for extra fudginess)
8 oz white chocolate, melted
Candy googly eyes
Instructions
1. Preheat oven to 350°F (175°C). Line a 9×13 inch baking pan with parchment paper, leaving an overhang on the sides.
2. In a large bowl, whisk together the melted butter and granulated sugar until smooth.
3. Beat in the eggs one at a time, then stir in the vanilla extract.
4. In a separate bowl, whisk together the flour, cocoa powder, baking powder, and salt.
5. Gradually add the dry ingredients to the wet ingredients, mixing until just combined (do not overmix).
6. If using, fold in the chocolate chips.
7. Pour the batter into the prepared baking pan and spread evenly.
8. Bake for 25–30 minutes, or until a toothpick inserted into the center comes out with moist crumbs (not wet batter).
9. Let the brownies cool completely in the pan on a wire rack.
10. Once cooled, cut the brownies into individual rectangles or squares.
11. Melt the white chocolate in a microwave-safe bowl in 30-second intervals, stirring between each, until smooth.
12. Transfer the melted white chocolate to a piping bag with a small round tip (or a zip-top bag with a corner snipped).
13. Pipe “bandages” back and forth across each brownie, leaving a small gap near the top third for the eyes.
14. While the white chocolate is still wet, place two candy googly eyes in the gap on each brownie.
15. Let the white chocolate set completely before serving.
Notes
For extra spooky flair, tint a small portion of the white chocolate with a drop of green or orange food coloring for contrasting bandages.
Ensure brownies are completely cool before decorating, or the white chocolate will melt into the brownie.
Store in an airtight container at room temperature.
- Prep Time: 20 minutes
- Cook Time: 30 minutes
- Category: Dessert
- Method: Baking
- Cuisine: American
- Diet: Vegetarian
Nutrition
- Serving Size: 1 brownie
- Calories: 350
- Sugar: 35g
- Sodium: 120mg
- Fat: 18g
- Saturated Fat: 11g
- Unsaturated Fat: 6g
- Trans Fat: 0.5g
- Carbohydrates: 45g
- Fiber: 3g
- Protein: 4g
- Cholesterol: 70mg
Spooky Mummy Brownies: Top 6 Decorating Ideas
Equipment
- baking pan
- mixing bowls
- whisk
- spatula
- piping bag
- fork
Ingredients
Brownie Base
- 1 batch brownies prepared from your favorite recipe or a mix
Decorations
- 1 can white frosting or melted white chocolate
- 24 candy eyes small
- 1/4 cup chocolate chips
- 6 gummy worms
- Halloween sprinkles optional
Instructions
Preparation
- Prepare your favorite batch of brownies according to the recipe or package directions, then allow them to cool completely before decorating.
Mummy Decorating Ideas
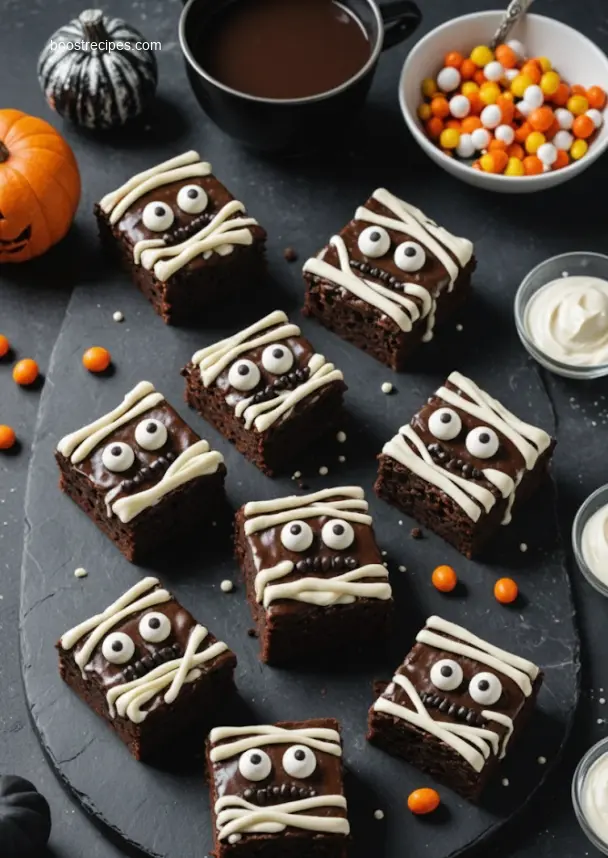
- For Classic Mummies, use a fork or piping bag to drizzle white frosting in horizontal lines across the brownies, then place two candy eyes at the top to create the mummy's face.
- To make detailed mummies, spread a thin layer of white frosting over the brownie, then pipe thinner lines of frosting on top to create intricate bandage patterns.
- For chocolate drizzle mummies, pipe white frosting strips, then drizzle melted chocolate chips over the frosting for a contrasting effect.
- To make messy mummies, apply a thick, uneven layer of white frosting and use a spoon or knife to create rough, textured bandages, adding candy eyes for a spooky glance.
- Create playful mummies by using green or purple frosting for the bandages, and consider adding colorful gummy worms peeking out for a playful touch.
- Finally, for spooky sprinkles mummies, after applying the frosting bandages, sprinkle Halloween-themed nonpareils or edible glitter over select areas for a vibrant and festive appearance.