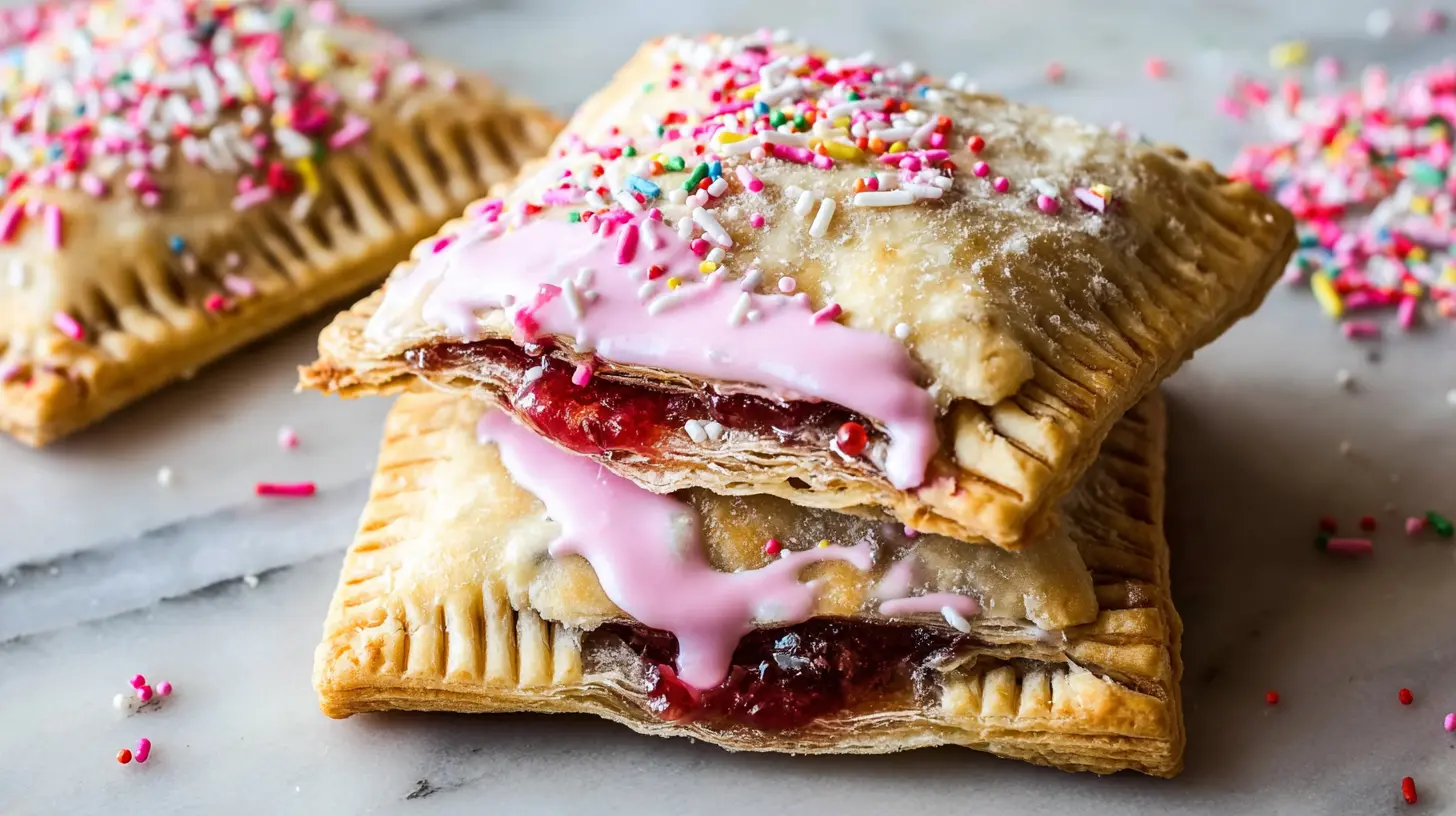
The smell of warm, slightly jammy pastry wafting from the oven on a Saturday morning instantly transports me back to childhood. But forget those overly sweet, artificially flavored versions from a box. We’re talking about something far superior today: Homemade Pop Tarts. If you’ve been yearning for that perfect blend of flaky crust and sweet fruit filling, made with love and real ingredients, then you’ve landed in the right place. This recipe isn’t just about recreating a nostalgic treat; it’s about elevating it into a truly delicious and satisfying breakfast or snack that the whole family will adore.
Why You’ll Love This Dish
There’s something uniquely satisfying about biting into a warm, freshly baked pastry, and these Homemade Pop Tarts deliver that in spades. You get to control every ingredient, from the buttery flakiness of the crust to the vibrant fruitiness of the filling, meaning no more questionable additives or too-sweet syrups. They’re perfect for a leisurely weekend breakfast, a fun baking project with kids, or even as a delightful grab-and-go snack for busy mornings. Plus, the sheer joy of watching them puff up in the oven and then decorating them with a simple glaze? Priceless.
> “I used to think making Pop Tarts at home would be way too complicated, but this recipe changed my mind! The steps were so clear, and the result was infinitely better than anything I’ve ever bought. My kids devoured them!” – A Happy Home Baker
How This Recipe Comes Together
Crafting these delightful pastries is surprisingly straightforward. You’ll start by preparing a simple, tender pastry dough, either from scratch or using a trusty shortcut like store-bought pie crusts. Next, you’ll roll out the dough, cut it into rectangles, and spoon on your favorite fruit filling. After crimping the edges to seal in all that goodness, they’re off to the oven until golden brown and gloriously flaky. The final touch, a quick powdered sugar glaze, adds that signature sweet finish. It’s a rhythmic process that’s enjoyable from start to finish, culminating in a truly rewarding treat.
What You’ll Need
Here’s a rundown of the ingredients you’ll need to create these nostalgic delights.
For the Pastry:
- 2 ½ cups all-purpose flour: The base for our flaky crust.
- 1 teaspoon salt: Balances the sweetness and enhances flavor.
- 1 cup (2 sticks) unsalted butter, very cold and cut into ½-inch cubes: Crucial for achieving that light, flaky texture.
- ½ cup ice water: Helps bring the dough together without making it tough.
- 1 large egg, whisked: For an egg wash to help seal the edges and give a golden shine.
For the Filling:
- 1 cup fruit preserves or jam (any flavor you love – strawberry, raspberry, blueberry are classics): The heart of your Pop Tart! Choose a good quality one.
- 1 tablespoon cornstarch (if your jam is very runny): To thicken the filling slightly and prevent it from oozing out too much.
For the Glaze:
- 1 cup powdered sugar: The foundation of our sweet topping.
- 2-3 tablespoons milk (or water/lemon juice): To thin the glaze to the perfect drizzling consistency.
- ¼ teaspoon vanilla extract (optional): For an extra touch of flavor.
- Sprinkles (optional): For a fun, classic Pop Tart look!
Directions to Follow
Let’s get baking! Here’s how to assemble your Homemade Pop Tarts:
- Prepare the Dough: In a large bowl, whisk together the flour and salt. Cut in the very cold butter using a pastry blender or your fingertips until the mixture resembles coarse crumbs with some pea-sized pieces of butter remaining. Gradually add the ice water, a tablespoon at a time, mixing until the dough just comes together. Be careful not to overmix. Form the dough into two flattened discs, wrap them in plastic, and refrigerate for at least 30 minutes (or up to 2 days).
- Roll and Cut: On a lightly floured surface, roll out one disc of dough into a large rectangle, about 1/8-inch thick. Trim the edges to create a neat 9×12-inch rectangle (or approximate, depending on your pan size). Cut this large rectangle into 6 smaller rectangles, roughly 3×4 inches each. Repeat with the second disc of dough, yielding 12 rectangles in total.
- Fill and Seal: Place 6 of the dough rectangles on a parchment-lined baking sheet. Spoon about 1-2 tablespoons of your fruit filling onto the center of each rectangle, leaving a ½-inch border around the edges. If your jam is very runny, mix it with a little cornstarch first. Brush the edges of the dough with the whisked egg. Place the remaining 6 dough rectangles over the filled ones.
- Crimp and Bake: Gently press down on the top dough layers to seal the edges, then use a fork to crimp all around the perimeter of each tart. This helps prevent the filling from leaking. Using a small knife or fork, prick the top of each tart a few times to create steam vents. Transfer the baking sheet to the refrigerator for 15 minutes while your oven preheats to 375°F (190°C).
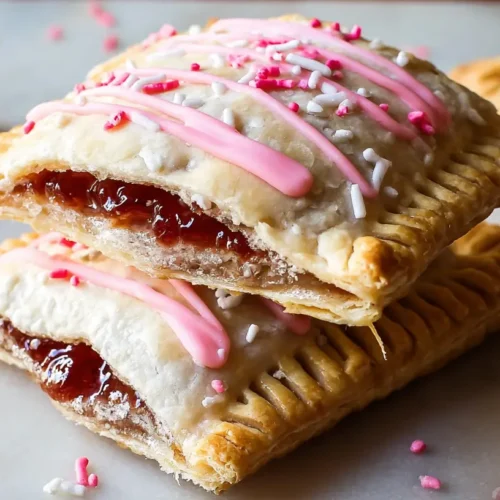
- Bake and Glaze: Bake the Pop Tarts for 15-18 minutes, or until the crusts are golden brown and slightly puffy. Let them cool on the baking sheet for a few minutes before transferring them to a wire rack to cool completely. Once cooled, prepare the glaze by whisking together the powdered sugar, milk, and vanilla (if using) until smooth. Drizzle the glaze over the cooled Pop Tarts and add sprinkles if desired. Let the glaze set before serving.
How to Plate and Pair
These Homemade Pop Tarts are fantastic warm, fresh from the oven, or at room temperature once the glaze has set. For a classic breakfast experience, serve them alongside a glass of cold milk or a hot cup of coffee or tea. If you’re feeling extra indulgent, a scoop of vanilla ice cream turns them into a surprisingly delightful dessert! They also make a wonderful addition to a brunch spread, alongside fresh fruit and yogurt.
Keeping Leftovers Fresh
Proper storage ensures you can enjoy your delicious Homemade Pop Tarts for a few days. Once completely cooled and the glaze has set, store them in an airtight container at room temperature for up to 2-3 days. If you want to keep them longer, you can refrigerate them for up to 5 days, though the pastry might lose a touch of its crispness.
Reheating: To warm them up, a toaster oven or even a regular oven (at 300°F/150°C for about 5-7 minutes) works best to crisp up the crust again. Avoid the microwave, as it can make them soggy.
Freezing: Pop Tarts freeze beautifully before glazing. After baking and cooling completely, place them in a single layer on a baking sheet to freeze solid, then transfer them to a freezer-safe bag or container for up to 2-3 months. Thaw in the refrigerator overnight, then reheat and glaze before serving.
Helpful Cooking Tips
- Keep ingredients cold: This is paramount for flaky pastry. Cold butter and ice water prevent the butter from melting too quickly, creating those desirable pockets of steam that make the crust flaky.
- Don’t overwork the dough: Overmixing develops the gluten, leading to a tough crust. Mix just until it comes together.
- Chill, chill, chill: Chilling the dough firm makes it easier to roll and cut, and chilling the assembled tarts before baking helps maintain their shape and flakiness.
- Don’t overfill: Too much filling can lead to leaks. Keep it to a tablespoon or two per tart.
- Seal well: Use that egg wash and fork crimp to create a strong seal around the edges. A leaking Pop Tart is a sad Pop Tart!
Creative Twists
The beauty of homemade treats is customization! Here are a few ideas to mix things up:
- Savory Pop Tarts: Skip the sugar in the dough and fill with pesto and mozzarella, or a thin layer of cooked spinach and feta.
- Chocolate Hazelnut: Use Nutella as your filling – pure indulgence!
- Citrus Zest: Add a teaspoon of lemon or orange zest to the dough for a brighter flavor.
- Different Glazes: Instead of vanilla, try a lemon glaze (lemon juice instead of milk in the glaze) or a chocolate drizzle.
- Cream Cheese Filling: Mix softened cream cheese with a little sugar and vanilla for a cheesecake-like filling.
Common Questions
How do I prevent my Pop Tarts from leaking?
The key to preventing leaks is a good seal. Make sure to use the egg wash to moisten the edges before placing the top crust on, and then crimp firmly with a fork all around. Don’t overfill the tarts, and ensure your jam isn’t too runny (a little cornstarch can help thicken it).
Can I use store-bought pie crust for this recipe?
Absolutely! Using pre-made pie crust is a fantastic shortcut that cuts down on prep time significantly. Just roll out two pie crusts, cut them into your desired rectangle shapes, and proceed with the filling and baking steps. It’ll still taste amazing!
How long do Homemade Pop Tarts stay fresh?
Once fully cooled and ideally glazed, freshly baked Pop Tarts will stay fresh in an airtight container at room temperature for 2-3 days. For longer storage, refrigerate for up to 5 days or freeze unglazed Pop Tarts for up to 2-3 months.
Homemade Fruit Pop Tarts
Equipment
- Large bowl
- Pastry blender or two knives
- Plastic wrap
- Small bowl
- Sharp knife or pizza cutter
- Fork
- Skewer or small knife
- Baking sheet
- Parchment paper
- Whisk
Ingredients
Dough
- 2.5 cups all-purpose flour
- 1 tablespoon granulated sugar
- 1 teaspoon salt
- 1 cup unsalted butter, very cold and cubed
- 0.5 cup ice water
Filling
- 0.75 cup fruit preserves or jam
- 1 tablespoon cornstarch
- 0.5 teaspoon lemon juice
Glaze (Optional)
- 1.5 cups powdered sugar
- 2-3 tablespoons milk or cream
- 0.5 teaspoon vanilla extract
Instructions
Pastry Dough
- Whisk together flour, granulated sugar, and salt; cut in cold, cubed butter until mixture resembles coarse crumbs.
- Gradually add ice water to the mixture until the dough just comes together, then form into two discs, wrap, and refrigerate for at least 30 minutes.
Filling Preparation
- Combine fruit preserves or jam, cornstarch, and optional lemon juice in a small bowl, stirring well.
Assemble Pop Tarts
- Roll one dough disc to 1/8-inch thick on a floured surface, then trim edges and cut into even rectangles (approx. 3×4 inches); repeat with the second disc.
- Spoon 1-2 teaspoons of filling onto the center of half the dough rectangles, leaving a border.
- Place a second dough rectangle on top of each filled one, press gently around the filling, and crimp the edges with a fork to seal.
- Poke vent holes in the top of each pop tart, then transfer to a parchment-lined baking sheet and refrigerate for 15-20 minutes.
Baking and Glazing
- Preheat oven to 375°F (190°C) and bake pop tarts for 18-22 minutes until golden brown and flaky.
- While cooling, whisk powdered sugar, milk/cream, and vanilla for the glaze, then drizzle or spread over cooled pop tarts and let set before serving.