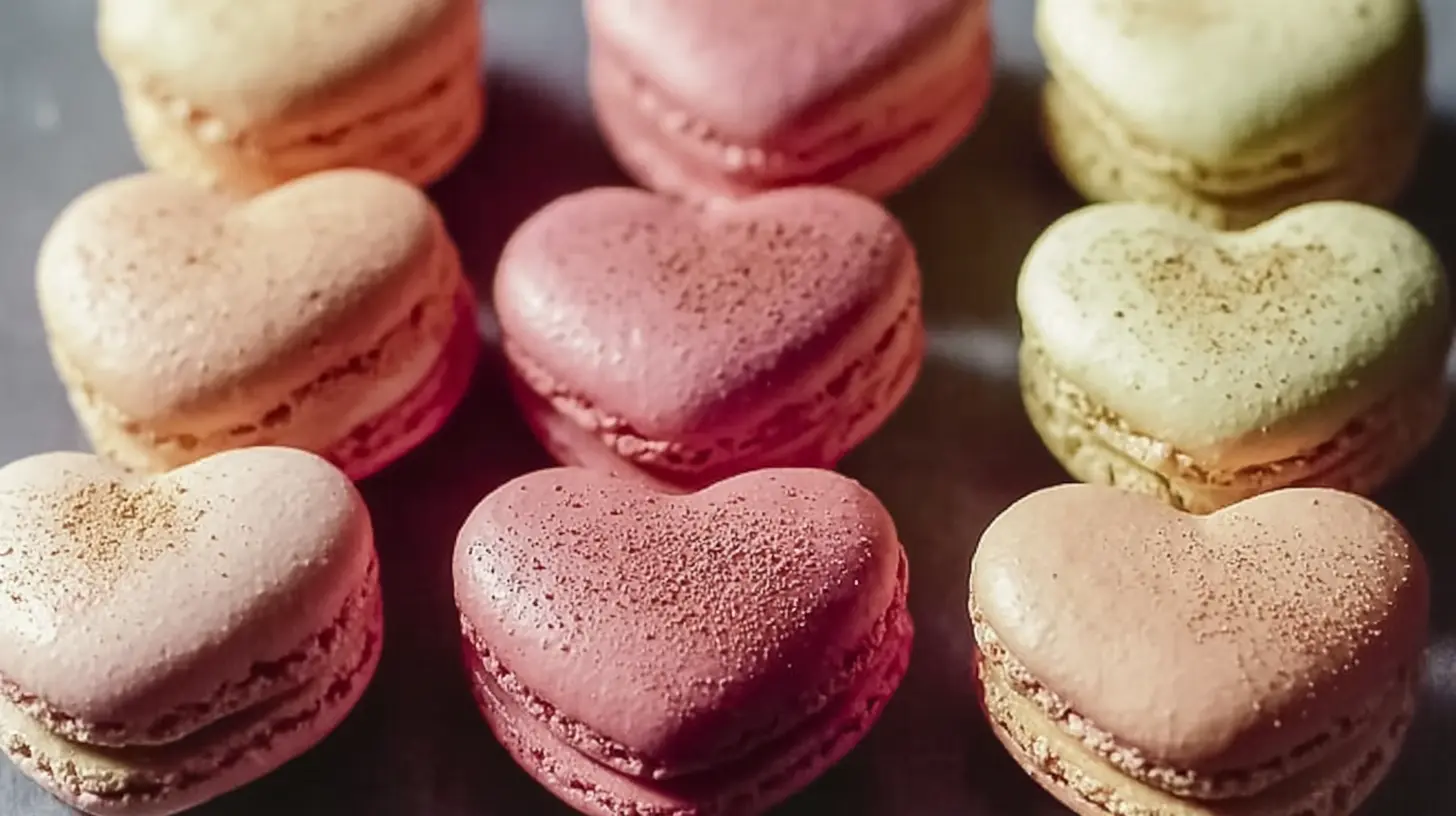
The first time I attempted macarons, I’ll admit, it felt like a culinary Everest. But the sheer joy of biting into that delicate, chewy, melt-in-your-mouth cookie, especially one shaped like a tiny heart, made all the effort worthwhile. There’s something undeniably enchanting about them, a perfect blend of elegance and affection that elevates any occasion.
Why You’ll Love This Dish
Why bother with the delicate dance of macaron-making, especially in a charming heart shape? Well, beyond the obvious delight of eating them, there are several compelling reasons these Heart-Shaped Macarons should make it onto your baking to-do list. Firstly, they are absolute showstoppers! Imagine presenting a plate of these for a special occasion – an anniversary, Valentine’s Day, or even just a thoughtful pick-me-up. They instantly elevate the moment from ordinary to extraordinary. Secondly, mastering macarons, particularly with a specific shape, provides a fantastic sense of accomplishment in the kitchen. It’s a skill builder that genuinely impresses. Thirdly, despite their fancy appearance, the core ingredients are quite simple, meaning you’re mostly investing in technique and patience. Fourthly, they’re incredibly versatile; you can play with colors and fillings to match any mood or event. And finally, making them at home means you control the quality, flavors, and freshness, yielding a far superior treat to anything store-bought.
> “I thought making heart-shaped macarons would be impossible, but this recipe made it so clear and achievable. The result was absolutely beautiful and tasted even better!” – A Happy Baker
The Cooking Process Explained
Making these lovely Heart-Shaped Macarons might seem intimidating at first glance, but breaking it down makes it much more approachable. The journey begins with preparing your almond flour and powdered sugar mixture, ensuring it’s as fine as possible for that signature smooth shell. Next, you’ll whip up meringue to stiff peaks – this is where the magic happens, trapping air to create lightness. The crucial “macaronage” stage follows, where you gently fold the dry ingredients into the meringue until the batter flows just right. Then, it’s all about piping those adorable heart shapes onto your baking sheet. After a crucial resting period to form a skin, they bake into delicate, chewy perfections. Finally, you’ll sandwich them with your chosen delicious filling, transforming them into irresistible treats.
What You’ll Need
To embark on this delightful baking adventure, gather these essential items. Precision is key in macaron making, so having everything ready before you start is a good habit.
- Almond Flour: Superfine is best for smooth shells.
- Powdered Sugar (Confectioners’ Sugar): Helps with consistency and sweetness.
- Granulated Sugar: For the meringue.
- Egg Whites (aged is sometimes preferred, but fresh works too): The backbone of your meringue, ideally at room temperature.
- Cream of Tartar (optional, but recommended): Helps stabilize the meringue.
- Food Coloring (gel or powder is best): To give your hearts a vibrant hue.
- Salt: Just a pinch to balance flavors.
- Vanilla Extract (or other flavorings): For adding depth to your shells or filling.
- Filling of Choice: Buttercream, ganache, fruit curd – the possibilities are endless!
Directions to Follow
Let’s walk through the steps to create your charming Heart-Shaped Macarons. Take your time with each stage; patience is your best friend here!
- Prep Dry Ingredients: Sift your almond flour and powdered sugar together into a large bowl. Repeat this process at least twice (or use a food processor to pulse briefly) to ensure there are no lumps, which can affect the smooth texture of your shells. Set aside.
- Make the Meringue: In a clean, grease-free bowl (preferably metal or glass), add your room-temperature egg whites. Begin whipping on medium speed until foamy. Add the cream of tartar (if using) and gradually add the granulated sugar, increasing the speed to high. Continue whipping until you achieve stiff, glossy peaks. This means when you lift the whisk, the meringue holds its shape firmly. Gently fold in your chosen gel food coloring until evenly distributed.
- Macaronage: Add about one-third of the sifted dry ingredients to the meringue. Fold gently with a spatula, using a ‘cut and fold’ motion. Add the remaining dry ingredients in two more additions. Continue folding until the batter reaches the “lava-like” or “ribbon” stage. This means when you lift the spatula, the batter falls back into the bowl in a slow, continuous ribbon that eventually melts back into itself within about 10-20 seconds. Be careful not to overmix!
- Pipe the Hearts: Transfer the macaron batter to a piping bag fitted with a round tip. On baking sheets lined with parchment paper or silicone mats (with heart templates drawn underneath if you need guidance), pipe heart shapes. You can pipe a small circle and then use a toothpick to gently draw out the bottom point.
- Rest the Macarons: This is a crucial step! Let the piped macarons rest at room temperature for 30-60 minutes, or until they form a ‘skin.’ You should be able to gently touch the surface without any batter sticking to your finger. This skin prevents cracking and promotes the formation of the ‘feet.’
- Bake: Preheat your oven to 300°F (150°C). Bake one tray at a time for 12-15 minutes. The macarons are done when the ‘feet’ are fully formed and they don’t wobble when gently nudged.
- Cool Completely: Once baked, remove the tray from the oven and slide the parchment paper onto a wire rack to cool completely. Do not try to remove them from the paper until they are entirely cool, or they will stick and break.
- Fill: Once cool, match similarly sized shells. Pipe or spread your desired filling onto one shell and gently sandwich it with another.
How to Serve Heart-Shaped Macarons
These charming Heart-Shaped Macarons are beautiful enough to be the star attraction on their own. Arrange them artfully on a tiered serving tray for a party, or lovingly place a few in a small box tied with a ribbon for a thoughtful gift. They’re perfect as a delicate dessert after a romantic dinner, an elegant addition to an afternoon tea spread, or a sweet treat for a bridal or baby shower. For a delightful pairing, serve them alongside a cup of freshly brewed coffee, a fragrant Earl Grey tea, or even a glass of sparkling rosé. The contrast between the rich, chewy macaron and a refreshing beverage is truly divine.
Keeping Leftovers Fresh
Proper storage ensures your Heart-Shaped Macarons retain their delicate texture and delicious flavor. Once filled, macarons are best enjoyed within 2-3 days. Store them in an airtight container in the refrigerator. The flavors will actually meld and deepen over the first 24 hours, often making them taste even better the day after they’re made!
For longer storage, you can freeze unfilled macaron shells. Place them in a single layer in an airtight container, separated by parchment paper, and freeze for up to one month. When ready to use, thaw them in the refrigerator, then let them come to room temperature before filling. Filled macarons can also be frozen for about 2-3 weeks, though the filling’s texture might change slightly upon thawing depending on what it is. Always make sure they are fully thawed in the fridge before serving.
Helpful Cooking Tips
- Precision is Power: Macaron baking is a science. Use a kitchen scale to measure ingredients accurately; volume measurements can be inconsistent.
- Cleanliness is Key: Ensure your mixing bowl and whisk are perfectly clean and free of any grease. Any trace of fat can prevent your egg whites from whipping properly. Wiping with a little lemon juice or vinegar helps.
- Don’t Overmix (or Undermix) the Batter: This is the most common pitfall. The “lava-like” consistency is crucial. If it’s too runny, they’ll spread too much; too stiff, and they won’t form feet. Watch videos of the “macaronage” stage to get a feel for it.
- Tap It Out: After piping, firmly tap your baking sheets on the counter a few times. This helps release any trapped air bubbles, preventing hollow shells and cracks.
- Oven Calibration: Oven temperatures can vary greatly. Consider investing in an oven thermometer to ensure your oven is truly at the temperature you set. Slight temperature fluctuations can significantly impact macaron success.
- Patience with Resting: Don’t rush the resting stage. A proper skin is essential for the “feet” to form. The time can vary depending on your kitchen’s humidity.
Creative Twists
While classic Heart-Shaped Macarons are delightful, there are endless ways to get creative:
- Flavor Fusion: Experiment with different extracts in your shells – raspberry, rosewater, pistachio, or coffee. Match these with complementary fillings like white chocolate ganache, a vibrant fruit curd, or a rich espresso buttercream.
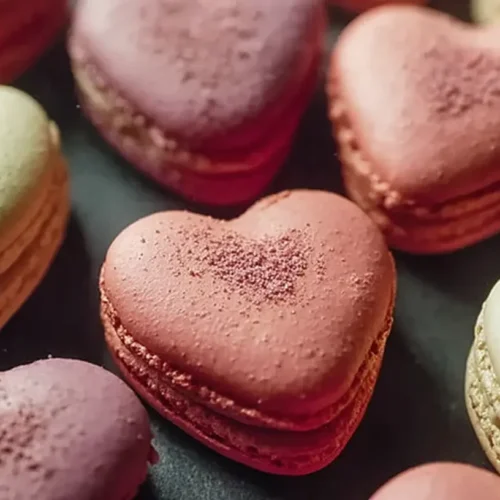
- Color Play: Beyond classic reds and pinks, consider pastel blues, lavenders, or even ombré effects by adding a tiny bit more food coloring to a portion of the batter.
- Toppings and Decorations: Before baking, sprinkle a few edible glitter flakes or finely chopped nuts on top of the piped shells. After filling, you can drizzle melted chocolate or dust with cocoa powder for an extra flourish.
- Dietary Swaps: For a vegan option, you can explore aquafaba (chickpea brine) based macarons, though the technique is slightly different. For gluten-free, ensure your almond flour is certified gluten-free.
Common Questions
Q1: Why are my macaron shells hollow?
A1: Hollow shells are a common issue! It can stem from several factors: over-mixing the batter (too runny), under-mixing the batter (too stiff), baking at too high a temperature, or not tapping the trays enough to release air bubbles before resting. Sometimes, even the humidity in your kitchen can play a role. Experiment with your macaronage consistency and oven temperature.
Q2: Can I use regular food coloring instead of gel or powder?
A2: It’s highly recommended to use gel or powder food coloring. Liquid food colorings add too much moisture to the batter, which can negatively impact the delicate balance needed for macarons, often leading to cracked shells or a lack of feet. Gel or powder provides vibrant color without altering the consistency.
Q3: How do I get consistent heart shapes?
A3: Piping consistent shapes takes practice! Printing heart templates and placing them under your parchment paper or silicone mat is a great trick. You can also use a small round nozzle, pipe a small circle, and then use a clean toothpick to gently drag a small point downwards to form the heart shape. For really challenging shapes, some bakers even use small stencils or cookie cutters to slightly indent the parchment paper first.
Delightful Heart-Shaped Macarons
Equipment
- Sieve
- Mixing bowls
- Electric mixer
- Spatula
- Pastry bag
- Round tip
- Parchment paper or silicone mat
- Baking sheets
- Toothpick
Ingredients
Macaron Shells
- 100 g almond flour
- 100 g powdered sugar (confectioners’ sugar)
- 70 g egg whites (from about 2-3 large eggs)
- 70 g granulated sugar
- cream of tartar (optional but recommended)
- Gel food coloring (optional)
Filling
- Filling of choice (e.g., buttercream, ganache, jam)
Instructions
Preparation
- Sift almond flour and powdered sugar twice, discarding any large pieces.
- Beat egg whites until foamy, then gradually add granulated sugar and cream of tartar, beating until stiff, glossy peaks form and gently folding in food coloring if desired.
- Gently fold the sifted dry ingredients into the meringue in three additions until the batter flows like molten lava (lava consistency), being careful not to overmix.
Baking
- Transfer batter to a pastry bag with a round tip and pipe overlapping circles on parchment paper or a silicone mat, dragging the tip down to form a heart shape.
- Tap baking sheets to release air bubbles, pop any remaining with a toothpick, and let macarons rest at room temperature for 30-60 minutes until a dry skin forms.
- Preheat oven to 300°F (150°C) and bake one tray at a time for 12-15 minutes until feet are developed and shells are firm, rotating halfway through.
- Cool the macaron shells completely on the baking sheet, then match them by size and pipe your chosen filling onto one shell before sandwiching with another.