There’s something incredibly comforting about a pan of bubbling, cheesy enchiladas. For me, it evokes memories of family dinners, where the kitchen was filled with the aroma of simmering spices and warm tortillas. While many associate enchiladas with complex techniques, I’ve found that with a few expert insights, you can elevate a classic ground beef version into something truly restaurant-worthy right in your own home. If you’re ready to transform your weeknight meal into a fiesta of flavor, you’re in the right place.
Why You’ll Love This Dish
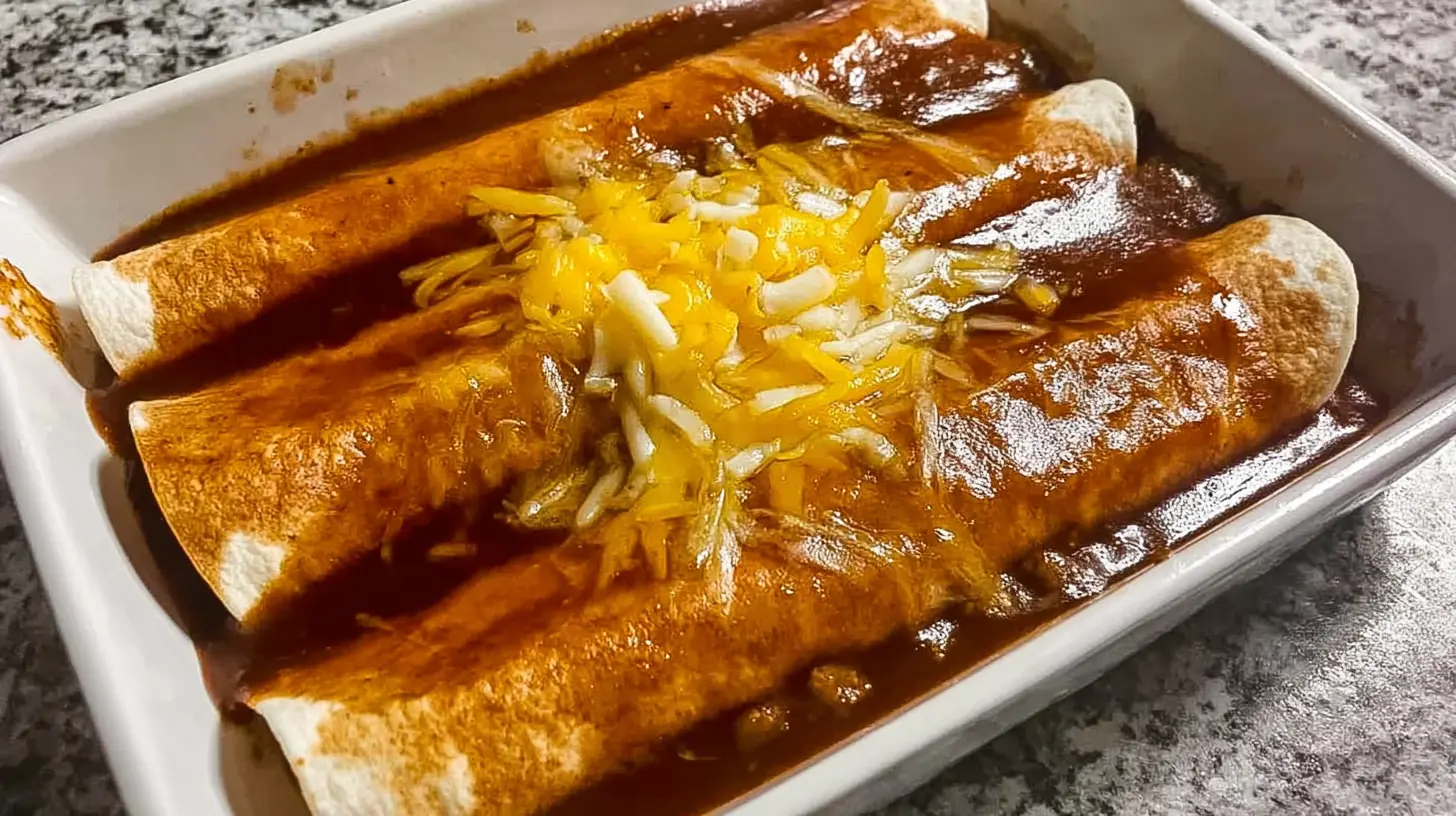
Ground Beef Enchiladas are more than just a meal; they’re a celebration of hearty, savory flavors wrapped in a cozy package. This recipe isn’t just about throwing ingredients together; it’s about crafting an experience. You’ll love its robust, comforting taste that satisfies even the pickiest eaters, making it a perfect family dinner solution. Plus, it’s surprisingly versatile – great for a casual weeknight but equally impressive when serving guests.
> “I thought making homemade enchiladas would be too difficult, but these tips made it so easy! My family devoured them, and the flavor was incredible. Definitely making these again!”
The Cooking Process Explained
Making these Ground Beef Enchiladas involves a few straightforward steps that build flavor at each stage. First, you’ll brown your ground beef, infusing it with aromatic spices. Then, you’ll warm your tortillas to make them pliable, perfect for rolling. Next, you’ll assemble the enchiladas by filling the tortillas with the seasoned beef, a sprinkle of cheese, and a dollop of sauce. Finally, they’re baked until bubbly and golden, allowing all those delightful flavors to meld together under a blanket of melted cheese.
What You’ll Need
Key Ingredients
- 1 tablespoon olive oil
- 1 large onion, chopped
- 2 cloves garlic, minced
- 1 ½ pounds lean ground beef
- 1 (15-ounce) can tomato sauce
- 1 (4-ounce) can diced green chiles, undrained
- 1 tablespoon chili powder
- 1 teaspoon ground cumin
- ½ teaspoon dried oregano
- ¼ teaspoon cayenne pepper (optional, for heat)
- Salt and freshly ground black pepper to taste
- 10-12 corn or flour tortillas (6-inch)
- 2 cups shredded Monterey Jack or cheddar cheese (or a blend)
- 1 (10-ounce) can red enchilada sauce
- Optional toppings: sour cream, chopped fresh cilantro, sliced green onions, diced avocado
Directions to Follow
- Prepare the Beef Filling: Heat olive oil in a large skillet over medium heat. Add the chopped onion and cook until softened, about 5-7 minutes. Stir in the minced garlic and cook for another minute until fragrant.
- Brown the Meat: Add the ground beef to the skillet, breaking it apart with a spoon. Cook until browned and no longer pink. Drain any excess grease.
- Season the Filling: Stir in the tomato sauce, diced green chiles, chili powder, cumin, oregano, and cayenne pepper (if using). Season with salt and pepper. Bring to a simmer, then reduce heat and cook for 10-15 minutes, allowing the flavors to meld and the sauce to thicken slightly.
- Preheat Oven & Prep Dish: Preheat your oven to 375°F (190°C). Lightly grease a 9×13 inch baking dish.
- Warm Tortillas: To make tortillas pliable and prevent tearing, either quickly dip each tortilla in the enchilada sauce or warm them individually in a dry skillet or microwave for about 15-20 seconds per side.
- Assemble Enchiladas: Spread a thin layer of enchilada sauce on the bottom of the prepared baking dish.
- Fill & Roll: Take one warm tortilla. Spoon about ¼ cup of the ground beef mixture down the center. Sprinkle with a tablespoon of shredded cheese. Roll the tortilla tightly and place it seam-side down in the baking dish. Repeat with the remaining tortillas and filling until the dish is full.
- Sauce & Cheese: Pour the remaining enchilada sauce evenly over the rolled enchiladas. Sprinkle the remaining shredded cheese generously over the top.
- Bake: Bake for 20-25 minutes, or until the cheese is melted and bubbly and the enchiladas are heated through.
- Serve: Let the enchiladas rest for 5 minutes before serving. Garnish with optional toppings like sour cream, cilantro, green onions, and avocado.
Best Ways to Enjoy It
These Ground Beef Enchiladas are fantastic on their own, but pairing them with a few simple sides can create a complete meal. I often serve them with a fresh, crisp green salad tossed in a light vinaigrette to cut through the richness. A side of fluffy Mexican rice or a simple bowl of black beans also makes for a classic and satisfying combination. Don’t forget a dollop of sour cream and a sprinkle of fresh cilantro right before serving – these little touches really brighten up the dish.
Keeping Leftovers Fresh
Storing your enchiladas properly ensures you can enjoy them for days. Once cooled, cover the baking dish tightly with plastic wrap or aluminum foil and refrigerate for up to 3-4 days. For reheating, you can warm individual servings in the microwave or place the whole dish (covered with foil) back into a preheated oven at 350°F (175°C) until heated through, about 20-30 minutes.
If you want to freeze them, you can do so before or after baking. If freezing unbaked, cover tightly with foil and plastic wrap and they’ll last for up to 2-3 months. Bake from frozen, adding an extra 30-45 minutes to the baking time, or until hot and bubbly.
Pro Chef Tips
- Don’t Skimp on Draining the Fat: Excess grease from the ground beef can make your enchiladas oily. Make sure to drain it thoroughly after browning.
- Warm Those Tortillas! This is crucial. Cold tortillas will crack and break when you try to roll them. A quick dip in warm sauce or a few seconds in a hot skillet makes them pliable and easy to handle.
- Layer Flavor in the Filling: Don’t just dump all the spices in at once. Sauté the onions and garlic first to build a fragrant base, then toast the dry spices like chili powder and cumin for a minute or two before adding the tomato sauce – this deepens their flavor.
- A Touch of Sweetness: A pinch of sugar (about ½ teaspoon) in your beef filling or enchilada sauce can help balance the acidity of the tomatoes and round out the flavors beautifully.
- Homemade vs. Canned Sauce: While a good canned enchilada sauce works perfectly, making your own can elevate the dish significantly. If using canned, look for a quality brand.
- Cheese Choice Matters: A good melting cheese is key. Monterey Jack, cheddar, or a Mexican blend are excellent. Don’t be afraid to mix cheeses for more complex flavor.
- Sauce on the Bottom: Always spread a thin layer of enchilada sauce on the bottom of your baking dish. This prevents the enchiladas from sticking and adds another layer of moisture and flavor.
- Rest Time is Best: Let your enchiladas sit for 5-10 minutes after baking. This allows the cheese and sauce to set slightly, making them easier to serve without falling apart.
Creative Twists
- Hearty Veggie Boost: Stir in some finely diced bell peppers, corn, or black beans into the ground beef filling for added nutrition and texture.
- Spicy Kick: For those who love heat, incorporate some chopped jalapeños into the beef mixture or add a dash of your favorite hot sauce to the enchilada sauce.
- Creamy Upgrade: Mix a few tablespoons of cream cheese or sour cream into the ground beef filling for a richer, creamier texture.
- Breakfast Enchiladas: While not strictly ground beef, you can adapt this concept for breakfast by filling tortillas with scrambled eggs, cooked sausage or bacon, and cheese, then topping with a green chile sauce.
- Different Meats: Instead of ground beef, consider using ground turkey, shredded chicken, or even a mix of ground beef and chorizo for a different flavor profile.
Common Questions
How can I make these enchiladas less spicy?
To reduce the spiciness, simply omit the cayenne pepper from the recipe. You can also choose mild diced green chiles instead of medium or hot varieties. If your chili powder is very potent, you might want to reduce the amount slightly.
Can I prepare these enchiladas ahead of time?
Absolutely! You can assemble the entire dish, cover it tightly with plastic wrap, and refrigerate it for up to 24 hours before baking. When ready to cook, let it sit on the counter for about 20-30 minutes to come to room temperature while your oven preheats, then bake as directed. You might need to add an extra 5-10 minutes to the baking time if baking directly from the fridge.
What’s the difference between corn and flour tortillas for enchiladas?
Corn tortillas are the traditional choice for enchiladas, offering a distinct earthy flavor and slightly firmer texture that holds up well under sauce. They also tend to be naturally gluten-free. Flour tortillas, on the other hand, are softer and more pliable, making them easier to roll, and they absorb sauce differently, offering a milder flavor. The choice often comes down to personal preference!

Classic Ground Beef Enchiladas
Equipment
- Large skillet
- 9×13 inch baking dish
- Microwave (optional)
- Dry skillet (optional)
- Oven
Ingredients
Main Ingredients
- 1 lb lean ground beef 85/15 or 90/10
- large onion chopped
- 2 cloves garlic minced
- 1 tsp chili powder
- 1 tsp ground cumin
- 1/2 tsp paprika
- 1/4 tsp dried oregano
- 1/2 cup enchilada sauce from a 19 oz can
- 10-12 corn tortillas
- 1 can red enchilada sauce 19 oz
- 2 cups shredded Monterey Jack or cheddar cheese
- 1 tbsp olive oil for browning beef
Optional Garnishes
- Fresh cilantro
- sour cream
- diced avocado
- pickled jalapeños
Instructions
Prepare the Filling
- Heat olive oil in a large skillet over medium-high heat, then add ground beef and cook until browned, draining any excess fat.
- Add chopped onion and minced garlic to the skillet with the beef and cook until the onion is softened, about 5-7 minutes.
- Stir in chili powder, cumin, paprika, and oregano and cook for 1 minute until fragrant.
- Pour in 1/2 cup of enchilada sauce and simmer for 5 minutes to meld flavors, then remove from heat.
Soften Tortillas
- Pour a thin layer of enchilada sauce into the bottom of a 9×13 inch baking dish.
- Warm each corn tortilla using one of three methods: microwave, dip in warm sauce, or heat in a dry skillet, to make them pliable.
Assemble Enchiladas
- Spoon about 1/4 cup of beef filling onto a softened tortilla, sprinkle with cheese, and roll it up tightly.
- Place the rolled tortilla seam-side down in the baking dish and repeat with remaining tortillas and filling, arranging them snugly.
Sauce and Cheese
- Pour the remaining enchilada sauce evenly over the rolled enchiladas, ensuring full coverage.
- Generously sprinkle the rest of the shredded cheese over the top of the enchiladas.
Bake
- Preheat your oven to 375°F (190°C).
- Bake for 20-25 minutes, or until the cheese is bubbly and lightly golden and the enchiladas are heated through.
Rest and Serve
- Let the enchiladas rest for 5-10 minutes before serving to allow flavors to settle.
- Garnish with fresh cilantro, sour cream, avocado, or pickled jalapeños if desired.