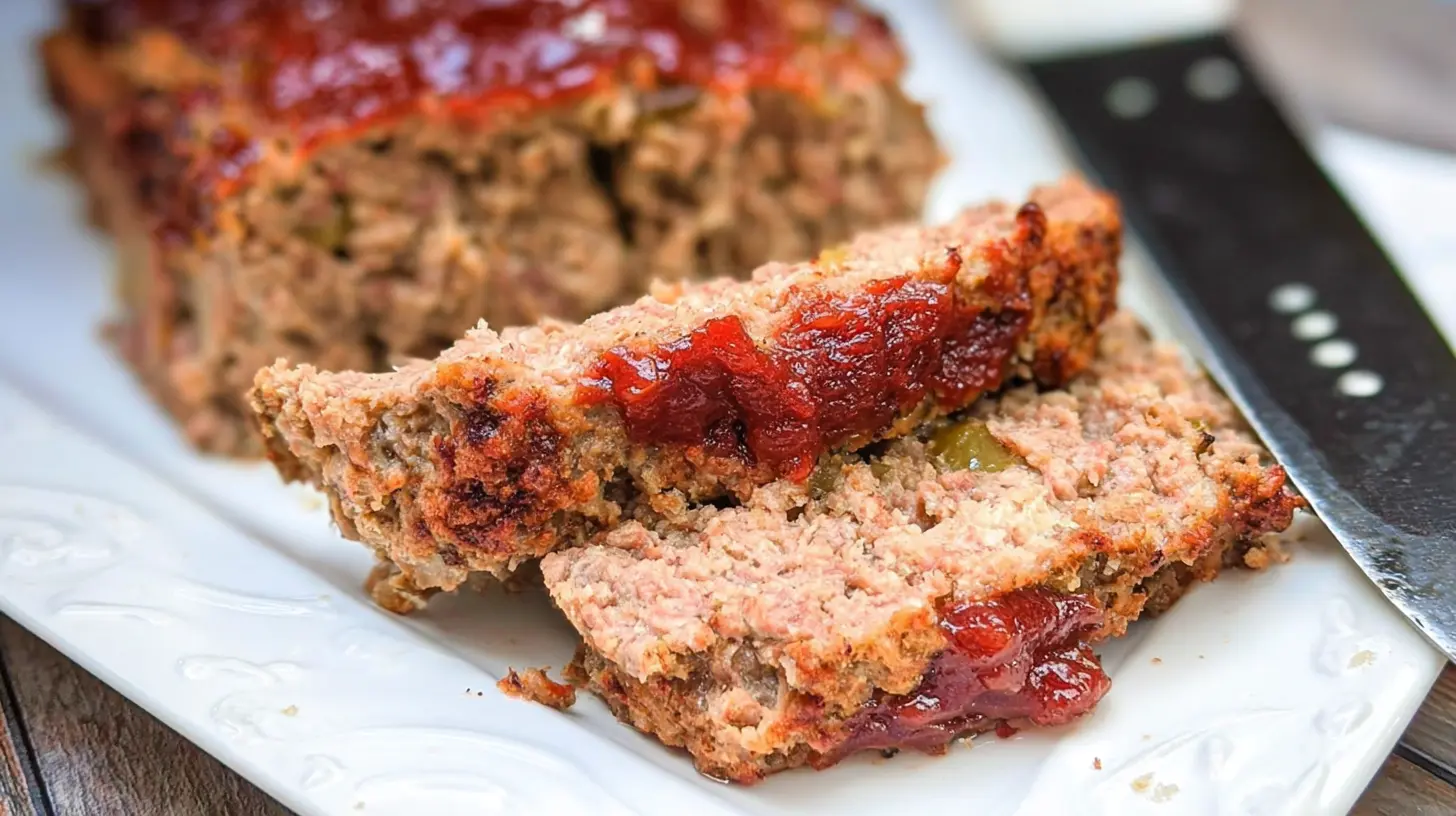
Growing up, few things signaled comfort food quite like the aroma of Grandma’s meatloaf wafting from the kitchen. It was the kind of meal that wrapped you in a warm hug, even before you took the first bite. The only downside? Her recipe made enough to feed an army! Over the years, I’ve perfected a scaled-down version that captures all that classic flavor but is just right for two. This isn’t just any meatloaf; it’s a nod to tradition, made perfectly practical for a cozy dinner.
Why You’ll Love This Dish
There’s something inherently comforting about a well-made meatloaf. This particular recipe for Grandma’s Classic Meatloaf isn’t just about nostalgia; it’s designed with modern households in mind. If you’re tired of massive recipes that leave you with endless leftovers (or worse, too much food waste), this two-serving adaptation is your new best friend. It’s perfect for a cozy weeknight dinner with your partner, or even a treat for yourself with a small portion left for lunch the next day. Plus, it hits all the satisfying notes – savory, tender, and with that irresistible glaze that makes it feel special every time.
> “This meatloaf is a revelation! All the classic taste I remember from childhood, but finally a recipe that doesn’t overwhelm my small household. The glaze is absolutely divine!”
Preparing Grandma’s Classic Meatloaf
Don’t let the idea of making meatloaf intimidate you. This dish is surprisingly straightforward, and my version keeps it simple while ensuring maximum flavor. We’ll start by gently mixing our ingredients, being careful not to overwork the meat. This is crucial for tenderness! Then, we’ll shape it and get it ready for its crucial bake, topping it off with that signature tangy-sweet glaze that truly elevates every slice.
What You’ll Need
To whip up this delightful meatloaf for two, gather these items:
- Ground Beef: 1 pound (80/20 lean offers the best flavor and moisture)
- Egg: 1 large
- Breadcrumbs: 1/4 cup (plain or panko work well)
- Milk: 2 tablespoons
- Onion: 1/4 cup, finely chopped
- Garlic: 1 clove, minced
- Worcestershire Sauce: 1 teaspoon
- Salt: 1/2 teaspoon
- Black Pepper: 1/4 teaspoon
- For the Glaze:
- Ketchup: 1/4 cup
- Brown Sugar: 1 tablespoon
- Dijon Mustard: 1 teaspoon
- Apple Cider Vinegar: 1/2 teaspoon (optional, for a little extra tang)
Directions to Follow
Let’s get cooking! Follow these simple steps for a perfect meatloaf:
- Preheat & Prep: Preheat your oven to 350°F (175°C). Line a small baking sheet or an 8×4 inch loaf pan with parchment paper for easier cleanup.
- Combine Wet Ingredients: In a medium bowl, lightly whisk the egg, then stir in the milk and Worcestershire sauce.
- Add Flavor Base: Sauté the finely chopped onion and minced garlic in a small pan with a drizzle of olive oil until softened, about 3-5 minutes. Let cool slightly.
- Mix Meatloaf: In a large bowl, combine the ground beef, breadcrumbs, salt, pepper, the sautéed onion and garlic, and the egg mixture. Using your hands, gently mix until just combined. Be careful not to overmix, as this can make the meatloaf tough.
- Shape: Form the meat mixture into a small, compact loaf shape on your prepared baking sheet or press it into the loaf pan.
- Make Glaze: In a small bowl, whisk together the ketchup, brown sugar, Dijon mustard, and apple cider vinegar (if using) until smooth.
- Bake: Spoon about half of the glaze over the top of the meatloaf, spreading it evenly. Bake for 30 minutes.
- Glaze & Finish: After 30 minutes, remove the meatloaf from the oven and spread the remaining glaze over it. Return to the oven and bake for another 15-20 minutes, or until the internal temperature reaches 160°F (71°C) on a meat thermometer.
- Rest & Serve: Once cooked, remove the meatloaf from the oven and let it rest for 5-10 minutes before slicing. This allows the juices to redistribute, ensuring a more tender and flavorful result.
How to Serve Grandma’s Classic Meatloaf
This meatloaf is a star on its own, but it truly shines when paired with classic comfort food sides. My absolute favorite is a generous dollop of creamy mashed potatoes – perfect for soaking up any extra glaze or savory meat juices. Steamed green beans or roasted asparagus add a pop of color and freshness, balancing the richness of the meatloaf. For a slightly different twist, consider serving it with a simple green salad with a vinaigrette dressing to cut through the richness. And don’t forget the crusty bread for a full, satisfying meal!
Keeping Leftovers Fresh
Should you happen to have any leftovers (it’s perfectly portioned for two, so you might not!), storing them properly is key. Let the meatloaf cool completely before transferring it to an airtight container. It will keep beautifully in the refrigerator for up to 3-4 days. To reheat, you can slice it and gently warm it in the microwave, or cover it loosely with foil and reheat in a preheated oven at 300°F (150°C) until warmed through. Freezing is also an option: wrap individual slices tightly in plastic wrap, then foil, and store in a freezer bag for up to 2-3 months. Thaw in the refrigerator overnight before reheating.
Pro Chef Tips
- Don’t Overmix: This is probably the most important tip! Overmixing the ground beef will develop tougher protein strands, resulting in a dense, rubbery meatloaf. Mix just until the ingredients are combined.
- Quality Beef: Opt for 80/20 ground beef. The fat content adds crucial moisture and flavor, preventing your meatloaf from becoming dry.
- Finely Dice Veggies: Ensure your onions and garlic are very finely chopped. Large pieces can disrupt the texture of the meatloaf. Cooking them first also softens them and brings out their sweetness.
- The Rest is Best: Always let the meatloaf rest for 5-10 minutes after baking. This allows the juices to settle back into the meat, ensuring a much juicier and more flavorful slice.
- Meat Thermometer: For food safety and perfect doneness, invest in an instant-read meat thermometer. Meatloaf is safely cooked when it reaches an internal temperature of 160°F (71°C).
Creative Twists
While Grandma’s classic is hard to beat, you can certainly play around with this recipe:
- Cheesy Surprise: For an indulgent twist, press a line of shredded cheddar or mozzarella down the center of the loaf before shaping.
- Herbaceous Notes: Add 1-2 tablespoons of fresh chopped herbs like parsley, thyme, or rosemary to the meat mixture for an aromatic boost.
- Spicy Kick: A pinch of red pepper flakes in the meat mixture or a dash of hot sauce in the glaze can add a nice warmth.
- Vegetable Boost: Sneak in some finely grated zucchini or carrots (squeezed of excess moisture) for extra nutrients without altering the flavor too much.
- Different Meats: While classic beef is king, you can experiment with a mix of ground beef and pork, or even ground turkey for a lighter version (though it may be a bit drier).
Common Questions
How do I know when my meatloaf is fully cooked?
The best way to tell is by using an instant-read meat thermometer. Insert it into the thickest part of the meatloaf; it should register 160°F (71°C). The juices should also run clear.
Can I make this meatloaf ahead of time?
Absolutely! You can prepare the meatloaf mixture, shape it, and make the glaze up to a day in advance. Store the unbaked meatloaf covered in the refrigerator. When ready to bake, apply the glaze and bake as directed, adding about 5-10 minutes to the total baking time to account for starting from a colder temperature.
What if I don’t have breadcrumbs?
No problem! You can use crushed crackers (like saltines or Ritz), or even a slice of stale bread processed into crumbs. If using fresh bread, you might need slightly less milk. Oatmeal (quick or rolled) can also be used as a binder; just be sure to let it sit in the milk for a few minutes to soften before adding to the meat.
Grandma’s Classic Meatloaf
Equipment
- Skillet
- Large bowl
- Baking sheet or loaf pan
Ingredients
Meatloaf
- 2 lbs ground beef (80/20 lean-to-fat ratio)
- large eggs, lightly beaten
- 1 cup breadcrumbs (plain or panko)
- 1/2 cup whole milk
- 1 medium onion, finely diced
- 3 cloves garlic, minced
- 1/2 cup ketchup divided for mix and glaze
- 2 tablespoons Worcestershire sauce
- 1 tablespoon Dijon mustard
- 1 teaspoon dried thyme
- 1 teaspoon dried oregano
- 1 teaspoon salt
- 1/2 teaspoon freshly ground black pepper
- 1 tablespoon olive oil for sautéing aromatics
Glaze (Optional)
- 2 tablespoons brown sugar
- 1 teaspoon apple cider vinegar
Instructions
Preparation
- Sauté the finely diced onion and minced garlic in olive oil until softened, then let cool.
- Whisk together eggs, milk, 1/4 cup ketchup, Worcestershire sauce, and Dijon mustard in a large bowl.
- Stir in breadcrumbs, dried thyme, oregano, salt, and pepper; let sit for 5 minutes.
- Add ground beef and the cooled sautéed onion and garlic to the mixture.
- Gently mix all ingredients until just combined, being careful not to overmix.
- Form the mixture into an oblong loaf on a foil-lined baking sheet or in a loaf pan.
Cooking
- Combine the remaining 1/4 cup ketchup with brown sugar and apple cider vinegar, if using, to make the glaze.
- Spread half of the glaze evenly over the meatloaf.
- Preheat oven to 350°F (175°C) and bake for 45 minutes.
- Remove the meatloaf, apply the remaining glaze, and bake for another 15-20 minutes, until it reaches an internal temperature of 160°F (71°C).
- Let the meatloaf rest for 10-15 minutes before slicing and serving.