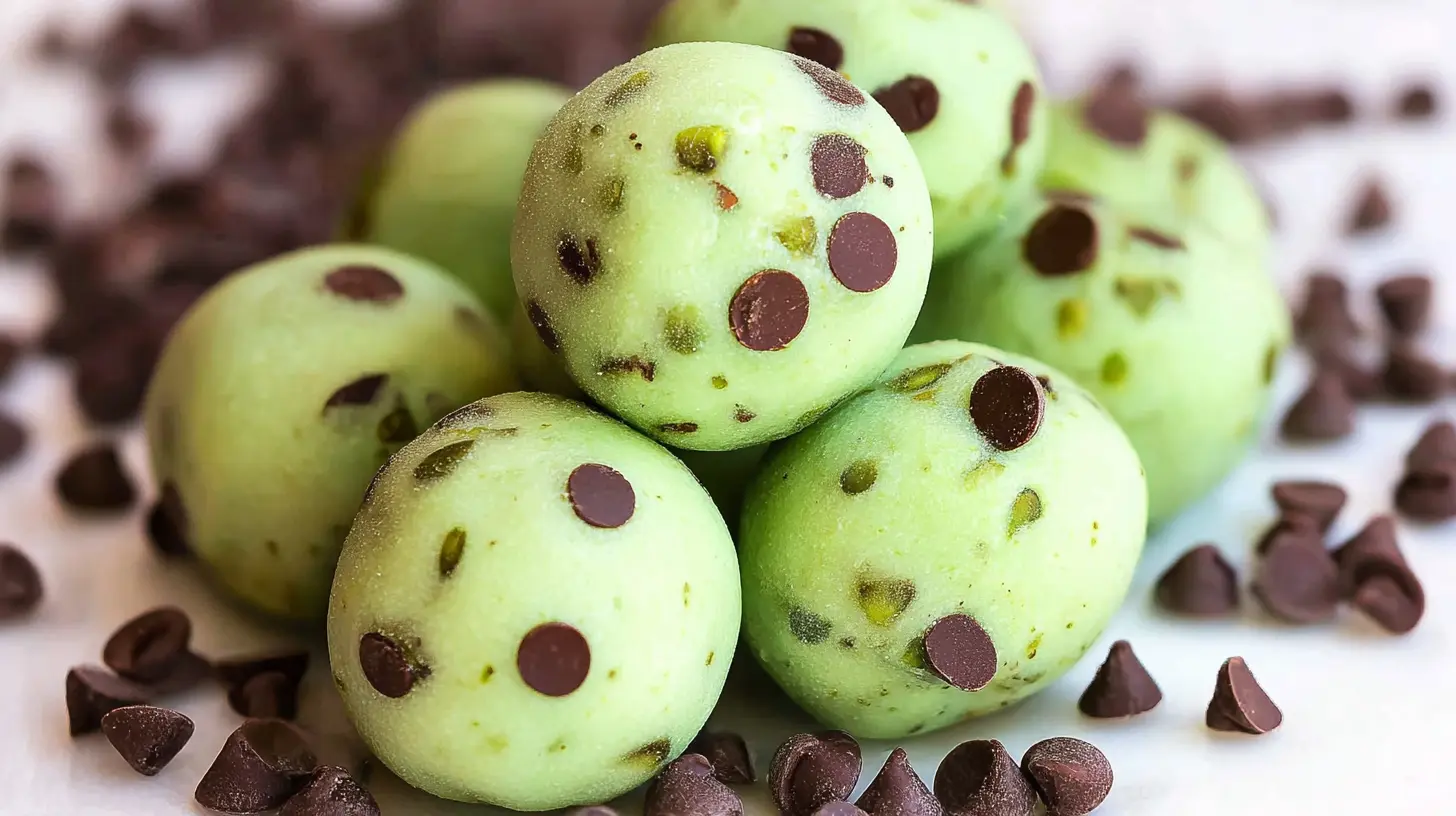
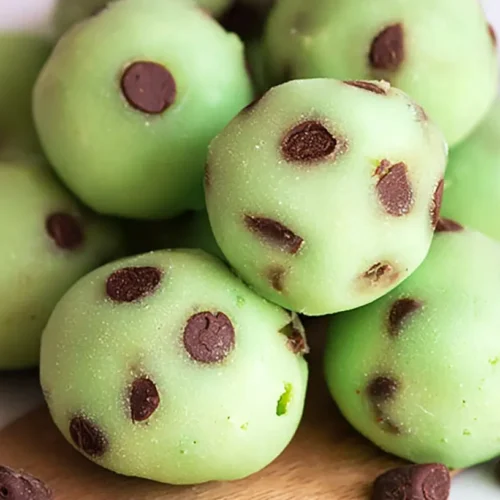
The first time I whipped up a batch of these Creamy Andes Mint Chocolate Truffles, I knew I’d stumbled upon something truly special. There’s just something magical about the cool, refreshing burst of mint playing off the deep, rich chocolate. They’re a grown-up treat that instantly brings a smile, perfect for satisfying that late-night sweet craving or impressing guests without breaking a sweat in the kitchen.
Why You’ll Love This Dish
These aren’t just any truffles; they’re an experience. If you’re a fan of that classic mint-chocolate combination, you’re in for a real treat. What makes these truffles particularly fantastic is their luxurious creaminess, which melts in your mouth and leaves you wanting just one more. They’re surprisingly simple to make, requiring minimal ingredients and no baking, making them an ideal project for a lazy afternoon or a fun activity with kids (though you might want to hide a few for yourself!). Perfect for holiday platters, as a thoughtful DIY gift, or simply as an indulgent pick-me-up on a Tuesday, these Andes Mint Chocolate Truffles are a guaranteed crowd-plepleaser.
> “I made these truffles for our holiday party, and they were the first dessert to disappear! Everyone raved about how smooth and flavorful they were. So easy and so delicious!” – A happy home baker
The Cooking Process Explained
Making these Creamy Andes Mint Chocolate Truffles is a wonderfully straightforward process, broken down into just a few key stages. You’ll start by gently melting the base ingredients together until they’re perfectly smooth and combined. This mixture then needs some time to chill and firm up, which is crucial for achieving that ideal truffle consistency. Once firm, you’ll roll them into their classic spherical shape and finally give them a beautiful coating. It’s a simple sequence of melt, chill, roll, and coat – making it an accessible recipe for even novice confectioners.
What You’ll Need
To embark on your truffle-making journey, gather these essential items:
- Andes Mint Chocolate Baking Chips: These are the star of the show, providing that iconic minty chocolate flavor.
- Sweetened Condensed Milk: This contributes to the incredible creaminess and sweetness of the truffles.
- Powdered Sugar: Used for dusting and preventing stickiness during rolling, it also adds a touch more sweetness.
- Vanilla Extract: A splash enhances the overall flavor profile.
- Optional for coating: Melted chocolate, cocoa powder, or crushed Andes Mints for an extra flourish.
Directions to Follow
Here’s how to bring these irresistible truffles to life:
- Melt the Base: In a double boiler or a microwave-safe bowl (heating in 30-second intervals and stirring), combine the Andes Mint chocolate chips and sweetened condensed milk. Stir constantly until completely melted and smooth. Remove from heat.
- Add Flavor: Stir in the vanilla extract until fully incorporated.
- Chill to Firm: Pour the mixture into a shallow dish lined with parchment paper. Press down evenly and cover. Refrigerate for at least 2-3 hours, or until the mixture is firm enough to roll.
- Roll the Truffles: Scoop out small portions of the chilled mixture (about 1 tablespoon each) and gently roll them between your palms to form smooth balls. If the mixture becomes too sticky, return it to the fridge for a few minutes.
- Coat and Finish: Roll the truffles in powdered sugar for a classic finish. Alternatively, dip them in melted chocolate or roll them in crushed Andes mints for an extra touch of decadence. Place them on a parchment-lined tray.
Best Ways to Enjoy It
These Creamy Andes Mint Chocolate Truffles are versatile little delights! They’re absolutely perfect served on their own as a small indulgence after dinner, perhaps with a cup of coffee or a digestif. For a dessert platter, arrange them artfully with other small treats like mini cookies or fruit tarts. They also make a fantastic edible gift when packed in a pretty box with some tissue paper – a truly thoughtful gesture that says “I care, and I know you love mint chocolate!”
How to Store & Freeze
To keep your truffles fresh and delicious, store them in an airtight container in the refrigerator. They will last for up to 1-2 weeks. If you want to make them ahead or have a larger batch, these truffles freeze beautifully. Place them in a single layer on a parchment-lined baking sheet until solid, then transfer them to a freezer-safe bag or container, separating layers with parchment paper. They can be frozen for up to 3 months. Thaw them in the refrigerator for a few hours before serving.
Helpful Cooking Tips
- Don’t Rush the Chill: The chilling step is critical. Resist the urge to shorten it, or your truffle mixture will be too soft and sticky to roll properly.
- Hands-On Rolling: Your hands are the best tool for rolling truffles. If they get too warm and sticky, rinse them with cold water, dry thoroughly, and continue. A light dusting of powdered sugar on your hands can also help.
- Even Scoops: For uniform truffles, use a small cookie scoop or a measuring spoon to portion out the mixture. This ensures they all look professional and cook (or chill) evenly.
- Creative Coatings: While powdered sugar is classic, don’t limit yourself! Crushed peppermints, finely chopped nuts, or a drizzle of contrasting white chocolate can add visual appeal and extra flavor.
Creative Twists
- Espresso Kick: Add a teaspoon of instant espresso powder to the melted chocolate mixture for a mocha-mint twist.
- Orange Zest: A little finely grated orange zest can add a surprising bright note that beautifully complements the chocolate and mint.
- Boozy Truffles: For an adult version, stir in a tablespoon of peppermint schnapps or crème de menthe (reduce condensed milk by a tiny amount, or add a bit extra powdered sugar, to maintain consistency) with the vanilla extract.
- Darker Chocolate: For a more intense chocolate flavor, swap out some of the Andes chips for high-quality dark chocolate chips.
Common Questions
Q: Can I use regular chocolate chips instead of Andes Mints?
A: Yes, you can! If you use regular chocolate chips (semi-sweet or dark are best), you’ll need to add mint flavoring. Start with 1/2 teaspoon of peppermint extract and adjust to your taste. Ensure it’s a food-grade extract, not an essential oil.
Q: Why are my truffles too sticky to roll?
A: This usually means the mixture hasn’t chilled long enough or your hands are too warm. Return the mixture to the refrigerator for another 30-60 minutes. You can also lightly dust your hands with powdered sugar before rolling.
Q: How far in advance can I make these truffles?
A: You can comfortably make these truffles up to a week in advance and store them in an airtight container in the refrigerator. They taste even better after a day or two, as the flavors meld. For longer storage, freeze them as directed.
Classic Creamy Andes Mint Chocolate Truffles
Equipment
- Heatproof Bowl
- Saucepan
- Whisk or Spatula
- Plastic Wrap
- Cookie Scoop
- Baking Sheet
- Parchment Paper
Ingredients
Truffle Base
- 1.5 cups Andes Crème de Menthe Thins
- 1 cup Good Quality Semi-Sweet Chocolate Chips or finely chopped semi-sweet chocolate
- 0.5 cup Heavy Cream
- 2 tablespoons Unsalted Butter
Optional Coatings
- Powdered Sugar for dusting or adding to mixture
- Cocoa powder natural or Dutch-processed, optional coating
- Sprinkles optional coating
- Additional melted chocolate for drizzling (optional coating)
- Crushed Andes mints optional coating
Instructions
Make the Ganache
- Combine Andes mints, chocolate chips, and butter in a heatproof bowl to prepare the ganache base.
- Heat heavy cream in a saucepan until it just simmers, then pour it over the chocolate mixture, letting it sit for 5 minutes.
- Gently stir the mixture until smooth, incorporating powdered sugar if desired; then chill for 3-4 hours or overnight until firm.
Form and Coat Truffles
- Scoop and roll portions of the chilled ganache into smooth balls, placing them on a parchment-lined baking sheet.
- Optionally coat the truffles in cocoa powder, sprinkles, melted chocolate, or crushed Andes mints, allowing them to set.
- Refrigerate the finished truffles for at least 30 minutes to fully set the coatings and firm up.