The scent of peppermint and vanilla always brings me back to childhood Christmases, and there’s nothing quite like biting into a tender, buttery candy cane cookie. They’re a holiday staple for a reason, but let’s be honest, sometimes they can look a little… plain. That’s where the real fun begins – transforming them from simple swirls into dazzling festive masterpieces.
Why You’ll Love These Decorating Ideas
These aren’t just about making your cookies look pretty (though they will!). This collection of decorating ideas is about igniting your holiday spirit and adding a personalized touch to your baking. You’ll find inspiration for every skill level, from simple sprinkles to more intricate designs. It’s a fantastic way to engage the whole family, turn a baking session into a creative art project, and honestly, the “oohs” and “aahs” you’ll get when you present these are worth every extra sprinkle.
> “I used to think candy cane cookies were just red and white swirls. These ideas completely changed my cookie game! My kids had a blast helping, and they looked incredible on our holiday dessert platter.” – Happy Baker
How These Decorating Ideas Come Together
The beauty of decorating candy cane cookies is that the base cookie is already a classic. Once you have your perfectly baked candy cane cookies, the decorating process is where you get to play. Generally, it involves preparing your icing or melting your chocolate, gathering your chosen embellishments, and then systematically applying them. Some ideas are as simple as a quick dip, while others involve a bit more precision with piping bags. The key is to let your imagination lead the way!
What You’ll Need
To embark on your candy cane cookie decorating adventure, you’ll need a few essentials. Of course, this starts with your already baked and cooled candy cane cookies. For the decorating itself, here’s a general list, keeping in mind that specific ideas might require specific items:
- Baked Candy Cane Cookies: The canvas for your edible art.
- Royal Icing or Glaze: For detailed work or a smooth, shiny finish.
- Melted Chocolate: White, dark, or milk chocolate for dipping and drizzling.
- Food Coloring: Gel colors work best for vibrant hues.
- Sprinkles: Red, green, white, silver, gold, snowflake shapes, nonpareils, sanding sugar.
- Crushed Candy Canes: The ultimate festive topping!
- Edible Glitter or Dust: For a magical shimmer.
- Piping Bags and Tips (optional): Small round tips and star tips are useful.
- Small Offset Spatula or Butter Knife: For spreading icing.
- Toothpicks or Skewers: For fine details or marbling.
- Parchment Paper or Wax Paper: For easy cleanup and drying.
Directions to Follow (Decorating Steps)
Here are the 9 festive decorating ideas once your candy cane cookies are baked and cooled:
- Classic Peppermint Sparkle:
- Dip one end of your cookie into melted white chocolate.
- Immediately sprinkle generously with crushed candy canes before the chocolate sets.
- Let dry on parchment paper.
- Chocolate-Dipped & Drizzled:
- Dip half or two-thirds of the cookie into melted dark chocolate.
- Once mostly set, drizzle with melted white chocolate in a zig-zag pattern.
- Optionally, add a few festive sprinkles while wet.
- Winter Wonderland Glaze:
- Prepare a thin white glaze (powered sugar, milk, vanilla).
- Dip the entire cookie into the glaze, letting excess drip off.
- Before it sets, sprinkle with silver or white nonpareils and edible snowflake sprinkles.
- Ombré Effect:
- Prepare royal icing in three shades: white, a light pink/red, and a slightly darker pink/red.
- Carefully pipe or spread a band of white on one end, then the light pink/red, then the darker pink/red, blending slightly where they meet.
- Use a toothpick to gently marble the colors for a soft transition.
- Festive Polka Dots:
- Flood the entire cookie with a base color of royal icing (e.g., white or light green).
- While still wet, use a contrasting color (e.g., red) in a piping bag with a small round tip to create small dots.
- Drag a toothpick through the wet dots to create heart shapes or swirls.
- “Sweater Weather” Texture:
- Using a medium-stiff royal icing and a small star tip, pipe parallel lines or chevron patterns onto parts of the cookie to mimic a knitted sweater.
- You can then add small “buttons” with round dots of icing.
- Frosted & Sugared:
- Spread a thin layer of cream cheese frosting (or any white frosting) onto the cookie.
- Immediately roll the frosted cookie edges in coarse white sanding sugar for a glistening, snow-like effect.
- Elf Boot Tip:
- Dip the curved “foot” end of the candy cane into melted green chocolate.
- While wet, place a small red M&M or red sugar pearl at the tip for a “bell” on the elf shoe.
- Two-Tone Drizzle & Sparkle:
- Drizzle melted white chocolate over the cookies in a diagonal pattern.
- Then, drizzle melted green or red chocolate in the opposite diagonal direction.
- Before it dries, sprinkle with iridescent edible glitter.
Best Ways to Enjoy These Festive Cookies
These beautifully decorated candy cane cookies are absolutely perfect for holiday gatherings, cookie exchanges, or as a thoughtful homemade gift. Arrange them on a festive platter with other holiday treats. They pair wonderfully with a steaming mug of hot cocoa, a cozy chai latte, or even a glass of cold milk. Don’t forget to leave a few out for Santa – he’ll appreciate the extra effort!
How to Store & Freeze
To keep your decorated candy cane cookies fresh and beautiful, proper storage is key.
- Storage: Once the icing or chocolate has fully set (this can take several hours, especially for royal icing), store the cookies in an airtight container at room temperature. Placing parchment paper between layers can prevent sticking and smudging. They will stay fresh for up to 1-2 weeks. If your decorations include fresh elements or cream cheese frosting, store them in the refrigerator and consume within 3-5 days.
- Freezing: For longer storage, flash freeze the decorated cookies on a baking sheet until solid. Then, transfer them to an airtight freezer-safe container or bag, again separating layers with parchment paper. They can be frozen for up to 3 months. Thaw at room temperature before serving. Be aware that some delicate decorations (like very fine royal icing lines) might be slightly more prone to cracking after freezing and thawing.
Helpful Cooking Tips
- Cool Completely: Always, always ensure your cookies are completely cool before you even think about decorating. Warm cookies will melt chocolate and make icing runny.
- Work in Batches: If dipping, melt your chocolate in smaller batches so it stays at the right consistency.
- Thin Your Icing Wisely: For flooding with royal icing, aim for a consistency that smooths out in a count of 5-10 seconds after a spoonful is dropped back into the bowl. For piping details, a thicker consistency is needed.
- Patience is a Virtue: Especially with royal icing, allow ample drying time between layers or colors to prevent bleeding. This might mean decorating in stages over several hours or even days.
- Clean Up As You Go: Keep a damp cloth handy for quick cleanups of sprinkles or drips.
- Practice Makes Perfect: Don’t stress about perfection. The joy is in the process, and even slightly imperfect cookies will taste delicious and look charmingly homemade.
Creative Twists
Want to go beyond these 9 ideas? Here are a few more ways to shake things up:
- Monochromatic Elegance: Use only white icing and different textures – a smooth flood, piped dots, and a dusting of white edible glitter.
- “Stained Glass” Effect: Cut out a small shape (like a star) from the center of the dough before baking. Fill the hole with crushed hard candies (not candy canes) before baking for a sparkling translucent window.
- Flavor Infusions: Add a tiny drop of peppermint extract to white chocolate or royal icing for an extra burst of mint. You could also use almond extract for a twist.
- Cookie Pops: Insert a lollipop stick into the base of the cookie dough before baking to turn them into decorative cookie pops, perfect for a display or party favors.
Common Questions
Can I use store-bought frosting for these decorating ideas?
A: Yes, you can! Store-bought frosting works well for spreading and some simpler dipping techniques. However, for fine piping details, smooth flooding, or decorations that need to set firm, royal icing or melted chocolate generally yield better results. Consider whipping store-bought frosting slightly to improve its texture.
My melted chocolate is too thick – what should I do?
A: If your melted chocolate becomes too thick, you can add a small amount of neutral oil (like vegetable oil or coconut oil) or shortening, about ½ teaspoon at a time, and stir until it reaches your desired consistency. Be careful not to add too much, or it will become too greasy.
How can I prevent my sprinkles from falling off?
A: The key is to apply sprinkles immediately after applying the wet element (icing, glaze, or melted chocolate). This gives them something to adhere to before it sets. If using a thin glaze, you can also gently press the sprinkles onto the surface.
Four-Flavor Candy Cane Cookies
Equipment
- Electric mixer
- Large bowl
- Medium bowl
- Plastic wrap
- Baking sheets
- Parchment paper
- Wire rack
Ingredients
Cookie Dough
- 2.5 cups all-purpose flour
- 1 cup granulated sugar
- 1 cup unsalted butter softened
- 2 large eggs
- 1 teaspoon vanilla extract
- 1 teaspoon baking powder
- 0.5 teaspoon salt
Flavorings & Colorings
- red food coloring
- pink or green food coloring optional, for almond variation
- yellow food coloring optional, for lemon variation
- 1 tsp peppermint extract total
- 1 tsp almond extract total
- 1 tsp lemon extract total
- 2 tbsp cocoa powder
- 1 tsp coffee extract total
Optional Decoration
- crushed candy canes or sprinkles
Instructions
Prepare the Dough
- Cream together the softened butter and granulated sugar in a large bowl until light and fluffy using an electric mixer.
- Beat in the eggs one at a time, then stir in the vanilla extract until well combined.
- In a separate bowl, whisk together the flour, baking powder, and salt.
- Gradually add the dry ingredients to the wet ingredients, mixing on low speed until a soft dough forms.
- Divide the dough into four equal portions.
Flavor and Color the Dough
- For classic peppermint, divide one portion in half. Add 1/2 tsp peppermint extract and red food coloring to one half; add 1/2 tsp peppermint extract to the other (no coloring).
- For almond delight, divide a second portion in half. Add 1/2 tsp almond extract and pink/green food coloring to one half; add 1/2 tsp almond extract to the other.
- For lemon zest, divide a third portion in half. Add 1/2 tsp lemon extract and yellow food coloring to one half; add 1/2 tsp lemon extract and a pinch of lemon zest to the other.
- For mocha swirl, divide the fourth portion in half. Add 2 tbsp cocoa powder and 1/2 tsp coffee extract to one half; add 1/2 tsp coffee extract to the other (no cocoa).
Chill and Bake
- Wrap each flavored dough portion separately in plastic wrap and chill in the refrigerator for at least 1 hour, or up to 2 days.
- Preheat your oven to 375°F (190°C) and line baking sheets with parchment paper.
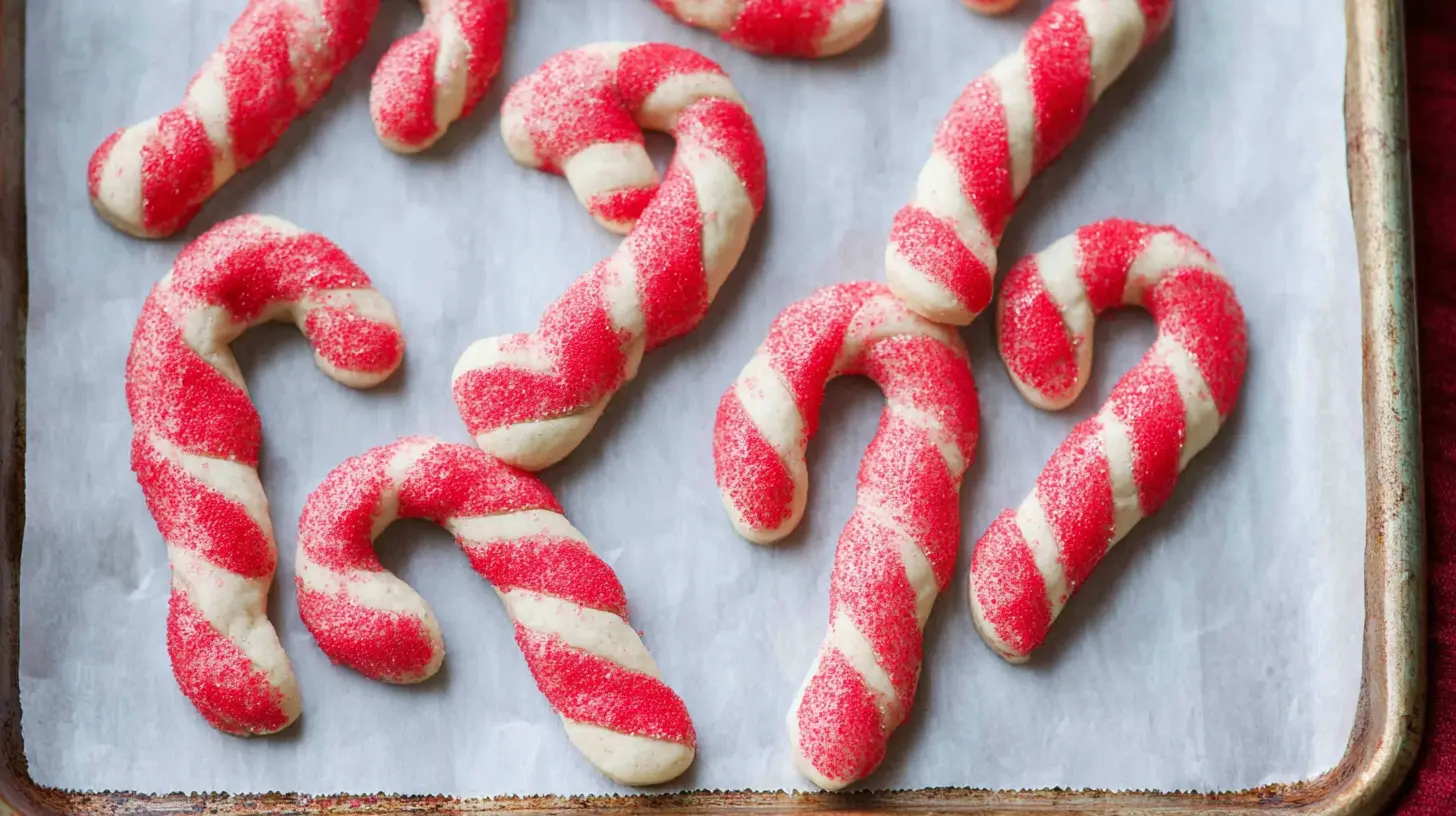
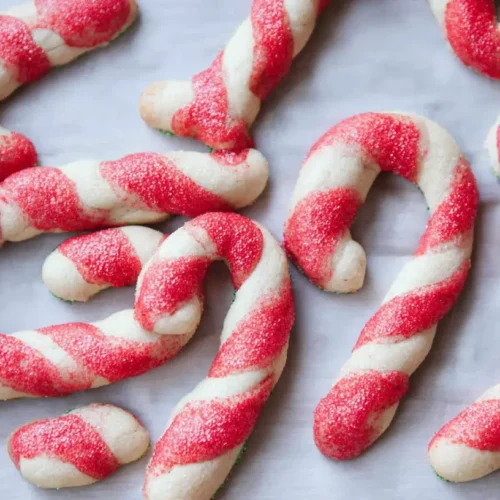
- Take a small piece (about 1 teaspoon) of each colored dough from one flavor combination and roll each into a thin rope, about 4-5 inches long.
- Lay one colored rope and one plain rope side-by-side, press them together at one end, then twist them to form a spiral, bending one end to create the candy cane hook.
- Repeat shaping with the remaining dough for all four flavor combinations, then place cookies on prepared baking sheets.
- Bake for 8-10 minutes, or until the edges are lightly golden, then cool on baking sheets before transferring to a wire rack.