I remember the first cake I ever tried to decorate. It was for my dad’s birthday, and let’s just say it looked more like a charmingly lopsided mound than a celebratory masterpiece. But that experience, humbling as it was, ignited a passion. Cake decorating, at its heart, is about adding that personal touch, transforming a delicious bake into an edible work of art. If you’ve ever felt intimidated by elaborate designs, you’re in the right place. Today, we’re diving into four easy decorating ideas that will elevate your cakes from simple to spectacular, even if you’re a complete beginner.
Why You’ll Love These Cake Decorating Ideas
Learning a few simple cake decorating techniques is a game-changer. It means you’ll never have to settle for store-bought again unless you truly want to! These methods aren’t just easy, they’re designed to be quick, making them perfect for those last-minute celebrations or when you just want to impress without spending hours in the kitchen. Plus, they’re incredibly versatile – you can adapt them for birthdays, holidays, or just a Tuesday treat.
> “I used to be so intimidated by decorating cakes, but these ideas made it so much fun and surprisingly simple! My friends were so impressed, and I actually enjoyed the process.” – A Happy Home Baker
How These Decorating Ideas Come Together
Before you even think about applying that first swirl of frosting, you’ll want to have a cooled, crumb-coated cake ready to go. A crumb coat is a thin layer of frosting that traps any loose crumbs, ensuring a smooth finish for your final decoration. Once your cake is prepped, these ideas typically involve a few simple steps: gathering your chosen tools (piping bags, spatulas, or even household items), preparing your frosting or toppings, and then applying them with a bit of flair. Each idea is designed to be approachable, focusing on techniques that build confidence rather than requiring years of practice.
What You’ll Need
While the specific items will vary slightly depending on which decor idea you choose, there are a few essentials that will make your cake decorating journey smoother.
- A Baked and Cooled Cake: This is fundamental! Make sure it’s completely cool to prevent frosting from melting.
- Buttercream Frosting: (Your favorite recipe or store-bought.) Ensure it’s a good consistency – not too stiff, not too runny.
- Offset Spatula or Butter Knife: For spreading frosting.
- Piping Bags and Tips (Optional but Recommended): For more precise designs. A large round tip (like Wilton 1A or 1M) and a star tip are great starting points.
- Various Toppings: Sprinkles, fresh fruit, chocolate shavings, edible flowers, crushed cookies, fruit zest.
- Parchment Paper or Wax Paper: For shaping chocolate or for practicing piping.
Directions to Follow
Let’s break down these four easy decorating ideas:
Idea 1: The Rustic Swirl
- Crumb Coat & Base: Ensure your cake has a thin crumb coat and then apply a generous, even layer of your main frosting to the top and sides of the cake.
- Create the Swirls: Using the back of a spoon, an offset spatula, or even a small palette knife, make gentle, sweeping swirl patterns across the top and sides of the cake. You can go in circles, create S-shapes, or just make organic movements. The beauty is in the imperfection!
- Optional Garnish: Finish with a scattering of fresh berries, a few edible flowers, or a light dusting of powdered sugar.
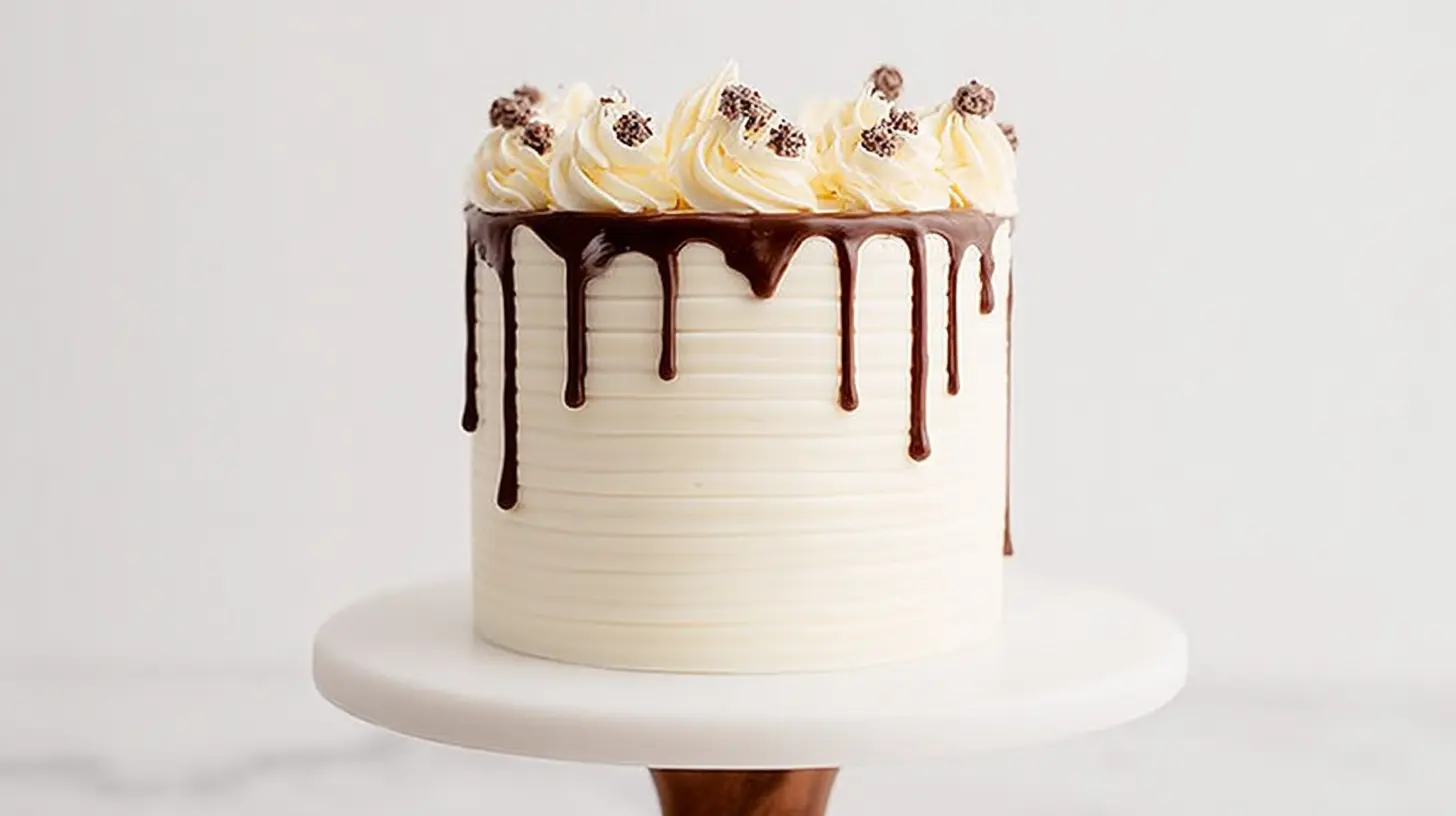
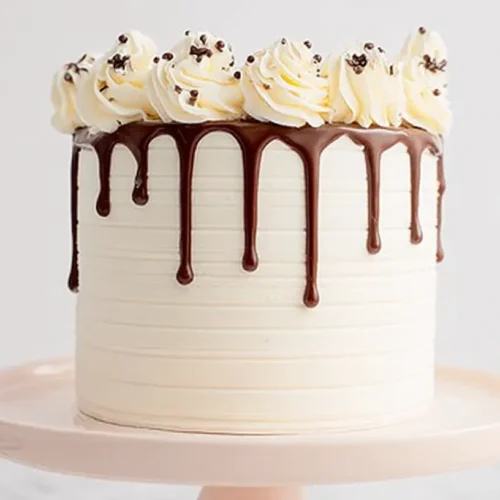
Idea 2: The Drip Effect
- Chill Your Cake: Once your cake is frosted, pop it in the fridge for about 15-20 minutes. This helps the drip set nicely.
- Prepare Your Drip: Use a ganache (chocolate and cream), a thinned-down icing, or even melted candy melts. Make sure it’s warm enough to pour but not hot enough to melt your frosting.
- Apply the Drips: Use a spoon or a squeeze bottle to carefully apply the drip mixture to the edge of the cake, allowing it to naturally fall down the sides. For a fuller drip, add more. For a subtle drip, use less.
- Top It Off: Decorate the top of the cake with complementary toppings like chocolate curls, sprinkles, or piped buttercream borders.
Idea 3: The Ombre Effect (Side or Top)
- Divide & Color Frosting: Divide your buttercream into 3-4 bowls. Leave one white, and tint the others with progressively darker shades of your chosen color (e.g., light pink, medium pink, dark pink).
- Apply to Sides (Option A): Apply the darkest color in a band around the bottom of the cake, then the medium shade above that, and the lightest shade at the top. Use an offset spatula to gently blend the edges where the colors meet, creating a gradient.
- Apply to Top (Option B): Alternatively, for a top-only ombre, pipe concentric circles of each color from the center outwards, then gently swirl with a spatula.
- Smooth (Optional): For a smoother finish, use a bench scraper around the sides after blending.
Idea 4: The Sprinkle Fiesta
- Base Coat: Ensure your cake is fully frosted with a smooth (or even rustic) base coat.
- Apply Sprinkles to Sides: Gently press sprinkles onto the sides of the cake. You can do this by holding the cake over a baking sheet to catch excess, or by pouring sprinkles onto a plate and rolling the cake’s sides through them.
- Apply Sprinkles to Top: Scatter sprinkles generously over the top of the cake.
- Get Creative: Mix different types of sprinkles, use specific colors for themes, or create patterns by shielding parts of the cake while applying.
Best Ways to Enjoy It
These decorated cakes are, of course, best enjoyed with friends and family! Slice generously and serve as the grand finale to any meal. Pair a fruit-laden cake with a light sorbet, or a chocolate-drizzled creation with a scoop of vanilla bean ice cream. Don’t be afraid to let your cake be the star of the show – a well-decorated cake rarely needs much else to shine!
How to Store & Freeze
To keep your beautifully decorated cake fresh, store it in an airtight cake carrier or under a cake dome at room temperature for up to 2-3 days if frosted with buttercream. If your frosting or filling contains fresh fruit or cream cheese, it’s best to refrigerate it and consume within 2-3 days. Always bring refrigerated cakes to room temperature for an hour or so before serving for the best texture and flavor.
For longer storage, most frosted cakes (especially those with buttercream) freeze beautifully. Place the cake in the freezer uncovered for about 30-60 minutes until the frosting is firm. Then, wrap it tightly in plastic wrap, followed by a layer of aluminum foil. You can store a frozen cake for up to 2-3 months. Thaw overnight in the refrigerator, then bring to room temperature before serving.
Helpful Cooking Tips
- Cool Completely: Always, always make sure your cake is completely cool before frosting. Even slightly warm can lead to a messy, melted disaster.
- Crumb Coat is Your Friend: Don’t skip the crumb coat! It’s a thin layer of frosting that seals in crumbs, giving you a smooth canvas for your final decorative layer. Chill for 15-20 minutes after crumb coating.
- Consistency is Key: Your frosting consistency dramatically impacts your decorating success. If it’s too stiff, add a tiny bit of milk or cream. If it’s too soft, add more powdered sugar or chill it for a bit.
- Practice Makes Perfect: Don’t expect perfection on your first try. Grab some parchment paper and practice piping different patterns or swirls before tackling the actual cake. You’ll be amazed how quickly your skills improve!
- Embrace Imperfection: Some of the most charmingly decorated cakes have a rustic, handmade feel. Don’t stress over absolute symmetry; focus on making it look delicious and personal.
Creative Twists
These ideas are just jumping-off points! Here’s how you can make them truly your own:
- Flavor Swaps: Don’t limit yourself to vanilla! Imagine a rustic swirl on a lemon olive oil cake, or a chocolate drip on a rich red velvet.
- Seasonal Themes: Use fresh berries in summer, candied cranberries in winter, or dried citrus slices in autumn. Change your sprinkle colors for holidays like Halloween or Christmas.
- Personalized Touches: Add a simple fondant cutout of a name or age, or use edible markers to write a message directly on a smooth frosted surface.
- Combined Techniques: Why choose just one? Combine a rustic swirl top with a sprinkle-covered side, or add a subtle drip over an ombre gradient. Let your imagination run wild!
Your Questions Answered
How much frosting do I need for a typical 8-inch round cake?
A: For an 8-inch, two-layer cake, you’ll generally need about 3-4 cups of buttercream frosting to fully cover and decorate it. This allows for a good base coat and some extra for swirls or piping.
Can I use whipped cream instead of buttercream?
A: Yes, you can for decorative purposes, but consider its limitations. Whipped cream is much less stable than buttercream, especially in warm environments. It won’t hold intricate piped designs as well and has a shorter shelf life. It’s best for cakes that will be served immediately and kept refrigerated.
My sprinkles won’t stick to the side of the cake. What am I doing wrong?
A: The most common reason is that your frosting has crusted or dried too much. Sprinkles need a slightly “tacky” surface to adhere. If your frosting is too dry, try gently re-moistening the surface by lightly dabbing it with a damp (not wet) paper towel, or apply the sprinkles immediately after frosting before it sets. You can also press them gently!
Celebration Vanilla Bean Cake with Raspberry Filling
Equipment
- Round cake pans (8-inch)
- Medium bowl
- Large bowl
- Small saucepan
- Electric mixer
- Wire rack
- Serrated knife
- Piping bag (optional)
Ingredients
Cake
- 2 ½ cups all-purpose flour
- 1 ½ teaspoons baking powder
- ½ teaspoon baking soda
- ½ teaspoon salt
- 1 cup unsalted butter softened
- 2 cups granulated sugar
- 3 large eggs room temperature
- 1 tablespoon vanilla bean paste
- 1 cup buttermilk room temperature
Raspberry Filling
- 2 cups fresh or frozen raspberries
- ¼ cup granulated sugar
- 1 tablespoon lemon juice
- 1 tablespoon cornstarch mixed with 2 tablespoons cold water (slurry)
Vanilla Buttercream
- 2 cups unsalted butter softened
- 6-8 cups powdered sugar sifted
- 2 teaspoons vanilla extract
- ¼ cup milk or cream
- salt Pinch
Instructions
Cake Preparation
- Preheat oven to 350°F (175°C) and prepare two 8-inch round cake pans by greasing and flouring them.
- In a medium bowl, whisk together the flour, baking powder, baking soda, and salt.
- In a large bowl, cream together the softened butter and granulated sugar until light and fluffy.
- Beat in the eggs one at a time, ensuring each is well incorporated before adding the next, then stir in the vanilla bean paste.
- Alternate adding the dry ingredients and buttermilk to the wet ingredients, starting and ending with dry, mixing until just combined to avoid overmixing.
- Divide the batter evenly between the prepared cake pans and bake for 30-35 minutes, or until a wooden skewer comes out clean.
- Allow the cakes to cool in their pans for 10 minutes, then invert them onto a wire rack to cool completely.
Raspberry Filling Preparation
- In a small saucepan, combine raspberries, sugar, and lemon juice, then simmer over medium heat until the berries break down.
- Stir in the cornstarch slurry and cook, stirring constantly, until the mixture thickens; remove from heat and cool completely.
Vanilla Buttercream Preparation
- In a large bowl, beat softened butter with an electric mixer until creamy.
- Gradually add sifted powdered sugar, one cup at a time, beating until smooth and incorporated.
- Beat in vanilla extract, milk or cream, and a pinch of salt until the frosting is light and fluffy; adjust consistency with more sugar or milk as needed.
Assembly
- Once the cake layers are completely cool, level the tops with a serrated knife if necessary.
- Place one cake layer on a serving plate and pipe a dam of buttercream around its edge.
- Fill the center of the cake layer with the cooled raspberry filling.
- Carefully place the second cake layer on top, then frost the entire cake with the remaining vanilla buttercream and decorate as desired.
- Serve the cake at cool room temperature and enjoy!