My first encounter with Bloomin’ Onions was at a bustling chain restaurant, a colossal, deep-fried spectacle that always felt a bit too overwhelming for one person. But the crispy, seasoned petals were undeniably delicious. That’s why I was so thrilled to discover the concept of “Baby” Bloomin Onions – all the flavor and fun, but in a perfectly portioned, appetizer-friendly size. This twist takes everything wonderful about the original and makes it more accessible, more versatile, and frankly, even more exciting for home cooks.
Why you’ll love this dish
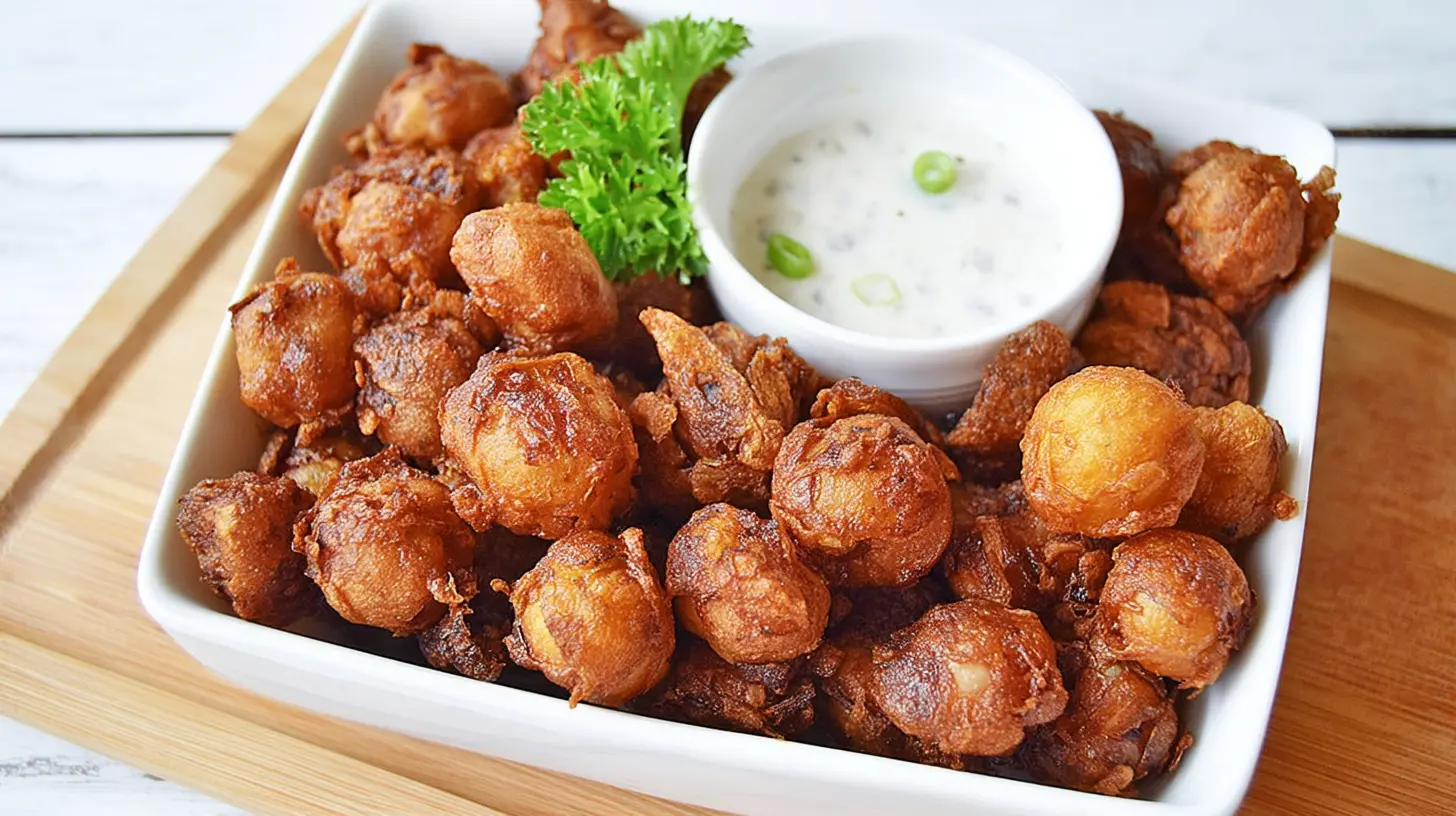
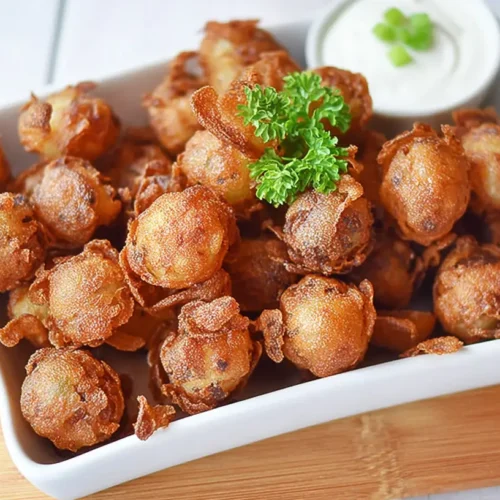
There’s something uniquely satisfying about a Baby Bloomin Onion. It’s not just a snack; it’s an experience. You get that incredible crunch, the sweet and savory onion, and a perfect vehicle for your favorite dipping sauces, all without the commitment of tackling a giant, unwieldy appetizer. These baby versions are fantastic for several reasons:
- Perfectly Portioned: No more guilt over a massive fried onion. These are ideal for individual servings or sharing a variety of flavors.
- Crowd-Pleaser: They disappear fast at parties! Guests love the novelty and delicious taste.
- Versatile: As you’ll discover, these aren’t just for classic seasoning. There are endless possibilities to infuse different flavors.
- Fun to Make: The process of blooming the onion is surprisingly therapeutic and impressive to watch.
- Budget-Friendly: Onions are inexpensive, making this a cost-effective gourmet-feeling appetizer.
> “I made these Baby Bloomin Onions for our last game night, and they were an absolute hit! Everyone loved how easy they were to pick up, and the different seasoning options kept things exciting. Definitely a new go-to appetizer!” – Sarah J.
Step-by-step overview
Making Baby Bloomin Onions involves a few key stages that transform a simple onion into a crispy, flavorful delight. First, you’ll prepare your baby onions by carefully cutting them to create those signature “petals” while keeping the root intact. Next comes the dredging, a crucial step where each onion is coated in a seasoned flour mixture, followed by an egg wash, and then another layer of flour for maximum crispiness. Finally, they take a quick dip in hot oil until golden brown and perfectly cooked. It’s a straightforward process that yields impressive results, ready for you to customize with exciting new flavors!
What you’ll need
Gather these items for your foundational Baby Bloomin’ Onion:
- Baby Onions: 4-6 small onions (such as pearl onions, cippolini, or small red/yellow onions), peeled. Look for ones that are firm and roughly 2-3 inches in diameter.
- All-Purpose Flour: 1 cup, for the crispy coating.
- Cornstarch: 1/4 cup, helps with extra crispiness.
- Smoked Paprika: 1 teaspoon, for a warm, smoky depth.
- Garlic Powder: 1 teaspoon, classic savory flavor.
- Onion Powder: 1/2 teaspoon, to enhance the onion taste.
- Salt: 1/2 teaspoon, or to taste.
- Black Pepper: 1/4 teaspoon, freshly ground if possible.
- Eggs: 2 large, whisked with a splash of milk or water for the wet dredge.
- Milk/Water: 2 tablespoons (for egg wash)
- Vegetable Oil (or other neutral oil): For deep frying, about 4-6 cups depending on your pot size. You’ll need enough to submerge the onions.
Directions to follow
Let’s get those Baby Bloomin’ Onions ready to impress!
- Prep the Onions: Carefully peel your baby onions. Place an onion root-side up on a cutting board. Using a sharp knife, make 4-6 evenly spaced vertical cuts from the top down, stopping about 1/2 inch from the root end. This keeps the onion intact while allowing the “petals” to separate. Gently spread the petals apart with your fingers without breaking them. Repeat for all onions.
- Set Up Dredging Stations: In one shallow bowl, whisk together the flour, cornstarch, smoked paprika, garlic powder, onion powder, salt, and black pepper. In a second shallow bowl, whisk the eggs with milk or water until well combined.
- Coat the Onions: Dredge one bloomed onion thoroughly in the seasoned flour mixture, making sure to get flour into all the crevices. Shake off any excess. Dip the floured onion into the egg wash, allowing excess to drip off. Finally, return the onion to the seasoned flour mixture, ensuring it’s completely coated a second time. Shake off any excess flour. Place on a wire rack while you coat the remaining onions.
- Heat the Oil: In a heavy-bottomed pot or Dutch oven, pour enough vegetable oil to reach about 3-4 inches deep. Heat the oil over medium-high heat until it reaches 350-375°F (175-190°C). If you don’t have a thermometer, a small pinch of flour should immediately sizzle and float to the top.
- Fry the Onions: Carefully lower 1-2 onions into the hot oil (don’t overcrowd the pot, as it lowers the oil temperature). Fry for 3-5 minutes, turning occasionally with tongs, until golden brown and crispy.
- Drain and Season: Using a slotted spoon or spider, carefully remove the cooked onions from the oil and place them on a wire rack set over paper towels to drain excess oil. Immediately sprinkle with a little extra salt if desired.
- Serve: Serve hot with your favorite dipping sauce.
How to serve Baby Bloomin Onions
These crispy morsels are fantastic on their own, but truly shine when paired with the right accompaniments. For a classic experience, serve them with a creamy, zesty dipping sauce – think a simple blend of mayonnaise, ketchup, horseradish, and a touch of cayenne. But don’t stop there!
- Appetizer Spread: Present them on a large platter alongside other finger foods like mini spring rolls, chicken skewers, or vegetable sticks.
- Flavorful Dippers: Offer an array of sauces such as ranch, sriracha mayo, honey mustard, or even a sweet chili sauce to let guests customize their bite.
- Garnish Love: A sprinkle of fresh chopped chives or parsley adds a pop of color and freshness.
- Game Day Grub: They’re perfect for game day! Set them out with napkins and a variety of sauces, and watch them disappear.
- Brunch Side: Believe it or not, a smaller, simpler seasoned Baby Bloomin Onion can be a delightful, savory addition to a brunch spread alongside eggs and bacon.
Keeping leftovers fresh
Baby Bloomin Onions are definitely best enjoyed immediately after frying for peak crispiness. However, if you do find yourself with leftovers:
- Storage: Store any cooled, leftover Baby Bloomin Onions in an airtight container in the refrigerator for up to 1-2 days. Be aware that they will lose some of their crispness.
- Reheating: To best revive them, reheat in an air fryer at 350°F (175°C) for 3-5 minutes, or in a conventional oven on a baking sheet at 375°F (190°C) for 5-8 minutes, until heated through and somewhat crispy again. Microwaving is not recommended as it will make them soggy.
- Freezing: Freezing fried onions isn’t ideal as the texture significantly degrades upon thawing and reheating. It’s best to enjoy these fresh.
Pro chef tips
Achieving that perfect Baby Bloomin’ Onion isn’t hard, but a few insider tricks can elevate your results:
- Cold Onions are Key: Start with cold onions. This makes them firmer and easier to cut without breaking too many petals.
- The Right Cut: Don’t cut all the way through the root. Leaving about 1/2 inch intact is crucial for the onion to hold its bloom shape during frying. Gently separate the petals after the initial flour dredge to allow the coating to penetrate better.
- Double Dredge for Crispiness: The double-dredging method (flour, egg, flour) is vital for a thick, crispy crust. Don’t skimp on getting flour into every crevice.
- Oil Temperature is Critical: Use a thermometer! Too-low oil temperature results in greasy onions, while too-high oil will burn the coating before the onion cooks through. Aim for 350-375°F (175-190°C).
- Don’t Overcrowd: Fry in batches. Overcrowding the pot significantly drops the oil temperature, leading to soggy, poorly cooked onions.
- Season Immediately: Salt adheres best to hot, freshly fried food. A light sprinkle right out of the oil makes a big difference.
Creative twists
Ready to take your Baby Bloomin’ Onions beyond the classic? Here are 8 exciting new ideas to inspire your next batch:
- Parmesan Herb Bloomers: Add 2 tablespoons grated Parmesan cheese, 1 teaspoon dried Italian herbs, and a pinch of red pepper flakes to your flour mixture. Serve with marinara or a creamy pesto aioli.
- Spicy Cajun Kick: Incorporate 2 teaspoons Cajun seasoning into the flour. Offer with a remoulade sauce (mayo, creole mustard, hot sauce, lemon juice).
- Smoky BBQ Blossom: Mix 1 tablespoon brown sugar, 1 teaspoon smoked paprika, 1/2 teaspoon chili powder, and 1/4 teaspoon ground cumin into the flour. Serve with a tangy BBQ dipping sauce.
- Garlic & Rosemary Crunch: Finely chop 1 tablespoon fresh rosemary and add it to the flour along with an extra teaspoon of garlic powder. A lemon-garlic aioli would be a perfect dip.
- Everything Bagel Bloom: After the second flour dredge, sprinkle the bloomed onion with “everything bagel” seasoning (poppy seeds, sesame seeds, dried garlic, dried onion, salt) before frying. Serve with a dill cream cheese dip.
- Curry Powder Crunch: Stir 1 tablespoon curry powder and a pinch of turmeric into the flour for an aromatic twist. A mango chutney or cooling raita (yogurt dip) would complement this beautifully.
- Sweet Chili Zing: Reduce the savory spices slightly and add 1 tablespoon sugar and a pinch of cayenne to the flour. Serve with a sweet chili dipping sauce (bottled or homemade).
- Black Pepper & Thyme: Add an extra 1/2 teaspoon of freshly ground black pepper and 1 teaspoon dried thyme to your flour mix. A simple ranch or a truffle aioli would be fantastic here.
Common questions
FAQ
Q: Can I use different types of onions?
A: Yes, you can! Small yellow onions, red onions, or even larger pearl onions work well. The key is to choose firm, small-to-medium sized onions that are easy to bloom and fit in your frying pot.
Q: How do I ensure my Bloomin’ Onions are crispy and not greasy?
A: The most important factor is maintaining the correct oil temperature (350-375°F or 175-190°C). If the oil is too cool, the onions will absorb too much oil and be greasy. Also, don’t overcrowd the pot, and ensure a good, even coating of the flour mixture.
Q: Can I bake or air fry these instead of deep frying?
A: While deep frying yields the crispiest, most authentic result for a Bloomin’ Onion, you can try air frying for a healthier alternative. After coating, spray the onions generously with cooking spray and air fry at 375°F (190°C) for 15-20 minutes, flipping halfway, until golden and tender. Baking in a hot oven (400°F/200°C) works similarly but may require a bit longer. The texture won’t be identical to deep-fried, but it will still be delicious!
Classic Baby Bloomin’ Onions
Equipment
- Sharp knife
- Bowl
- Shallow dishes
- Wire rack
- Large, heavy-bottomed pot or Dutch oven
- Candy thermometer
Ingredients
For the Onions
- 6-8 Small Onions
- 1 cup All-Purpose Flour
- 1/2 cup Cornstarch
- 1 teaspoon Paprika
- 1 teaspoon Garlic Powder
- 1 teaspoon Onion Powder
- 1/2 teaspoon Cayenne Pepper
- 1 teaspoon Salt plus more for seasoning
- 1/2 teaspoon Black Pepper
- 2 large Eggs
- 1/2 cup Milk
- 2 cups Panko Breadcrumbs
- 4-6 cups Vegetable Oil for deep frying, about
For the Dipping Sauce
- 1/2 cup Mayonnaise
- 2 tablespoons Ketchup
- 1 teaspoon Prepared Horseradish
- 1/2 teaspoon Paprika
- 1/4 teaspoon Garlic Powder
- pinch Cayenne Pepper
- Salt and Pepper to taste
Instructions
Preparation
- Peel the onions, leaving the root intact, then cut off 1/2 inch from the stem end. Place root-side up and make 8-12 uniform cuts from the top down to about 1/2 inch from the root, careful not to cut through.
Soak and Bread
- Optionally, soak the cut onions in ice water for 30 minutes to help them open and crisp, then drain and pat dry.
- Set up three breading stations: one with flour and spices, one with whisked eggs and milk, and one with panko and cornstarch.
- Dredge each onion in the flour mixture, then dip in the wet mix, letting excess drip off.
- Finally, coat generously with the panko mixture, pressing firmly, and place on a wire rack.
Frying and Serving
- Heat 4-6 cups of vegetable oil in a large pot to 350-375°F (175-190°C).
- Carefully fry 1-2 coated onions for 4-6 minutes until deeply golden brown and crispy, turning for even cooking.
- Remove fried onions, drain on a wire rack over paper towels, and immediately season with extra salt.
- Repeat frying remaining onions in batches, ensuring consistent oil temperature.
- For the sauce, whisk together all dipping sauce ingredients until smooth, then taste and adjust seasoning.
- Serve the hot Baby Bloomin’ Onions immediately with the dipping sauce.