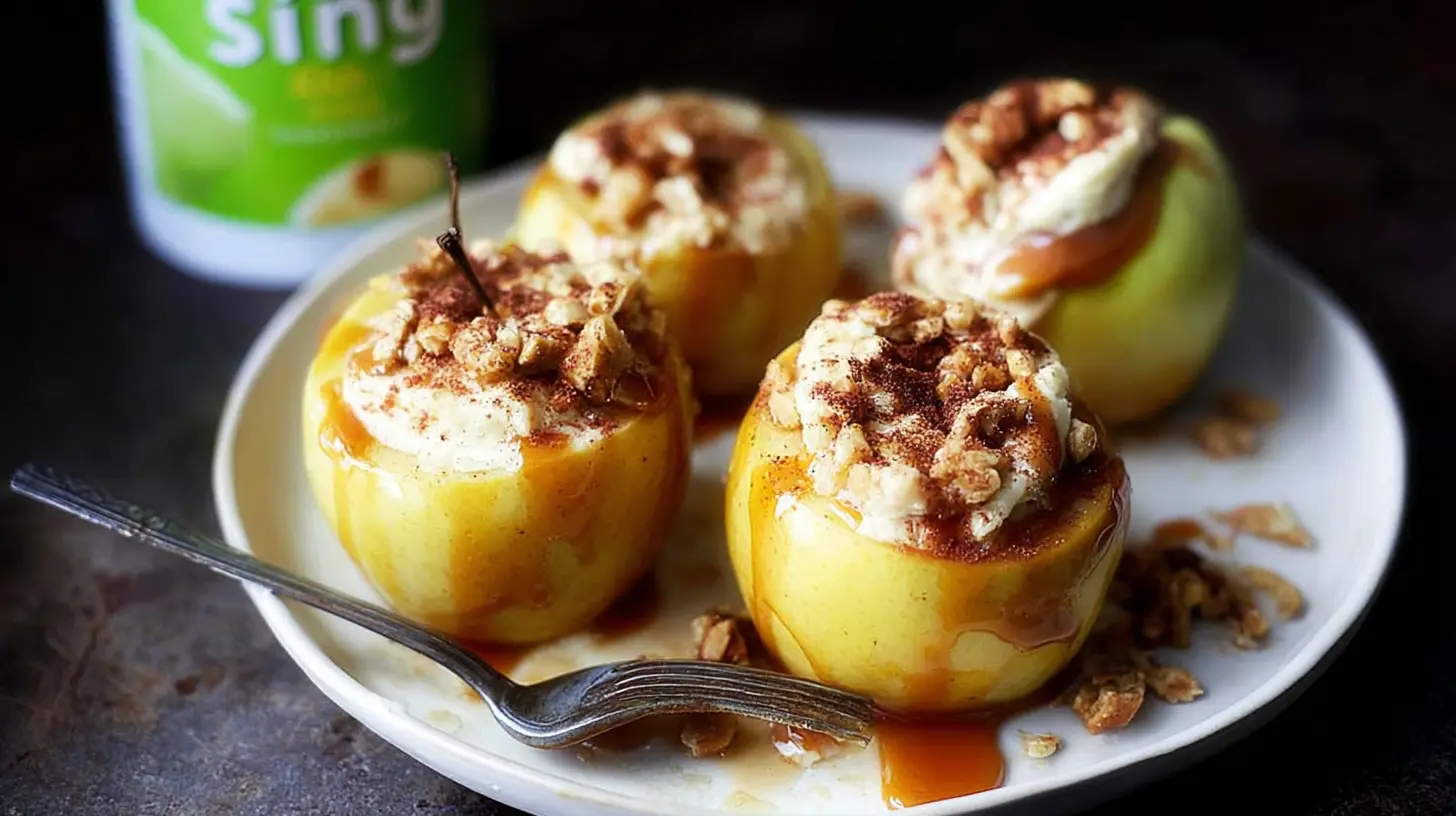
The crisp, cool air of autumn always brings a specific craving for me: the comforting warmth of baked apples. But let’s be honest, sometimes a plain baked apple, while lovely, can feel a touch… understated. That’s where my love affair with cheesecake stuffed baked apples began. Imagine the tender, sweet flesh of a perfectly baked apple, cradling a creamy, tangy cheesecake filling, perhaps with a hint of spice or a crunchy topping. It’s a dessert that feels both wholesome and decadent, a true showstopper that’s surprisingly approachable. Over the years, I’ve experimented with countless variations, and today, I’m thrilled to share what I consider the absolute best ways to create these delightful treats.
Why You’ll Love This Dish
If you’re on the hunt for a dessert that marries cozy comfort with gourmet flair, look no further. Cheesecake Stuffed Baked Apples hit all the right notes. They’re incredibly versatile, offering endless possibilities for seasonal flavor combinations. Picture these as the grand finale to a holiday meal, a special treat for a family brunch, or simply a delightful way to elevate a weeknight dessert. The best part? Despite their impressive appearance, they’re surprisingly simple to make, giving you that “effortlessly elegant” vibe without all the fuss. Plus, they perfectly balance the natural sweetness and slight tartness of apples with the rich, creamy texture of cheesecake – a combination that’s truly irresistible.
> “I made these for a dinner party last weekend, and they were an absolute smash! Everyone thought I’d spent hours, but they came together so easily. The cheesecake filling inside the warm apple? Pure genius!”
The Cooking Process Explained
Making Cheesecake Stuffed Baked Apples involves a few straightforward steps: first, you’ll select and prepare your apples, carefully coring them to create a cavity. Next comes the star of the show – whipping up that luscious cheesecake filling. This gets spooned generously into the cored apples. Finally, they’re baked until the apples are tender and the filling is set and lightly golden. The beauty of this recipe lies in its simplicity, allowing the natural flavors to shine. Depending on the variety of apple and the depth of the core, the baking time can vary, so a little watchful eye helps ensure perfection.
What You’ll Need
To embark on this delightful dessert adventure, gather these key ingredients.
For the Apples:
- 4 large baking apples: (Choose from Honeycrisp, Fuji, Gala, Granny Smith, or Pink Lady – see variations for why each is a great choice)
- 2 tablespoons unsalted butter, melted
- 1 teaspoon ground cinnamon
- 1/4 teaspoon ground nutmeg
- 2 tablespoons brown sugar (light or dark, optional, for apple exterior)
For the Classic Cheesecake Filling:
- 8 oz (1 block) cream cheese, softened
- 1/4 cup granulated sugar
- 1 large egg yolk
- 1 teaspoon vanilla extract
- 2 tablespoons sour cream
- Pinch of salt
For the Graham Cracker Crumble Topping (Optional but Recommended):
- 1/4 cup graham cracker crumbs
- 1 tablespoon brown sugar
- 1 tablespoon unsalted butter, melted
Directions to Follow
Let’s get those delectable apples baking! Follow these steps for perfect results:
- Prep the Apples: Preheat your oven to 375°F (190°C). Wash the apples thoroughly. Using an apple corer or a small knife, carefully core each apple, leaving about 1/2 inch at the bottom to create a stable cup for the filling. Don’t go all the way through! You can peel the apples if you prefer, but I usually leave the skin on for texture and presentation.
- Season the Apples: In a small bowl, combine the melted butter, cinnamon, nutmeg, and brown sugar (if using). Brush or rub this mixture evenly over the outside and inside of each cored apple. Place the apples in a baking dish that’s just large enough to hold them snugly.
- Prepare the Cheesecake Filling: In a medium bowl, beat the softened cream cheese with granulated sugar until smooth and creamy. Add the egg yolk, vanilla extract, sour cream, and a pinch of salt, beating until just combined. Don’t overmix.
- Stuff the Apples: Carefully spoon the cheesecake filling into the cavity of each apple, mounding it slightly at the top.
- Make the Crumble (if using): In a separate small bowl, combine graham cracker crumbs, brown sugar, and melted butter. Mix until crumbly. Sprinkle this mixture over the top of the cheesecake filling in each apple.
- Bake: Pour about 1/4 cup of water into the bottom of the baking dish (this helps create steam for tender apples). Bake for 30-45 minutes, or until the apples are tender when pierced with a fork and the cheesecake filling is set and lightly golden. The cooking time will vary depending on the size and variety of your apples.
- Cool & Serve: Remove from the oven and let cool slightly on a wire rack before serving. The filling will firm up as it cools.
How to Serve It
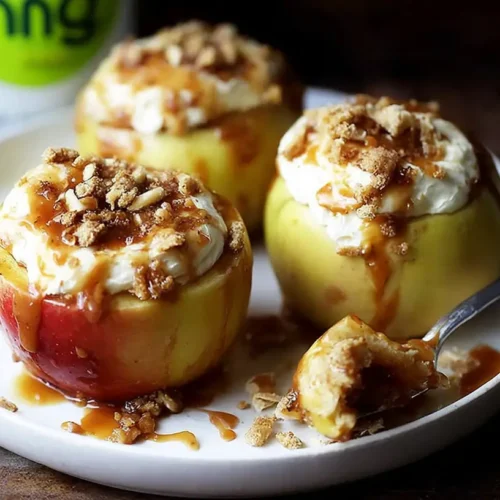
These Cheesecake Stuffed Baked Apples are a dessert all on their own, but a few garnishes can truly elevate the experience. For a simple yet elegant presentation, a dusting of powdered sugar or a drizzle of caramel sauce works wonders. A dollop of fresh whipped cream or a scoop of vanilla bean ice cream melting over the warm apple and creamy filling is simply divine. For an added crunch, consider sprinkling some toasted chopped pecans or walnuts just before serving. They’re perfect served warm, allowing the flavors to meld beautifully.
Keeping Leftovers Fresh
Should you have any glorious leftovers (a rare occurrence in my house!), they store beautifully. Once completely cooled, transfer the apples to an airtight container. They will keep in the refrigerator for up to 3-4 days.
To Reheat: For best results, gently reheat them in the oven at 300°F (150°C) for about 10-15 minutes, or until warmed through, to maintain the apple’s texture and prevent the filling from becoming rubbery. You can also microwave them for 30-60 seconds, but be aware the apple might soften more, and the crumble topping might lose crispness.
Freezing: Freezing is possible, though the apple’s texture might become a little mushier upon thawing. Bake the apples as directed, then let them cool completely. Wrap each apple individually in plastic wrap, then an additional layer of foil. Freeze for up to 1 month. Thaw overnight in the refrigerator and reheat gently in the oven.
Pro Chef Tips
- Choose the Right Apple: Not all apples are created equal for baking! Look for firm, slightly tart varieties that hold their shape well, such as Honeycrisp, Fuji, Gala, Granny Smith, or Pink Lady. Avoid really soft, mealy apples.
- Don’t Overmix the Filling: When preparing the cheesecake filling, mix until just combined. Overmixing can incorporate too much air, leading to cracks in the filling.
- Water in the Baking Dish: Adding a little water to the bottom of your baking dish creates a steamy environment, which helps the apples bake more evenly and become wonderfully tender without drying out.
- Test for Doneness: An apple is perfectly baked when a fork or knife slides into its flesh with minimal resistance but still holds its shape. The cheesecake filling should be set in the center.
Creative Twists
Here are four fantastic varieties to inspire your next batch of Cheesecake Stuffed Baked Apples:
- Classic Cinnamon-Spice: This is your foundational recipe, using a robust baking apple (like a Honeycrisp or Fuji) with the classic cheesecake filling. The simple addition of cinnamon and nutmeg to the apple’s exterior enhances its natural warmth. A sprinkle of graham cracker crumble on top adds irresistible texture.
- Caramel Pecan Delight: Start with a slightly tart apple like a Granny Smith to balance the richness. Before baking, drizzle a tablespoon of caramel sauce into the bottom of the cored apple. Stuff with the cheesecake filling, then top with a mix of chopped pecans and a little more caramel sauce. This one is pure indulgence!
- Cranberry Orange Zest: Perfect for the holidays! Use a Gala or Pink Lady apple. To the cheesecake filling, add 1 tablespoon of orange zest and 1/4 cup of dried cranberries (chopped if large). Skip the graham cracker topping. Instead, once baked, drizzle with a simple glaze made from powdered sugar and a touch of orange juice.
- Maple Walnut Crunch: A truly autumnal treat. Opt for a Honeycrisp. Add 1 tablespoon of maple syrup to the cheesecake filling. For the topping, combine chopped walnuts with a pinch of cinnamon and a drizzle of maple syrup, then sprinkle over the stuffed apples before baking. The walnuts toast beautifully, offering a fantastic crunch.
Your Questions Answered
FAQ
Q: Can I make these ahead of time?
A: You can prepare the apples by coring them and making the cheesecake filling up to a day in advance. Store the cored apples in water with a splash of lemon juice to prevent browning, and keep the filling covered in the refrigerator. Assemble and bake just before serving for the best results.
Q: What if I don’t have an apple corer?
A: No problem! You can use a small sharp paring knife and carefully cut around the core, then use a spoon to scoop it out. Be gentle not to cut through the bottom of the apple.
Q: Can I use light cream cheese?
A: Yes, you can use light cream cheese, but the filling might be slightly less rich and creamy. Avoid fat-free cream cheese as it can affect the texture and stability of the filling when baked.
Q: My cheesecake filling cracked. What happened?
A: Cracks in the filling often occur from overmixing the cream cheese mixture or baking at too high a temperature. Overmixing incorporates too much air, which expands then contracts, causing cracks. Baking too hot can also cause the outside to set too quickly while the inside is still expanding. Ensure your cream cheese is very soft, beat just until smooth, and don’t stray from the recommended oven temperature. Even if it cracks, it will still taste delicious!
Decadent Cheesecake-Stuffed Baked Apples
Equipment
- Oven
- Apple Corer or Small Knife
- Small Bowl
- Baking Dish
- Medium Bowl
Ingredients
Main Ingredients
- 4 large firm baking apples Honeycrisp, Gala, Fuji, or Granny Smith
- 4 oz cream cheese half a block, softened
- 1/4 cup granulated sugar plus 1 tablespoon for apples
- large egg yolk
- 1/2 teaspoon vanilla extract
- 1/2 teaspoon ground cinnamon plus a pinch for apples
- 2 tablespoons butter melted
Optional Topping
- 1/4 cup crushed graham cracker crumbs or chopped pecans
Instructions
Preparation
- Preheat your oven to 375°F (190°C), then wash and dry the apples.
- Core each apple carefully, leaving about 1/2 inch at the bottom to form a cup.
- Mix 1 tablespoon of granulated sugar with a pinch of cinnamon, then brush the cored apples with melted butter and sprinkle with the sugar-ccinnamon mix before placing them in a baking dish.
Cheesecake Filling
- In a medium bowl, beat softened cream cheese with 1/4 cup granulated sugar until smooth.
- Stir in the egg yolk and vanilla extract until just combined.
- Gently fold in 1/2 teaspoon of ground cinnamon.
Assembly and Baking
- Spoon the cheesecake mixture generously into each hollowed apple.
- Sprinkle crushed graham cracker crumbs or chopped pecans over the filling, if desired.
- Pour 1/4 cup of water into the baking dish then bake for 30-40 minutes until apples are tender and filling is golden.
- Let the apples cool slightly before serving; they are delicious warm or at room temperature.