The afternoon bell rings, and almost in sync, the rumble of hungry tummies begins. I’ve been there countless times – kids bursting through the door, eyes wide with the universal question: “What’s there to eat?” For years, I found myself scrambling, sometimes resorting to less-than-ideal options just to satisfy the immediate demand. But over time, I’ve discovered that with a little foresight and a few clever strategies, after-school snack time can be transformed from a daily struggle into a smooth, even enjoyable, part of the routine. It’s all about preparation, and I’m excited to share the three smart hacks that changed my snack game forever.
Why You’ll Love These Snack Prep Hacks
Let’s be honest, who doesn’t want less stress and more ease in their daily life? These smart prep hacks for after-school snacks aren’t just about food; they’re about reclaiming your afternoons, infusing a bit more health into your kids’ diets, and perhaps even teaching them a thing or two about proactive choices. You’ll quickly see why these aren’t just tips, but game-changers:
- Reduces “Hangry” Moments: When snacks are ready, there’s no waiting, no meltdown. Immediate gratification for hungry kids means calmer afternoons for everyone.
- Encourages Healthier Choices: With nutritious options readily available, your kids are far more likely to grab a fruit or veggie than dig for processed quick fixes.
- Saves Time (and Sanity): Batch prepping means you spend a concentrated block of time once (or twice) a week, freeing up those precious minutes when school lets out.
- Empowers Kids: When kids can easily grab their own prepped snacks, it fosters independence and helps them learn about portion control and healthy eating.
- Budget-Friendly: Less impulse buying of pre-packaged, single-serve snacks often translates to savings on your grocery bill.
> “These snack prep hacks have genuinely transformed our afternoons! No more frantic searches for food, and my kids are actually eating more fruits and veggies because they’re so accessible. It’s a lifesaver for busy parents.”
How These Smart Prep Hacks Come Together
The beauty of these hacks lies in their simplicity and adaptability. It’s not about complicated recipes, but rather smart organization and a little bit of upfront effort. Think of it as setting up a snack system. You’ll dedicate some time (maybe on a Sunday afternoon) to cleaning, chopping, portioning, and organizing. The goal is to make healthy options as accessible and appealing as possible, so when those inevitable hunger pangs strike, the good stuff is the easiest stuff to reach for. We’re talking about creating snack zones, pre-portioned goodness, and making the most of your pantry and fridge space.
What You’ll Need
Hack 1: The “Grab-and-Go” Snack Station
- Clear plastic containers or small airtight bags: For portioning fruits, veggies, and other small items.
- A designated shelf or drawer in the fridge: Easily accessible for kids.
- A designated pantry bin or basket: For non-refrigerated items.
Hack 2: Power-Packed Mini Meals
- Muffin tins: Perfect for baking egg muffins or mini frittatas.
- Small glass jars with lids (like Mason jars): Great for yogurt parfaits, overnight oats, or layered fruit cups.
- Food processor (optional but helpful): For making hummus, energy bites, or pesto quickly.
Hack 3: Freezer-Friendly Favorites
- Freezer-safe bags or containers: Essential for storing muffins, energy bites, or pre-made smoothie packs.
- Ice cube trays: Ideal for freezing smoothie components or yogurt drops.
- Parchment paper: Prevents sticky items from freezing together.
(Optional: Kid-friendly knives and cutting boards if involving children in prep.)
Directions to Follow: Implementing Your Smart Prep Hacks
Here’s how to put these three game-changing hacks into action, step-by-step:
Hack 1: Create a “Grab-and-Go” Snack Oasis
- Weekly Wash & Chop: Dedicate 30-60 minutes once a week (e.g., Sunday afternoon) to thoroughly wash and chop a variety of fruits and vegetables. Think carrot sticks, cucumber slices, bell pepper strips, apple wedges (toss with a little lemon juice to prevent browning), grapes, berries, and melon cubes.
- Portion and Pack: Divide these prepped items into small, individual, kid-friendly containers or reusable snack bags.
- Designate a Spot: Clear out a low shelf in your refrigerator and a dedicated bin or basket in your pantry. Label these as the “Snack Station.”
- Stock It Up: Fill the fridge shelf with your pre-portioned fruits and veggies, cheese sticks, hard-boiled eggs, and yogurt cups. Stock the pantry bin with whole-grain crackers, small bags of nuts (if no allergies), dried fruit, or homemade granola bars.
- Educate the Kids: Show your children their new snack station. Explain that when they’re hungry after school, this is their first stop for healthy options.
Hack 2: Master Mid-Week Power-Packed Bites
- Batch Bake: On your prep day, bake a batch of healthy muffins (banana, apple, or zucchini work well), mini frittatas using a muffin tin, or energy bites (oats, nut butter, honey, and mix-ins). These often yield multiple servings that last for several days.
- Assemble Layered Treats: Prepare overnight oats or yogurt parfaits in small glass jars. Layer oats, milk, and fruit for overnight oats, or yogurt, granola, and berries for parfaits. These are ready to grab directly from the fridge.
- Whip Up Dips: Make a batch of homemade hummus, guacamole (squeeze lime on top to prevent browning), or a healthy cream cheese dip for dipping veggies or crackers. Store in an airtight container.
Hack 3: Unleash the Power of Your Freezer
- Smoothie Packs: Place pre-portioned fruit (bananas, berries, spinach), and sometimes even a scoop of protein powder, into individual freezer bags. When it’s snack time, just dump the bag into a blender with liquid (milk, water, or juice) and blend.
- Frozen Bites: Freeze leftover fruit (grapes, blueberries, banana slices) for a naturally sweet, cold treat. You can also freeze yogurt in dollops on parchment paper for “yogurt buttons.”
- Freeze Baked Goods: Muffins, pancakes, or even pre-made breakfast burritos can be individually wrapped and frozen. Thaw in the microwave or toaster oven for a quick, substantial snack.
Best Ways to Enjoy Your Prepped Snacks
The beauty of having after-school snacks prepped and ready is that the serving is as simple as grabbing. However, you can make the experience even better:
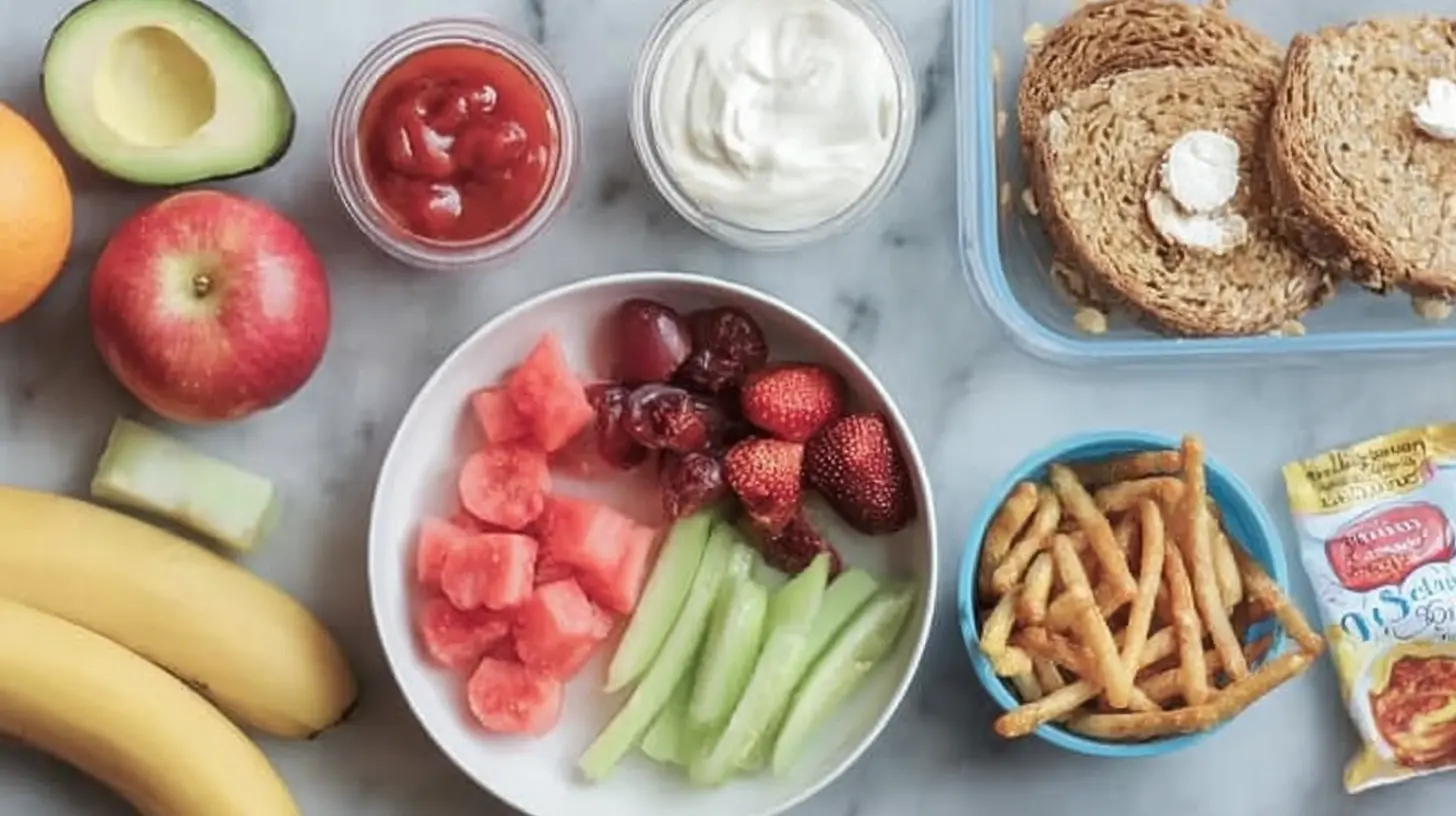
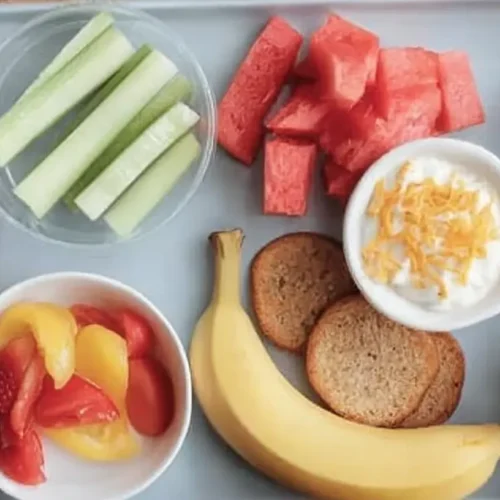
- The “Snack Board” Experience: Occasionally, instead of individual portions, lay out a small “snack board” with a selection of your prepped fruits, veggies, cheese, and a dip. This encourages variety and makes snack time feel a bit special.
- Hydration Station: Always serve snacks with a glass of water, or perhaps a small milk box or diluted juice, to ensure kids are well-hydrated.
- Mindful Munching: Encourage kids to eat their snacks at the kitchen table rather than in front of a screen. This helps them acknowledge their hunger and fullness signals.
- Themed Days: If you’re feeling creative, you can even have “theme days” for your snack station – “Fruit Fiesta Friday,” “Veggie Power Wednesday,” etc., to make it more engaging.
Storage and Reheating Tips
Proper storage is key to making these hacks work and ensuring food safety.
- Refrigerated Items: Pre-chopped fruits and vegetables, hard-boiled eggs, cheese sticks, yogurt, and dips should be stored in airtight containers in the refrigerator for 3-5 days. Always check for any signs of spoilage before consuming.
- Pantry Items: Granola bars, nuts, dried fruit, and crackers should be stored in airtight containers or their original packaging in a cool, dry pantry for their recommended shelf life.
- Baked Goods (Refrigerated): Muffins and mini frittatas can be stored in an airtight container at room temperature for a day or two, or in the refrigerator for up to 4-5 days.
- Freezer Items:
- Smoothie Packs & Frozen Fruit/Yogurt: These can be stored in the freezer for up to 1 month. Ensure bags are sealed tightly to prevent freezer burn.
- Frozen Baked Goods: Individually wrapped muffins or pancakes can be frozen for up to 2-3 months. Reheat in the microwave for 30-60 seconds, or in a toaster oven until warmed through.
- Food Safety Note: Always encourage children to wash their hands before grabbing snacks. If you’re packing snacks to take to extracurriculars, use an insulated bag with an ice pack for perishable items.
Tricks for Success
- Involve the Kids: Let your children help with washing produce, mixing ingredients for energy bites, or portioning out their own snacks. They’re more likely to eat what they helped prepare.
- Rotate Options: Don’t stick to the exact same snacks every week. Offer variety to keep things interesting and ensure a broader range of nutrients.
- Batch Cook Smarter: When making dinner, double up on ingredients that can be repurposed. For instance, cook extra chicken breast for wraps or salads, or roast extra sweet potatoes for a snack.
- Label Everything: Especially for freezer items, label containers or bags with the date and contents.
- Keep it Visible: If healthy snacks are out of sight, they’re out of mind. Make sure your snack station is prominent and easy for kids to see and access.
- Prep While You Cook: If you’re already in the kitchen cooking dinner, use that time to quickly wash and chop some snack veggies. You’re already messy, so why not?
Recipe Variations
While these hacks focus on strategy, you can get creative with the snacks themselves:
- Hummus Flavors: Make different types of hummus – roasted red pepper, garlic, or even a sweet dessert hummus with cocoa powder.
- Muffin Mania: Experiment with various muffin recipes: whole wheat blueberry, carrot and raisin, or savory cheese and herb muffins.
- Energy Bite Blends: Beyond the classic oat and nut butter, try adding shredded coconut, mini chocolate chips, chia seeds, flax seeds, or different dried fruits (cranberries, apricots).
- Yogurt Parfait Personalization: Offer a “yogurt bar” with plain yogurt and various toppings like granola, fresh fruit, a sprinkle of cinnamon, or a drizzle of honey.
- Pinwheel Wraps: Spread cream cheese or hummus on a whole-wheat tortilla, layer with lunch meat or veggies, roll tightly, and slice into pinwheels for a fun, savory bite.
Your Questions Answered
Q1: How long does pre-chopped fruit and veg actually stay fresh?
A1: Generally, most pre-chopped fruits and vegetables like carrots, celery, bell peppers, and harder fruits (apples, melons) will stay fresh in an airtight container in the fridge for about 3-5 days. Softer fruits like berries are best prepped closer to consumption, though they can often last 2-3 days. Adding a splash of lemon juice to cut apples can help prevent browning.
Q2: My kids are picky. How can I get them to eat these healthier snacks?
A2: Involving them in the process is a huge step! Let them pick which fruits and veggies to buy, help wash, or even arrange a “snack plate.” Make it fun – use cookie cutters to make shapes out of cheese or cucumber, or offer dips. Sometimes, presenting smaller portions and offering choices (e.g., “Do you want carrots or cucumber today?”) can increase acceptance. Don’t give up; repeated exposure often works!
Q3: What if I don’t have time for a big weekly prep session?
A3: Start small! Even 15-20 minutes can make a difference. Instead of chopping everything, just wash a bunch of apples and grapes. Or, focus on just one hack per week until it becomes a habit. Remember, any amount of prep is better than scrambling last minute. You can also leverage store-bought pre-chopped veggies or pre-portioned items to save time when you’re really in a pinch.
Peanut Butter Banana Bites
Equipment
- knife
- cutting board
Ingredients
Main Ingredients
- 1 ripe banana
- 2 tablespoons peanut butter
- 1 tablespoon mini chocolate chips
Instructions
Instructions
- Slice the banana into 1/2-inch thick rounds.
- Spread a small amount of peanut butter onto one side of each banana slice.
- Sprinkle a few mini chocolate chips on top of the peanut butter.
- Serve immediately.