Once upon a time, my kitchen smelled like a bakery, but my counter was a battlefield. I loved the idea of cheesecake, but the fuss of water baths and cracked tops often left me deflated. Then, I stumbled upon a revelation: cheesecake in cookie form! It was pure genius. All the creamy, tangy goodness I adored, but in a handheld, fuss-free package. And honestly, discovering how incredibly simple they are to make was a game-changer. If you, like me, appreciate a dessert that delivers maximum flavor with minimal stress, then get ready to meet your new favorite baked good.
Why You’ll Love This Dish
Let’s face it, sometimes you want that rich, luxurious taste of cheesecake without committing to an entire cake or spending hours in the kitchen. That’s precisely where these cheesecake cookies shine! They’re remarkably quick to put together, making them perfect for those spontaneous dessert cravings or when you need a crowd-pleasing treat in a hurry. Plus, they offer a delightful textural contrast – a tender, chewy cookie base giving way to a creamy, tangy cheesecake center. They’re also incredibly portable, ideal for sharing at potlucks, school events, or even just stashing in your lunchbox for a delightful mid-day treat.
> “I thought making cheesecake was always a huge project until I tried these cookies! They’re ridiculously easy and taste like a dream. My family devoured them!” – A Happy Home Baker
How This Recipe Comes Together
You’re in for a treat because the beauty of these cheesecake cookies lies in their straightforward approach. First, we’ll create a simple, yet delicious, cookie dough that forms the base and top of our treats. Think of it as a buttery, slightly crumbly hug for the cheesecake filling. Next, we’ll whip up a quick and creamy cheesecake mixture – no baking required for the filling itself before it goes into the cookie. Finally, we’ll assemble these delightful morsels, sandwiching the filling between two dollops of cookie dough, and then bake them to golden perfection. It’s truly just two main components coming together for a fantastic result.
What You’ll Need
Ingredient List
- All-purpose flour: The backbone of our cookie dough.
- Baking soda: Helps our cookies rise just enough to be tender.
- Salt: A pinch enhances all the other flavors.
- Unsalted butter: Softened, for that rich, tender cookie texture.
- Granulated sugar: Sweetens the cookie and helps with browning.
- Egg: Binds the cookie dough together.
- Vanilla extract: Essential for warmth and aroma in both cookie and filling.
- Cream cheese: Full-fat, softened, is key for that classic tangy cheesecake taste and creamy texture.
- Powdered sugar: Sweetens the cheesecake filling to perfection and ensures a smooth consistency.
Directions to Follow
- Prepare the Cookie Dough: In a medium bowl, whisk together the flour, baking soda, and salt. Set aside. In a large bowl, cream together the softened butter and granulated sugar until light and fluffy. Beat in the egg and vanilla extract until well combined. Gradually add the dry ingredients to the wet ingredients, mixing on low speed until just combined. Do not overmix.
- Make the Cheesecake Filling: In a separate medium bowl, beat the softened cream cheese until smooth. Gradually add the powdered sugar and vanilla extract, beating until creamy and well combined.
- Assemble the Cookies: Preheat your oven to 350°F (175°C). Line a baking sheet with parchment paper. Take small, rounded spoonfuls (about 1 tablespoon) of the cookie dough and flatten them slightly. Place about half of these flattened dough pieces onto the prepared baking sheet, leaving some space between them. These will be the bases.
- Fill and Cover: Spoon about 1-2 teaspoons of the cheesecake filling onto the center of each cookie dough base. Take the remaining cookie dough and gently flatten small pieces over the top of the cheesecake filling, sealing the edges as best you can to completely enclose the filling.
- Bake: Bake for 10-12 minutes, or until the edges are lightly golden. The centers might still look a little soft; that’s okay, they will set as they cool.
- Cool: Let the cookies cool on the baking sheet for a few minutes before transferring them to a wire rack to cool completely. The filling will firm up as they cool.
How to Serve It
These cheesecake cookies are incredibly versatile! They’re best enjoyed once they’ve had a chance to cool completely, allowing the cheesecake filling to set properly. Serve them as a delightful end to any meal, alongside a warm cup of coffee or tea. For a fancier presentation, consider dusting them with a little extra powdered sugar or a drizzle of chocolate sauce. They’re also fantastic straight from the fridge – the chilled filling is particularly refreshing. If you’re feeling adventurous, you could even serve them with a small dollop of fresh berries or a light berry compote on the side to cut through the richness.
The Best Way to Save Extras
Cheesecake cookies are a treat that keeps on giving! To store them, place them in an airtight container. They’ll keep well at room temperature for up to 2 days, though I find the cheesecake filling is best when kept chilled. For optimal freshness and to maintain the creamy texture of the filling, refrigerate them for up to 5-7 days.
To freeze: Once completely cooled, place the cookies in a single layer on a baking sheet and freeze for about an hour until firm. Then, transfer them to a freezer-safe bag or container, separating layers with parchment paper, for up to 2 months. Thaw them in the refrigerator before serving.
Helpful Cooking Tips
- Softened Ingredients are Key: Make sure your butter and cream cheese are truly softened to room temperature. This ensures a smooth, lump-free cookie dough and a creamy cheesecake filling. Otherwise, you’ll end up with lumps, and the texture won’t be as pleasant.
- Don’t Overmix: When combining the wet and dry ingredients for the cookie dough, mix only until just combined. Overmixing can develop the gluten in the flour, leading to tougher cookies.
- Seal the Deal: When enclosing the cheesecake filling with the cookie dough, make sure to seal the edges well. This prevents the filling from oozing out during baking.
- Chill if Sticky: If your cookie dough feels too sticky to handle easily, pop it in the refrigerator for 15-20 minutes. This will make it much easier to form the cookies.
- Cool Completely: Resist the urge to dive into warm cookies. The cheesecake filling needs time to set as it cools, so patience will be rewarded with a perfectly creamy center.
Creative Twists
- Lemon Zest Boost: For an extra zing, add 1 teaspoon of lemon zest to the cheesecake filling. It brightens the flavor beautifully.
- Chocolate Swirl: Melt a tablespoon of chocolate chips and swirl a tiny bit into the cheesecake filling before enclosing it in the dough for a marbled effect.
- Fruitful Delights: A tiny dollop of fruit preserve (like raspberry or cherry) can be added on top of the cheesecake filling before sealing, adding a burst of fruity flavor.
- Different Cookie Bases: While this recipe uses a standard cookie dough, you could experiment with a chocolate chip cookie dough or even a snickerdoodle-inspired dough for a unique flavor profile.
- Nutty Crumble: Before baking, sprinkle a few chopped nuts (pecans or walnuts) over the top of each cookie for added texture and flavor.
Your Questions Answered
FAQ
Q: Can I use low-fat cream cheese for the filling?
A: While you can, for the best and creamiest results, I highly recommend using full-fat cream cheese. Low-fat versions tend to have more water content and can result in a less rich and firm filling.
Q: My cookies spread too much. What did I do wrong?
A: This can happen if your butter was too soft (almost melted) when creaming, if you overmixed the dough, or if your oven temperature wasn’t quite right. Ensure your butter is just softened, mix only until combined, and check your oven’s accuracy. Chilling the formed cookies for 15 minutes before baking can also help prevent excessive spreading.
Q: How do I know when the cheesecake cookies are done baking?
A: The edges of the cookies should be lightly golden brown. The center might still look a little soft or slightly puffed, but don’t worry, the cheesecake filling will firm up as the cookies cool. Overbaking can lead to dry cookies and a rubbery filling.
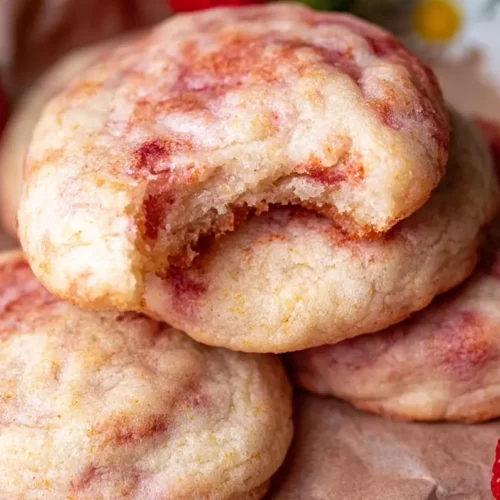
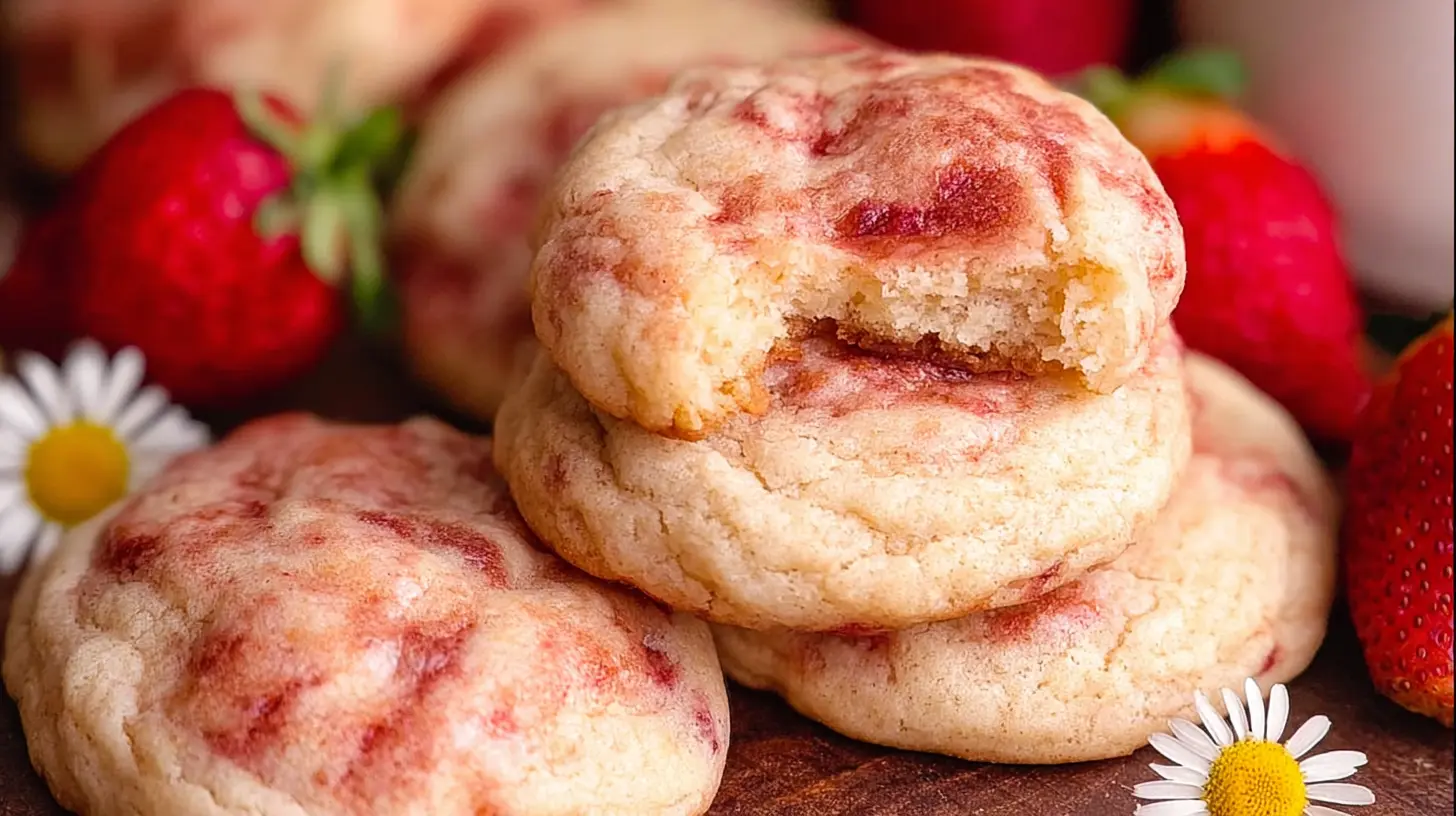
Lemon Raspberry Cheesecake Cookies
Equipment
- large bowl
- medium bowl
- electric mixer
- whisk
- plastic wrap
- baking sheets
- parchment paper
- wire rack
Ingredients
Cookie Dough
- 1 ½ cups All-purpose flour
- ½ cup Granulated sugar
- ½ cup Unsalted butter softened (1 stick)
- 4 oz Cream cheese softened (half of an 8oz block), full-fat recommended
- 1 large Egg yolk
- 1 teaspoon Vanilla extract
- 2 teaspoons Lemon zest
- ¼ teaspoon Salt
- ⅓ cup Fresh raspberries (chopped if large)
Instructions
Preparation
- In a large bowl, beat the softened butter and cream cheese together until smooth and creamy.
- Gradually add the granulated sugar, beating until light and fluffy. Mix in the egg yolk, vanilla extract, and lemon zest.
- In a separate medium bowl, whisk together the all-purpose flour and salt.
- Slowly add the dry ingredients to the wet ingredients, mixing on low speed until just combined.
- Gently fold in the fresh raspberries until evenly distributed.
- Cover the dough with plastic wrap and chill in the refrigerator for at least 30 minutes, or up to 2 hours.
Baking
- Preheat your oven to 350°F (175°C). Line baking sheets with parchment paper.
- Drop spoonfuls of dough (about 1.5 tablespoons each) onto the prepared baking sheets, leaving some space.
- Bake for 10-12 minutes, or until the edges are lightly golden and the centers are just set. Let cool before transferring to a wire rack.