Why Make These Creepy Eye Pies
You want your Halloween party to be amazing. These creepy eye pies are perfect. They look spooky and taste great. They are easy to make, even if you are new to baking. You can change them to suit your taste. Making them is fun for everyone.
How to Make Creepy Eye Pies
You will make a pie crust, then a vanilla pudding filling. After that, you will decorate them to look like eyeballs. It’s a simple process with big results.
Ingredients of Creepy Eye Pies
- For the Pie Crust:
- 2 ½ cups all-purpose flour
- 1 teaspoon salt
- 1 cup (2 sticks) unsalted butter, very cold and cut into cubes
- ½ cup ice water (or a little more)
- Optional: Black food coloring
- For the “Eyeball” Filling (Vanilla Pudding Base):
- ¾ cup granulated sugar
- ¼ cup cornstarch
- ¼ teaspoon salt
- 3 cups whole milk
- 2 large egg yolks
- 2 tablespoons unsalted butter
- 1 teaspoon vanilla extract
- For the “Iris” and “Pupil” Decorations:
- White frosting or whipped cream
- Green, blue, brown, or red food coloring gels (for iris)
- Black food coloring gel (for pupil)
- Red gel food coloring pen or thin brush with red food coloring (for “veins”)
- Optional Edible Decorations:
- Maraschino cherries or gummy eyeballs
- Edible glitter
Directions of Creepy Eye Pies
- Preparing the Spooky Crust
- Mix flour and salt in a large bowl. Add black food coloring if you want a dark crust.
- Add cold butter cubes. Cut the butter into the flour until it looks like coarse crumbs with some pea-sized butter pieces.
- Add ice water slowly, one tablespoon at a time. Mix gently until the dough just comes together. Do not overmix.
- Divide the dough into two flat discs. Wrap them in plastic wrap. Refrigerate for at least 30 minutes.
- Roll out one dough disc on a floured surface to a 12-inch circle. Place it in your pie plate. Trim and crimp the edges. Prick the bottom with a fork.
- Blind bake the crust if you want it crispier. Line with parchment paper, fill with pie weights, and bake at 375°F (190°C) for 15-20 minutes. Remove weights and parchment. Bake for 5-10 more minutes if needed. Let it cool.
- Creating the Brain-Teasingly Tasty Filling
- Whisk sugar, cornstarch, and salt in a saucepan.
- Slowly whisk in milk until smooth.
- Cook over medium heat. Stir constantly until it thickens and boils. Boil for 1 minute, stirring.
- Whisk egg yolks in a small bowl. Slowly pour about ½ cup of hot pudding into the yolks, whisking non-stop.
- Pour the egg yolk mixture back into the saucepan. Cook over medium-low heat. Stir constantly for 1-2 minutes until thick. Do not boil.
- Remove from heat. Stir in butter and vanilla.
- Pour the pudding into a bowl. Cover its surface directly with plastic wrap. Chill for at least 2-3 hours until set.
- Assembling Your Creepy Eye Pies
- Spoon the chilled pudding into the cooled pie crust. Spread it evenly.
- Spread a thin layer of white frosting or whipped cream over the pudding.
- Divide white frosting. Color portions with green, blue, brown, or red food coloring. Pipe or spread a colored circle in the center for the iris.
- Pipe a small black dot in the center of the iris for the pupil using black food coloring or frosting.
- Use a red gel food coloring pen or thin brush with red food coloring. Draw thin, squiggly lines from the iris onto the white frosting to make “veins.”
- Add edible glitter, a maraschino cherry, or a gummy eyeball if you wish.
- Refrigerate for at least 30 minutes before serving.
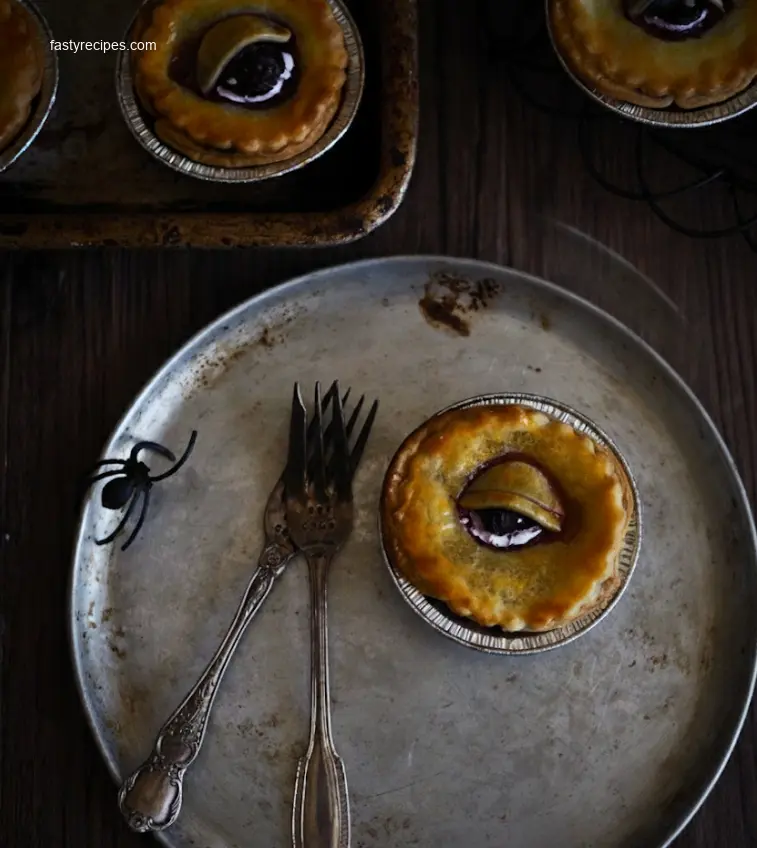
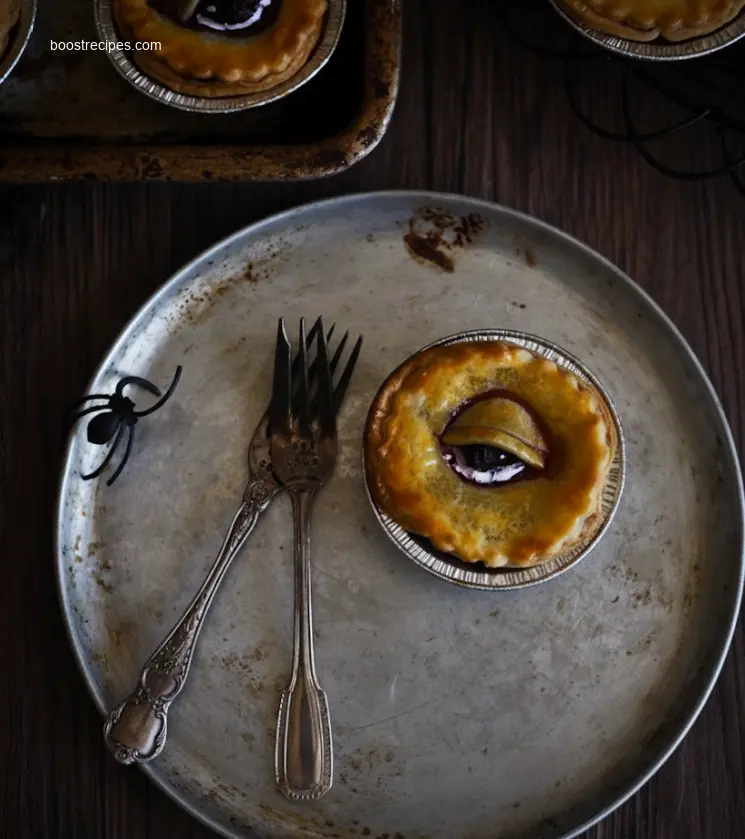
How to Serve Creepy Eye Pies
Place your finished pies on a spooky platter with spiderwebs or dry ice. For individual servings, use mini pie plates. Serve them as part of a Halloween dessert table with other treats.
How to Store Creepy Eye Pies
Store assembled pies covered in the refrigerator. They are best within 2-3 days. The crust might get soft, but they will still taste good.
Tips to Make Creepy Eye Pies
- Use very cold butter for a flaky crust.
- Do not overmix the dough.
- Chill dough and pudding fully. This is important for texture and handling.
- Practice drawing veins on paper first.
- Allow enough time for chilling and setting.
- Embrace small imperfections; they add to the creepy look.
Variation
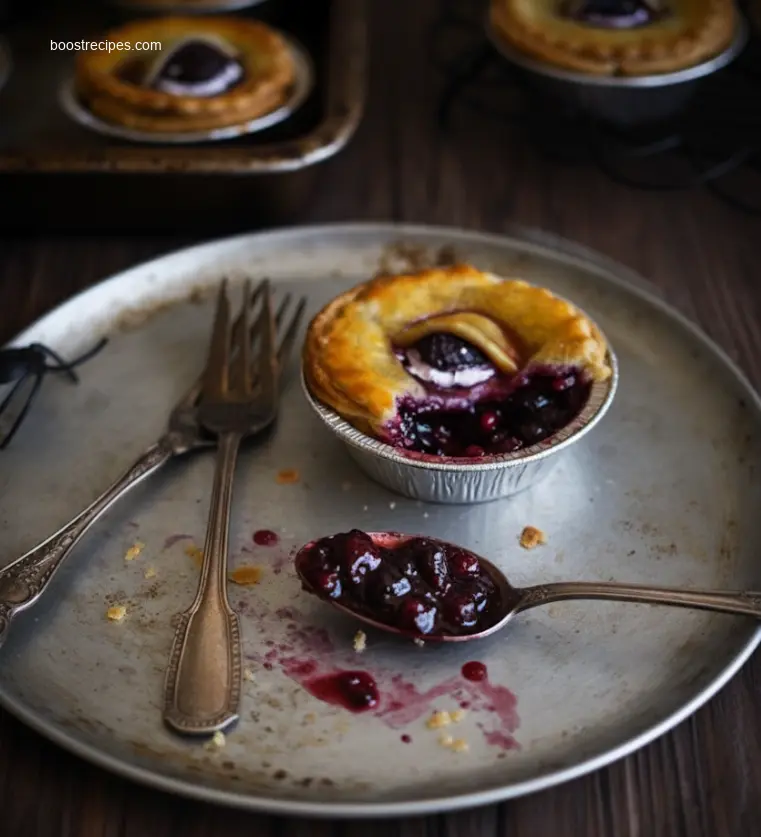
- Bloody Berry Pie: Use cherry or raspberry pie filling for a “bleeding” effect.
- Chocolatey Gaze: Use chocolate pudding for a richer pie.
- Monster Mash-Up: Use different colored crusts, like purple or grey.
- Eyeball Pops: Make small versions in muffin tins. Add a lollipop stick.
- Gummy Worms & Bugs: Put gummy worms or candy spiders around the pie.
FAQs
Q1: Can I make the pie crust and filling ahead of time for these Creepy Eye Pies?
Yes, you can make the pie crust dough 2-3 days before and keep it in the fridge. You can freeze it for a month. Make the vanilla pudding filling the day before and keep it covered in the fridge. This makes assembly easy.
Q2: What kind of pie plate is best for making Creepy Eye Pies?
A standard 9-inch pie plate works well for one large eye. For individual servings, use mini pie plates or tart pans. The size changes how creepy your pies look.
Q3: Are there any gluten-free options for these Creepy Eye Pies?
Yes! Use a good gluten-free all-purpose flour blend for the crust. Make sure the blend has xanthan gum, or add some. The filling is naturally gluten-free if you use cornstarch.
Creepy Eye Pies
Spook up your dessert table with these delightfully ghoulish Creepy Eye Pies! A flaky crust filled with sweet cherry pie filling, topped with a marshmallow ‘eyeball’ and a chocolate chip iris, perfect for Halloween treats.
Total Time: 35 mins
Yield: 6 mini pies 1x
Ingredients
Scale
1 pre-made pie crust, thawed
1 (21 oz) can cherry pie filling
6 large marshmallows
6 chocolate chips
Red food coloring gel
1 tablespoon milk
Instructions
1. Preheat your oven to 400°F (200°C).
2. Unroll the pie crust and cut out 6 individual circles using a cookie cutter or glass. You can re-roll scraps if needed.
3. Press each pie crust circle into a muffin tin or ramekin.
4. Fill each pie crust with approximately 2 tablespoons of cherry pie filling.
5. Bake for 12-15 minutes, or until the crust is golden brown.
6. While the pies are baking, prepare the ‘eyeballs’. Flatten each marshmallow slightly with your fingers.
7. Once pies are out of the oven and slightly cooled, place one flattened marshmallow on top of the cherry filling in each pie.
8. Return to the oven for 2-3 minutes, just until the marshmallows are lightly toasted and softened. Watch carefully to prevent burning.
9. Remove from oven. Immediately press one chocolate chip, pointed side down, into the center of each marshmallow to create the iris.
10. Using a thin brush or toothpick, draw small red “bloodshot” lines radiating from the chocolate chip onto the marshmallow with the red food coloring gel.
11. Let cool completely before serving your delicious Creepy Eye Pies.
Notes
For a richer flavor, you can add 1/4 teaspoon almond extract to the cherry pie filling before baking. These Creepy Eye Pies are a fantastic festive treat for Halloween parties or a fun baking project with kids. Yields 6 mini pies.
- Prep Time: 20 mins
- Cook Time: 15 mins
- Category: Dessert
- Method: Baking
- Cuisine: American
- Diet: Vegetarian
Nutrition
- Serving Size: 1 mini pie
- Calories: 280
- Sugar: 35g
- Sodium: 180mg
- Fat: 12g
- Saturated Fat: 3g
- Unsaturated Fat: 8g
- Trans Fat: 0g
- Carbohydrates: 40g
- Fiber: 2g
- Protein: 3g
- Cholesterol: 5mg
Creepy Eye Pies: How to Make 9 Ghoulish Goodies
Equipment
- Medium bowl
- 4-inch round cutter
- Cookie sheet
- Parchment paper
- Fork
- Cooling rack
- Small bowl
- Fine-tipped brush
Ingredients
Pie Ingredients
- 2 ea Refrigerated pie crusts (14.1 ounces each)
Filling
- 1 can Canned cherry pie filling (21 ounces)
- 0.25 tsp Almond extract
Egg wash
- 1 ea Egg
- 1 tbsp Water
Icing
- 1 cup Powdered sugar
- 1 tbsp Milk
- 1 dash Black food gel
- 1 dash Red food gel
Instructions
Prepping the pies
- Heat oven to 400°F (375°F for nonstick dark pan). Mix cherry pie filling and almond extract in a medium bowl.
- Unroll pie crusts and cut out using a 4-inch round cutter, making 9 circles from each crust. Place 9 circles on a parchment paper lined cookie sheet; press to flatten slightly.
- Brush edges of crust with egg wash. Place about 2 tablespoons of filling in the center of each circle.
Assembling and baking
- Top with remaining 9 crust circles. Crimp edges with a fork to seal and cut three small slits in the top of each pie.
- Bake for 18-20 minutes or until golden brown. Let cool slightly on a cooling rack.
- Make egg wash by whisking egg and water.
Icing the "eyes"
- In a small bowl, whisk powdered sugar and milk until smooth.
- Spoon about 1 tablespoon of icing on each pie, spreading in a circular motion to cover the top of the pie.
- Place 1 tiny drop of black food gel in the center of the pie for a pupil. With a fine-tipped brush, lightly drag red food gel out from the pupil to create bloodshot eyes.