A Delightful Scream for Your Taste Buds!
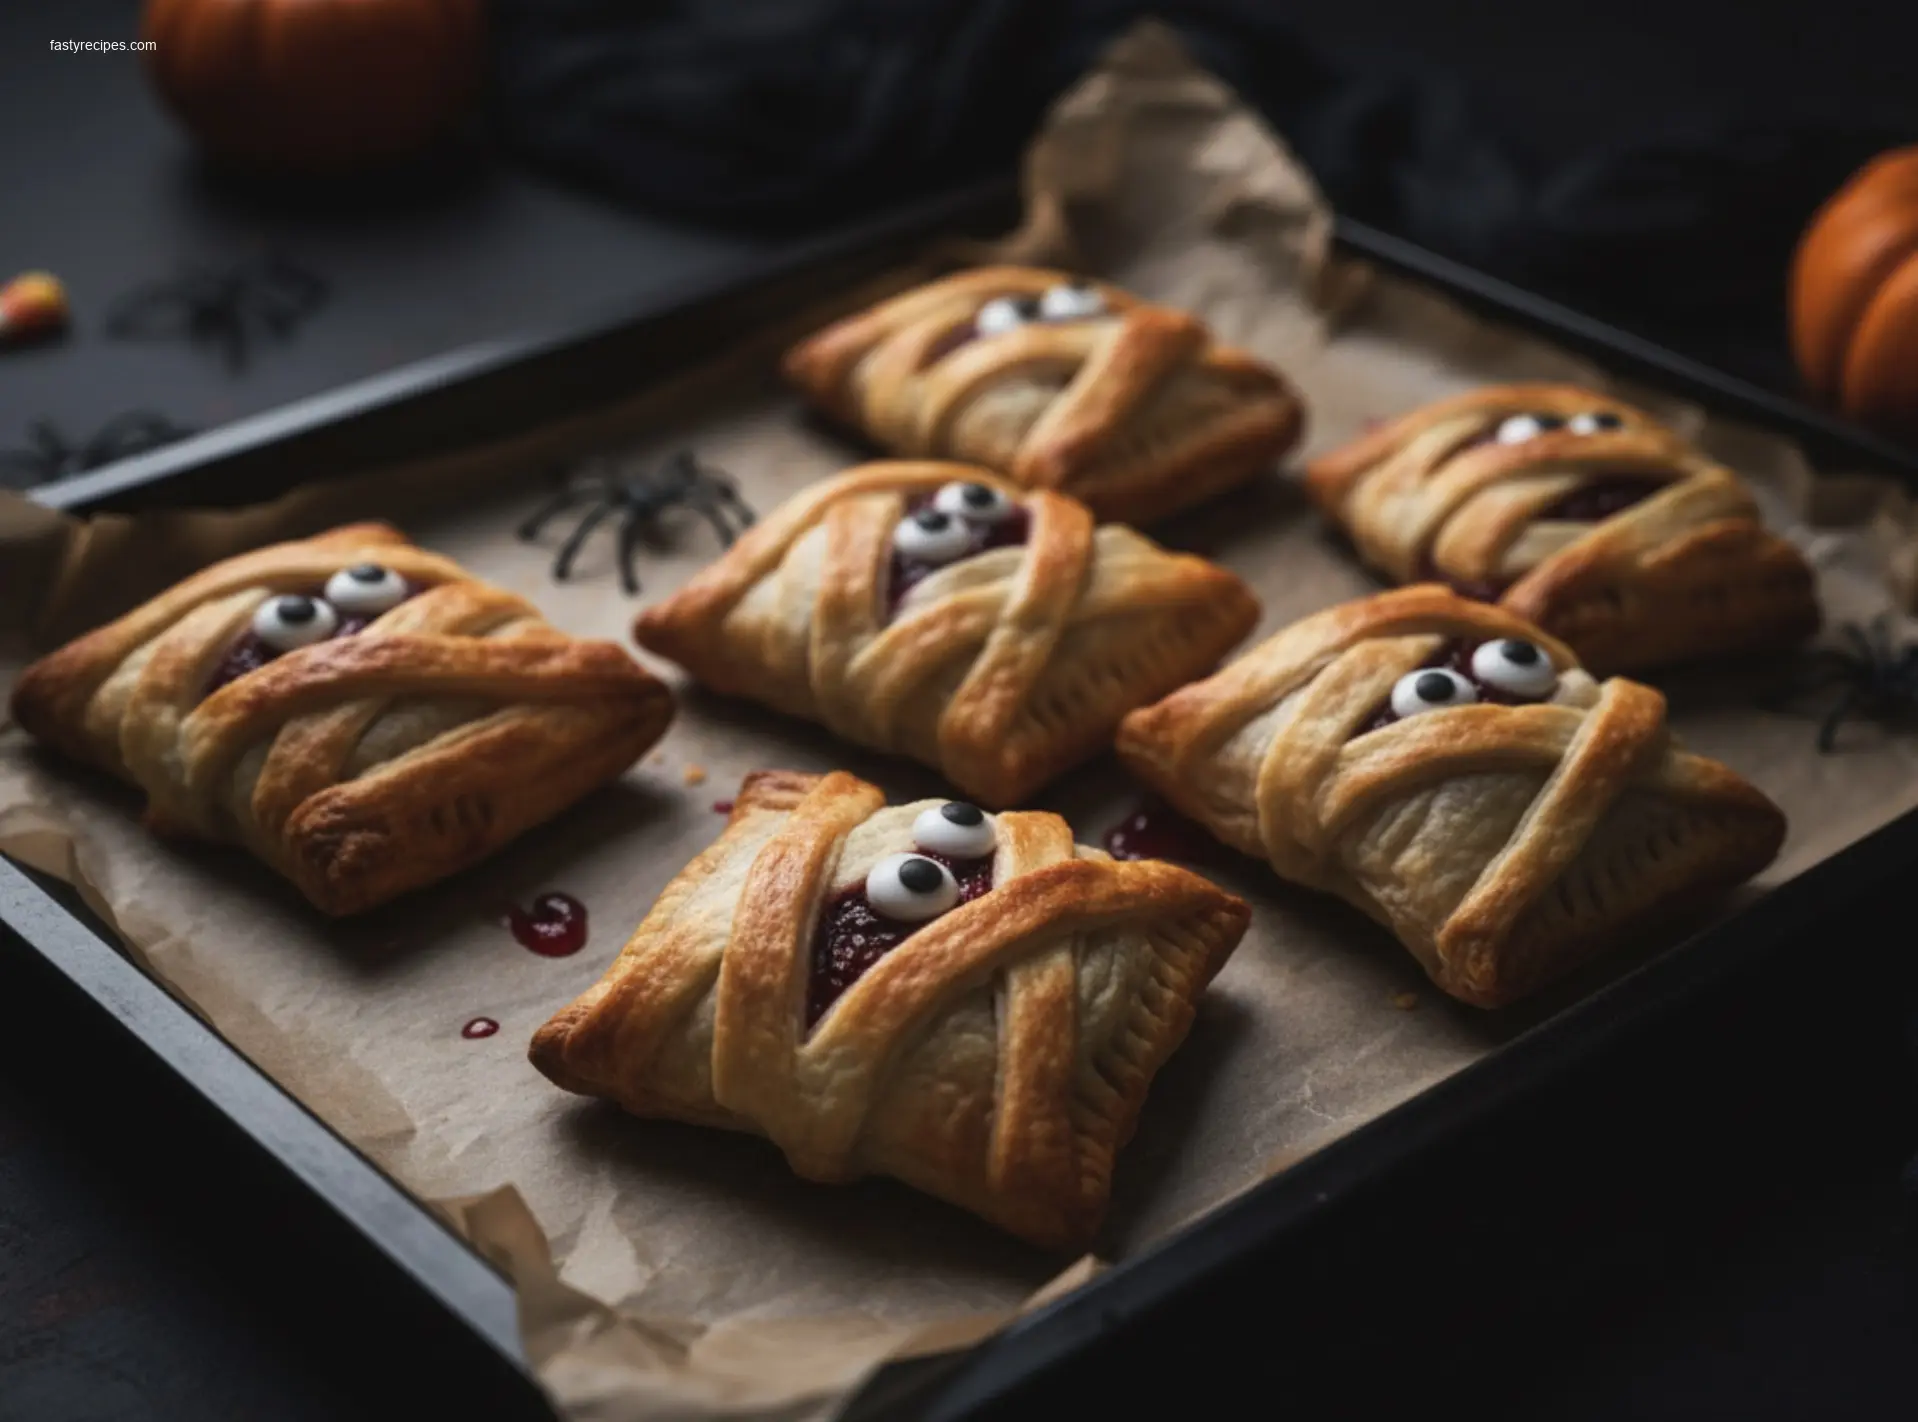
Hey there, fellow food adventurers! As the leaves turn golden and a crisp chill fills the air, there’s something truly magical about gathering in the kitchen to whip up a treat that’s both delicious and a little bit spooky. Forget those frightful ghouls and goblins; today, we’re crafting something adorably eerie and utterly irresistible: Mummy Cherry Pies! Get ready to unleash your inner pastry architect and create these charming, fruity delights that are perfect for any autumn gathering or just a cozy night in.
Why You’ll Love These Mummy Cherry Pies!
- Spooky & Sweet: A perfect blend of seasonal fun and classic cherry pie goodness, these Mummy Cherry Pies are an instant crowd-pleaser for all ages.
- Easy to Make: Don’t let their intricate appearance fool you! This recipe is surprisingly straightforward, even for beginner bakers.
- Kid-Friendly Fun: Involve your little monsters in the “wrapping” process – it’s a fantastic activity for the whole family!
- Perfect for Parties: These individual pies are ideal for Halloween celebrations, fall potlucks, or simply a festive dessert.
- Bursting with Flavor: Each bite offers a delightful explosion of sweet-tart cherry filling nestled within a flaky, golden crust.
How to Make Mummy Cherry Pies
You can easily make Mummy Cherry Pies by following these simple steps:
Ingredients of Mummy Cherry Pies:
#### For the Delicious Cherry Filling
- Fresh or frozen (thawed) pitted cherries
- Granulated sugar
- Cornstarch or arrowroot powder
- Lemon juice
- Almond extract (optional, but highly recommended!)
- Pinch of salt
#### For the Flaky Pie Crust “Mummy Wraps”
- Store-bought pie crusts (refrigerated or frozen, thawed) OR your favorite homemade pie crust recipe
- Egg (for egg wash)
- Water
#### Tools & Equipment
- Measuring cups and spoons
- Mixing bowls
- Small saucepan (if using fresh cherries)
- Round cookie cutter (or glass rim)
- Baking sheets
- Parchment paper or silicone baking mats
- Pastry wheel or sharp knife
- Small paintbrush (for egg wash)
- Small edible candy eyes (optional, but they bring the mummies to life!)
Directions of Mummy Cherry Pies:
#### Step 1: Prepare Your Cherry Filling
- If using fresh cherries, combine them with sugar, cornstarch, lemon juice, almond extract (if using), and salt in a saucepan over medium heat. Cook until the mixture thickens and the cherries are tender.
- If using frozen cherries, thaw them completely and drain any excess liquid before combining with the other filling ingredients.
- Let the filling cool completely before assembling your Mummy Cherry Pies.
#### Step 2: Cut Your Pie Crust Bases
- Unroll your pie crusts on a lightly floured surface.
- Using a round cookie cutter (approximately 3-4 inches in diameter), cut out an even number of circles. These will be the bases for your Mummy Cherry Pies.
- Place the circles on a parchment-lined baking sheet.
#### Step 3: Create the Mummy Wraps
- Gather the pie crust scraps. Gently re-roll them if necessary.
- Using a pastry wheel or a sharp knife, cut the pie crust into thin strips, about ¼ to ½ inch wide. These will be your “mummy wraps.”
#### Step 4: Assemble Your Mummy Cherry Pies
- Spoon a small amount of the cooled cherry filling onto the center of each pie crust circle, leaving a small border around the edge.
- Carefully lay the pie crust strips over the cherry filling in random, crisscrossing patterns, leaving a small gap at the top where the “eyes” will go. Don’t worry about perfection; rustic wraps add to the charm of your Mummy Cherry Pies!
- Gently press the ends of the strips onto the bottom crust to secure them.
#### Step 5: The Finishing Touches and Baking
- In a small bowl, whisk together the egg and a tablespoon of water to create an egg wash.
- Lightly brush the pie crust strips with the egg wash for a golden, shiny finish.
- If using, gently press two edible candy eyes into the small gap at the top of each “mummy” before baking.
- Bake in a preheated oven (check recipe for specific temperature and time) until the crusts are golden brown and the filling is bubbly.
- Let the Mummy Cherry Pies cool on the baking sheet for a few minutes before transferring them to a wire rack to cool completely.
How to Serve Mummy Cherry Pies
- Serve warm with a scoop of vanilla bean ice cream.
- A dollop of freshly whipped cream adds a delightful touch.
- Enjoy with a hot cup of coffee or a glass of cold milk.
How to Store Mummy Cherry Pies
You can assemble the Mummy Cherry Pies and refrigerate them (unbaked) for up to 24 hours. Alternatively, bake them, let them cool completely, and then store them in an airtight container at room temperature for 1-2 days, or in the refrigerator for up to 3-4 days.
Tips to Make Mummy Cherry Pies
- Cool Filling is Key: Ensure your cherry filling is completely cooled before assembly to prevent soggy bottoms.
- Don’t Overfill: Too much filling can make your pies difficult to manage and your “mummy wraps” might slide off.
- Chill Your Dough: If your store-bought pie crust feels too warm or sticky, pop it back in the fridge for a few minutes to firm up.
- Prevent Burning: If the crusts are browning too quickly, loosely tent the Mummy Cherry Pies with aluminum foil.
- Patience is a Virtue: Allow the pies to cool sufficiently after baking before handling to prevent the filling from spilling.
Variation
- Berry Good Mummies: Substitute cherry filling with a mixed berry filling for a different flavor profile.
- Apple Cinnamon Mummies: Use a spiced apple filling for a classic fall treat.
- Chocolate Chip Eyeballs: If you can’t find candy eyes, use mini chocolate chips instead.
- Dusting of “Cobwebs”: After baking, gently dust the cooled Mummy Cherry Pies with a sprinkle of powdered sugar for a snowy, web-like effect.
FAQs
Can I make these Mummy Cherry Pies ahead of time?
Yes, you can! You can assemble the Mummy Cherry Pies and refrigerate them (unbaked) for up to 24 hours. Alternatively, bake them, let them cool completely, and then store them in an airtight container at room temperature for 1-2 days, or in the refrigerator for up to 3-4 days.
What kind of cherries are best for Mummy Cherry Pies?
Both fresh and frozen pitted cherries work wonderfully. If using frozen, make sure they are completely thawed and any excess liquid is drained to prevent a watery filling in your Mummy Cherry Pies.
My mummy wraps keep tearing. What can I do?
If your pie crust strips are tearing, they might be too warm. Pop the dough back into the refrigerator to firm up for 10-15 minutes. Also, handle the strips gently and avoid stretching them too much.
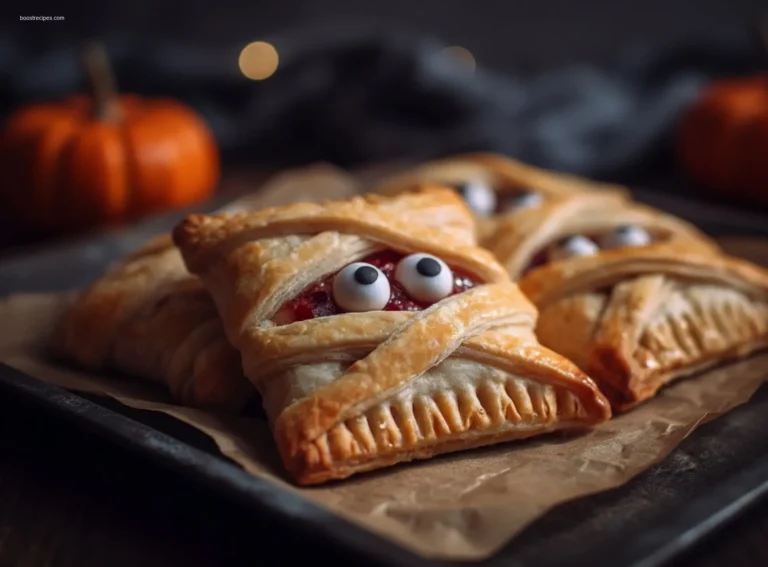
Mummy Cherry Pies
Spooky yet sweet, these Mummy Cherry Pies are a delightful Halloween treat! Flaky pie crust wraps around a vibrant cherry filling, creating a cute ‘mummy’ effect perfect for parties or a fun family baking day.
Total Time: 40 mins
Yield: 8 pies 1x
Ingredients
Scale
2 sheets (14.1 ounces each) refrigerated pie crust, thawed
1 (21 ounce) can cherry pie filling
1 large egg, whisked
1 tablespoon granulated sugar (optional, for sprinkling)
Instructions
1. Preheat your oven to 375°F (190°C) and line a baking sheet with parchment paper.
2. Unroll one pie crust on a lightly floured surface; cut out 8 circles with a 3-inch cutter or glass. Repeat with the second crust (16 circles total).
3. Spoon about 1 tablespoon of cherry pie filling onto the center of 8 circles (the bottoms).
4. With a sharp knife or pastry wheel, cut the remaining 8 circles into thin strips (about 1/4 inch) to make “bandages.”
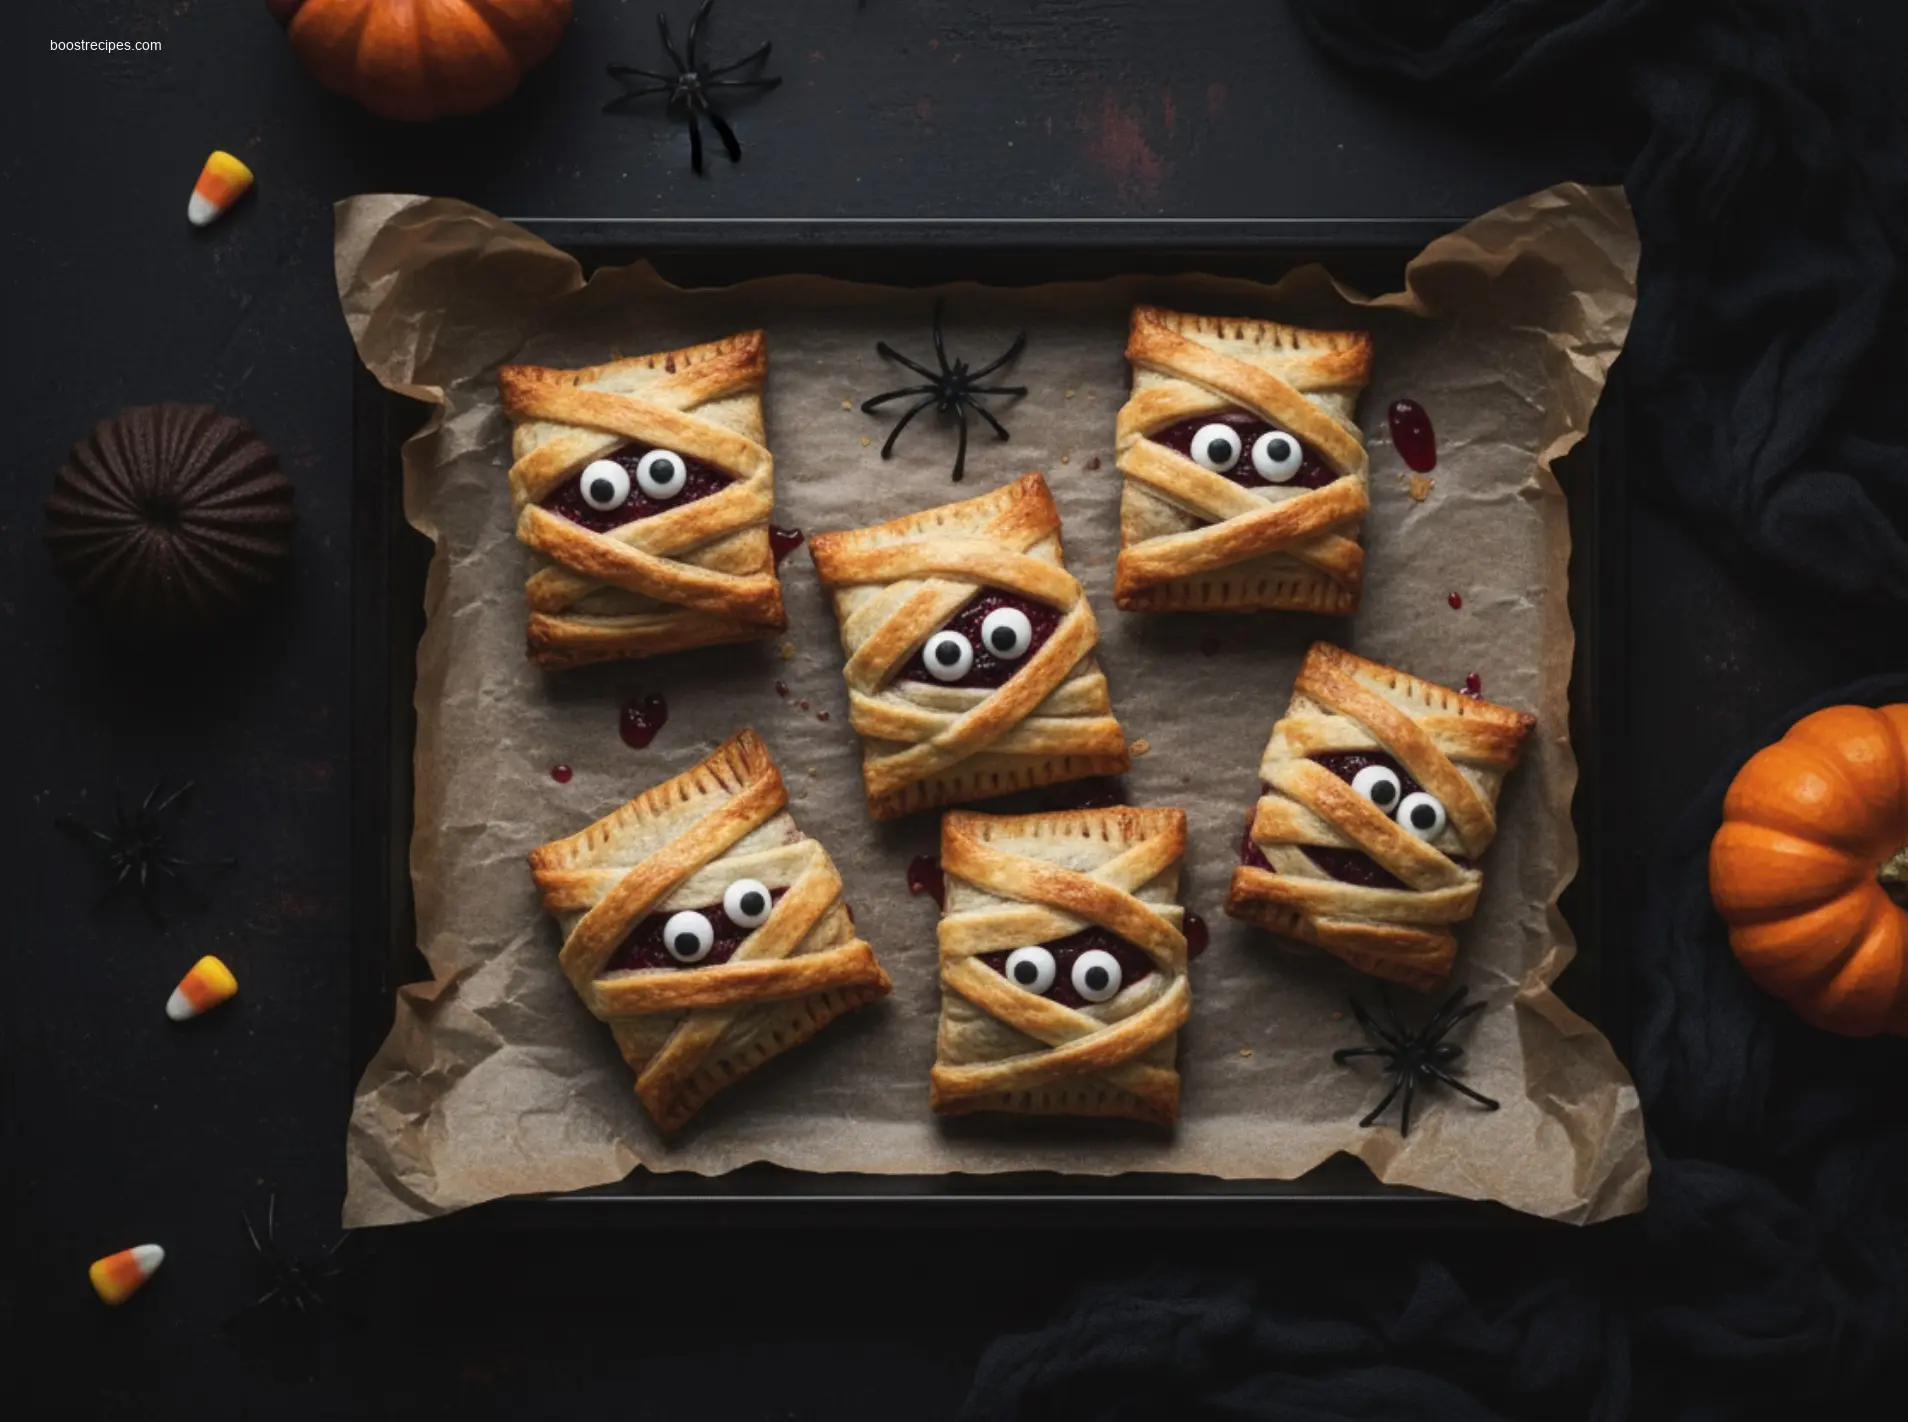
5. Lay 2–3 strips over each filled circle, crisscrossing slightly to resemble mummy bandages and leaving a small gap near the top for the “eyes.” Trim excess and press edges to seal.
6. Arrange the mummy pies on the prepared baking sheet; add two mini chocolate chips or candy eyeballs in the gap for eyes.
7. Brush pastry strips with the whisked egg and, if desired, sprinkle lightly with granulated sugar.
8. Bake 15–20 minutes, or until the crust is golden brown and the filling is bubbly.
9. Cool on a wire rack before serving. Happy Halloween!
Notes
For extra ghoulish fun, tint a bit of the egg wash with a drop of red food coloring for a slightly “bloody” look.
Best served warm, but tasty at room temperature too.
You can pre-assemble up to 24 hours ahead and refrigerate; add a few minutes to the bake time if baking from cold.
- Prep Time: 20 mins
- Cook Time: 20 mins
- Category: Dessert, Holiday
- Method: Baking
- Cuisine: American
- Diet: Vegetarian
Nutrition
- Serving Size: 1 pie
- Calories: 260
- Sugar: 25g
- Sodium: 210mg
- Fat: 12g
- Saturated Fat: 4g
- Unsaturated Fat: 7g
- Trans Fat: 0.5g
- Carbohydrates: 35g
- Fiber: 2g
- Protein: 3g
- Cholesterol: 15mg
Mummy Cherry Pies: 2 Quick Tips for a Flaky Crust
Equipment
- Baking sheet
- Parchment paper
- 3-inch round cutter
- Small bowl
- Whisk
- Wire rack
Ingredients
Pie Crust
- 2 sheets refrigerated pie crusts
Filling
- 1 can cherry pie filling (21 ounce)
Egg Wash
- 1 large egg
- 1 tablespoon water or milk
Instructions
Preparation
- Preheat oven to 375°F (190°C) and line a baking sheet with parchment paper.
- Unroll one pie crust onto the prepared baking sheet and cut out 8 circles using a 3-inch round cutter.
- Place a tablespoon of cherry pie filling in the center of each circle.
Assembling the Mummies
- Unroll the second pie crust and cut into thin strips, about ¼ inch wide, to create the mummy bandages.
- Arrange the strips over the cherry filling, leaving a small opening for the "eyes".
- For the flaky crust, here are two tips: lightly brush the strips with cold water before placing them, and avoid overworking the dough.
Baking
- In a small bowl, whisk together the egg and water (or milk) for an egg wash.
- Gently brush the tops of the mummified pies with the egg wash for a golden, flaky crust.
- Bake for 20-25 minutes, or until the crust is golden brown and the filling is bubbly.
Finishing Touches
- Remove from oven and let cool slightly on the baking sheet, then transfer to a wire rack to cool completely.
- Once cooled, use small dots of leftover pie filling or edible candy eyes for the mummy eyes.