Let’s be honest, some weeknights feel like a marathon even before you think about dinner. There have been countless evenings when I’ve stared into the fridge with a blank mind, dreading the multi-pot mess that often accompanies a “home-cooked” meal. That’s precisely why I became obsessed with dump-and-bake recipes. And let me tell you, this Dump-and-Bake Teriyaki Chicken & Rice became an instant family favorite. It’s the kind of dish that practically cooks itself, leaving you more time to, well, not cook.
Why You’ll Love This Dish
If the thought of minimal dishes, maximum flavor, and an unbelievably easy cooking process sounds good to you, then you’re in the right place. This “Dump-and-Bake Teriyaki Chicken & Rice” isn’t just another recipe; it’s a weeknight savior. It’s perfect for those busy evenings when you need a hearty, delicious meal on the table but have zero energy for complicated steps or an overflowing sink. Plus, it’s a fantastic budget-friendly option, using common pantry staples and affordable chicken. It’s the kind of comforting, savory dish that pleases nearly every palate, from picky eaters to adventurous foodies.
> “I couldn’t believe how little effort went into this! My kids devoured it, and I loved not having a mountain of dishes afterward. Definitely adding this to our regular rotation!” — A happy home cook
Preparing Dump-and-Bake Teriyaki Chicken & Rice
The beauty of this recipe lies in its simplicity. You’re essentially combining all your ingredients in one baking dish and letting the oven do all the hard work. First, you’ll prepare your teriyaki sauce mixture and combine it with the rice and chicken. Then, it all gets covered and baked, allowing the rice to soak up all that delicious teriyaki flavor while the chicken cooks to tender perfection. It’s truly a set-it-and-forget-it kind of meal that yields incredible results.
What You’ll Need
To get this flavor-packed meal on the table with minimal fuss, gather these items:
- Boneless, Skinless Chicken Thighs: About 1.5 lbs, cut into 1-inch pieces. Thighs stay moister than breasts in this baking method.
- Uncooked Long-Grain White Rice: 1.5 cups, rinsed well. Rinsing helps prevent stickiness.
- Low-Sodium Chicken Broth: 2.5 cups.
- Teriyaki Sauce: 1/2 cup (store-bought or homemade). Look for a good quality brand without too much high-fructose corn syrup.
- Soy Sauce: 2 tablespoons, low-sodium is a great option.
- Honey or Brown Sugar: 1 tablespoon, to balance the savory notes.
- Garlic: 2 cloves, minced (or 1 tsp garlic powder).
- Fresh Ginger: 1 teaspoon, grated (or 1/2 tsp ground ginger).
- Sesame Oil: 1 teaspoon.
- Frozen Mixed Vegetables: 1 cup (peas, carrots, corn are a good mix).
- Green Onions & Sesame Seeds: For garnish (optional, but highly recommended for freshness and flavor).
Directions to Follow
Ready to transform these simple ingredients into a sensational meal? Here’s your step-by-step guide:
- Preheat & Prep: Preheat your oven to 375°F (190°C). Lightly grease a 9×13-inch baking dish.
- Combine Rice & Chicken: Spread the rinsed rice evenly in the bottom of the prepared baking dish. Scatter the cut chicken thigh pieces over the rice.
- Mix the Sauce: In a medium bowl, whisk together the chicken broth, teriyaki sauce, soy sauce, honey (or brown sugar), minced garlic, grated ginger, and sesame oil until well combined.
- Pour & Add Veggies: Carefully pour the whisked sauce mixture over the chicken and rice in the baking dish. Gently stir everything together to ensure the rice is submerged. Sprinkle the frozen mixed vegetables evenly over the top. Do not stir the vegetables in too much, as they cook best on top.
- Cover & Bake: Tightly cover the baking dish with aluminum foil. This traps the steam, which is crucial for cooking the rice perfectly.
- First Bake: Bake for 30 minutes.
- Second Bake: Remove the foil, give it a gentle stir (being careful not to scratch the dish), and continue to bake uncovered for another 15-20 minutes, or until the rice is tender, most of the liquid has been absorbed, and the chicken is cooked through (internal temperature of 165°F / 74°C). If you prefer crispier chicken, you can even pop it under the broiler for a couple of minutes at the end, watching it carefully to prevent burning.
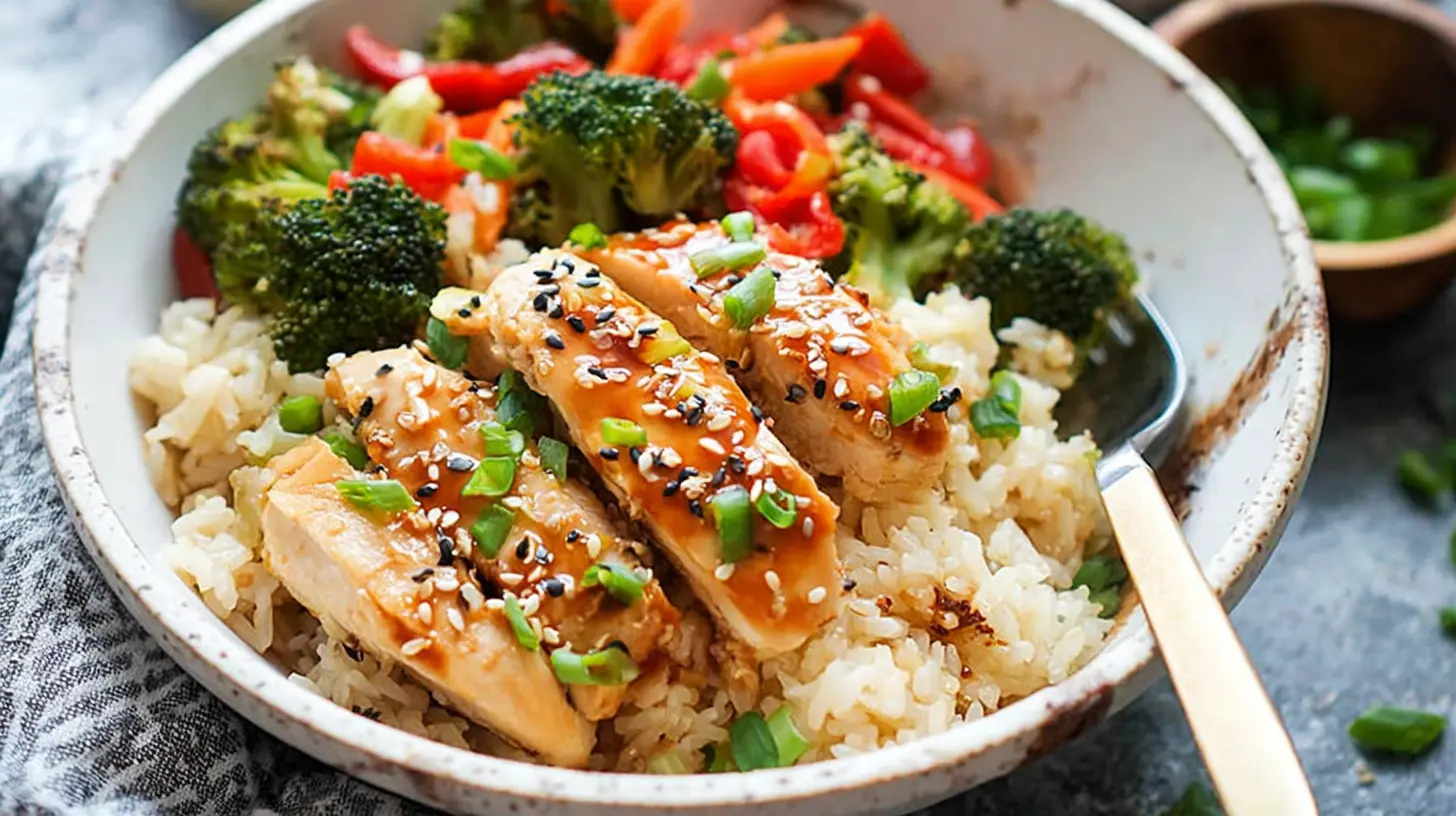
- Rest & Garnish: Once done, remove from the oven and let it rest for 5 minutes, covered (you can just pop the foil back on). This allows the rice to finish absorbing any remaining liquid and steam. Fluff with a fork, garnish with sliced green onions and a sprinkle of sesame seeds, and serve hot.
Best Ways to Enjoy It
This Dump-and-Bake Teriyaki Chicken & Rice is a complete meal on its own, offering protein, carbs, and veggies all in one dish. However, if you want to elevate your dining experience, here are a few ideas:
- Simple Side Salad: A light, crisp green salad with a ginger-sesame vinaigrette would offer a nice contrast to the richness of the teriyaki.
- Steamed Edamame: A quick and healthy side that adds more plant-based protein and a pop of green.
- Extra Veggies: If you’re a veggie lover, consider serving with a side of quickly stir-fried broccoli or snap peas.
- Spicy Kick: A drizzle of sriracha or a sprinkle of red pepper flakes certainly wouldn’t go amiss for those who enjoy a bit of heat.
Keeping Leftovers Fresh
Storing your “Dump-and-Bake Teriyaki Chicken & Rice” properly ensures you can enjoy its deliciousness for days.
- Refrigeration: Allow any leftovers to cool completely before transferring them to an airtight container. It will keep well in the refrigerator for up to 3-4 days.
- Reheating: To reheat, you can use the microwave (add a splash of water or broth to prevent drying out and microwave in 1-minute intervals until heated through) or gently warm it in a covered oven-safe dish at 300°F (150°C) until consistently hot.
- Freezing: This dish freezes fairly well. Once cooled, portion the leftovers into freezer-safe containers. It can be frozen for up to 2-3 months. Thaw overnight in the refrigerator before reheating. Note that the rice might be slightly softer after freezing and thawing, but the flavor will still be fantastic.
Helpful Cooking Tips
Achieving that perfect dump-and-bake result is incredibly easy, but a few pro tips can make it even better:
- Rinse Your Rice: Don’t skip rinsing the rice! It removes excess starch, which helps prevent the rice from clumping and becoming mushy.
- Use Chicken Thighs: While chicken breast can work, chicken thighs are generally more forgiving in a bake like this, staying juicy and tender even with longer cooking times.
- Don’t Skimp on Covering: Tightly covering the dish with foil for the initial bake is crucial. It creates steam, which is essential for cooking the rice evenly and thoroughly without drying out the chicken.
- Let it Rest: That final 5-minute rest after baking isn’t just for show. It gives the rice a chance to absorb any last bit of liquid and finish steaming, resulting in a more uniform texture.
- Customize Your Veggies: Feel free to swap the frozen mixed vegetables for your favorites. Broccoli florets, bell peppers, or sliced mushrooms would all be delicious additions. Add them in at the same time as the other frozen veggies.
Creative Twists
While the classic teriyaki is undeniably delicious, don’t hesitate to play with flavors and make this recipe truly your own!
- Spicy Teriyaki: Add a teaspoon of sriracha or a few dashes of chili garlic sauce to your teriyaki mixture for a pleasant kick.
- Pineapple Power: For a touch of sweetness and acidity, add a 1/2 cup of canned pineapple chunks (drained) along with the chicken and rice.
- Ginger Boost: If you love ginger, increase the amount of fresh grated ginger in the sauce.
- Nutty Noodle Sub: For a different texture, you could swap out half the rice for uncooked ramen noodles (without the seasoning packet) in the last 15 minutes of baking, ensuring they are submerged in the liquid.
- Broccoli florets: Stir in some fresh or frozen broccoli florets during the last 10-15 minutes of baking for added green goodness and crunch.
Common Questions
Q: Can I use brown rice instead of white rice?
A: Yes, but you’ll need to adjust the liquid and cooking time. Brown rice generally requires more liquid (about 3 cups broth for 1.5 cups rice) and a longer baking time (closer to 60-70 minutes total). Check for tenderness and add more liquid if it looks dry.
Q: My chicken and rice seem a little dry. What went wrong?
A: This usually happens if the dish wasn’t covered tightly enough during the first bake, allowing too much steam to escape. Make sure your foil creates a very tight seal. Also, ensure you used enough liquid as specified in the recipe.
Q: Can I prepare this ahead of time?
A: You can prep the chicken and sauce mixture a day in advance and store them separately in the refrigerator. When ready to bake, combine with the rice and proceed with the recipe. We don’t recommend combining the rice with the liquid too far in advance, as the rice can get mushy.
Q: What if I don’t have chicken broth?
A: Water can be used as a substitute, but the flavor will be less rich. If using water, you might want to add a pinch more soy sauce or a chicken bouillon cube for depth of flavor.
Classic Dump-and-Bake Teriyaki Chicken & Rice
Equipment
- Oven
- Baking dish (9×13 inch)
- Medium bowl
Ingredients
Main Ingredients
- 1.5 lbs Boneless, skinless chicken thighs or breasts about 3-4 thighs or 2 large breasts
- 1.5 cups Uncooked long-grain white rice e.g., jasmine, basmati
Teriyaki Sauce Mixture
- 1 cup Teriyaki sauce your favorite brand
- 1.5 cups Chicken broth or water
- 2 tablespoons Soy sauce
- 1 tablespoon Brown sugar
- 2 cloves Garlic minced
- 1 teaspoon Ginger freshly grated or ground
- 0.5 teaspoon Sesame oil
Optional Garnishes
- 2 stalks Green onions chopped
- 1 teaspoon Sesame seeds
Instructions
Preparation
- Preheat your oven to 375°F (190°C) and grab a 9×13 inch baking dish.
- Spread the uncooked rice evenly in the bottom of the baking dish, then arrange the chicken pieces over the rice.
Sauce and Bake
- In a medium bowl, whisk together teriyaki sauce, chicken broth, soy sauce, brown sugar, minced garlic, grated ginger, and sesame oil until well combined and the sugar is dissolved.
- Pour the teriyaki sauce mixture evenly over the chicken and rice in the baking dish, ensuring the rice is fully submerged in the liquid.
- Cover the baking dish tightly with aluminum foil and bake for 35-45 minutes, until the chicken is cooked through (165°F / 74°C internal temperature) and the rice is tender and has absorbed all the liquid.
Serve
- Remove from the oven and let it rest, still covered, for 5-10 minutes to allow the rice to steam further and flavors to meld.
- Fluff the rice with a fork and serve immediately, garnishing with chopped green onions and sesame seeds if desired.